Lesson Modules
Teaching Tips:
Observe Module Overview
- Teacher will grab student’s attention by asking them to look at a power point that begins with reflecting on lesson 6.
- After the Observe module, students will write a report for the first part of the challenge, so be sure to discuss the content so students will be prepared to write on this topic:
- "For today in the first part of the challenge you are to write a two page report on how automation has taken away jobs, but at the same time created many new jobs. Be specific in the kinds of jobs created and the existing jobs given higher demand. Mention degree requirements and the average salary earned in these fields."
Lesson Overview
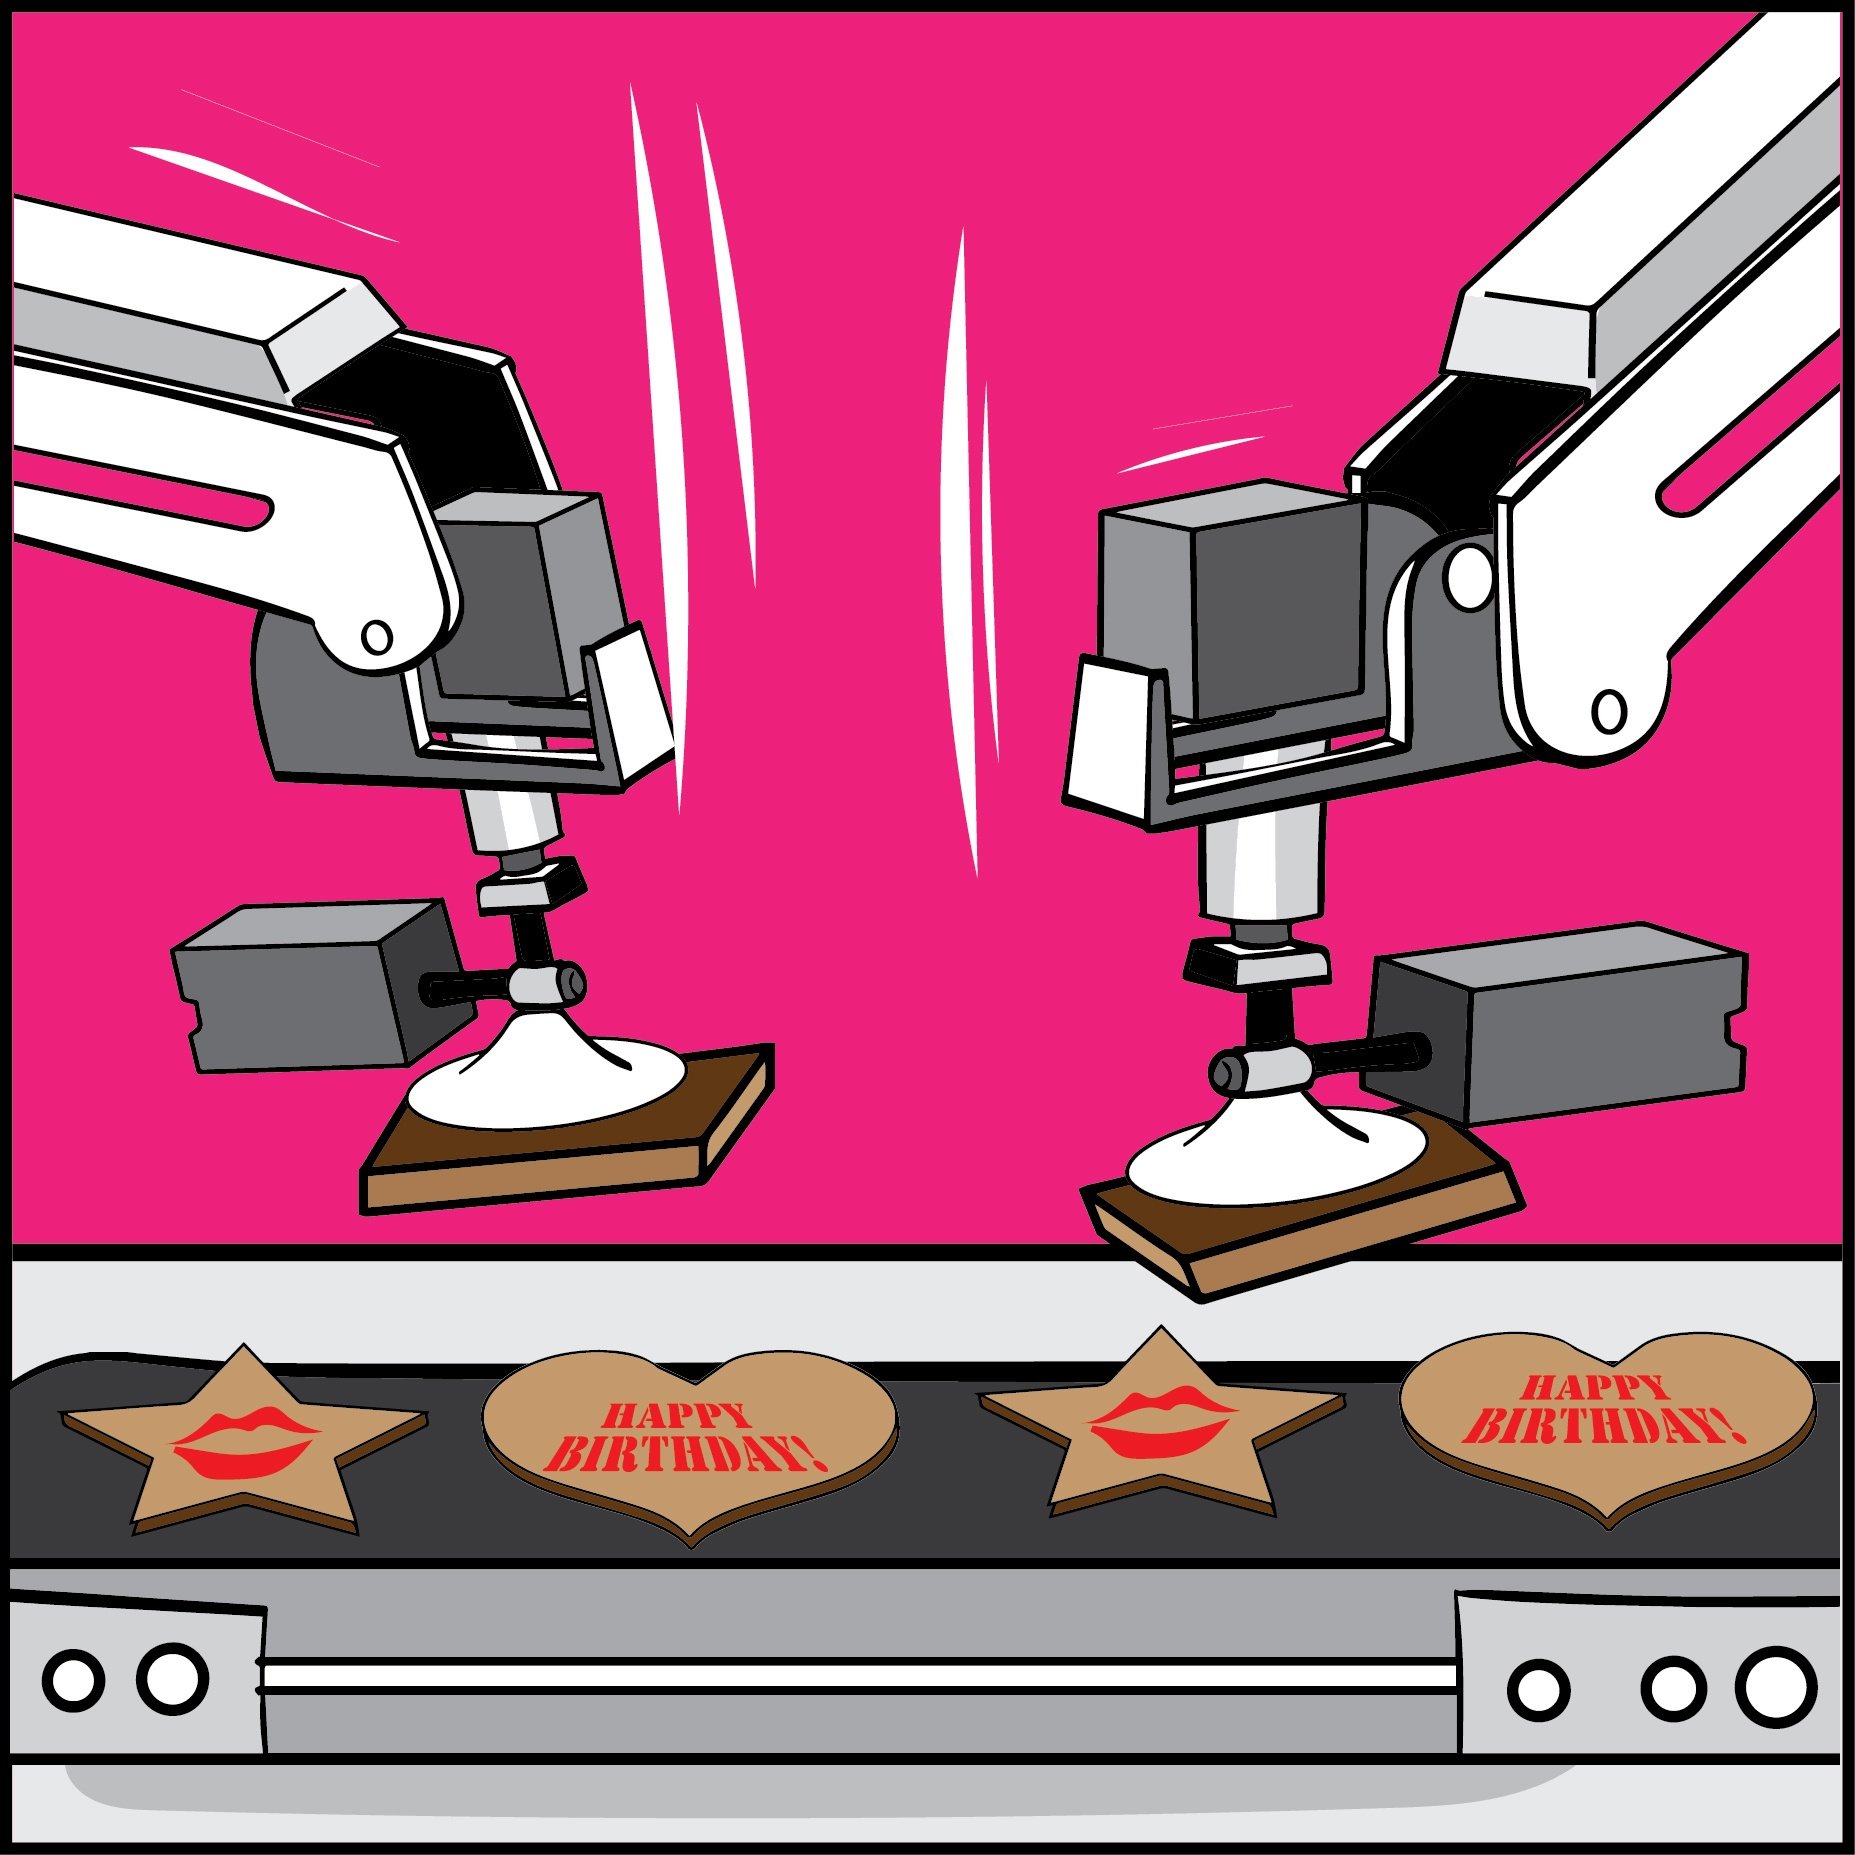
- Next day, students will join their group with another and program 2 Dobots to simulate the assembly of art crafts in a full automation project.
Materials needed
Lesson 7 Project Planning - 1st Robot
Lesson 7 Project Planning - 2nd Robot
Handout for students to use during the Prototype module: Place sheet
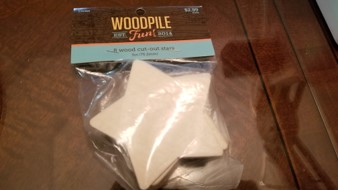
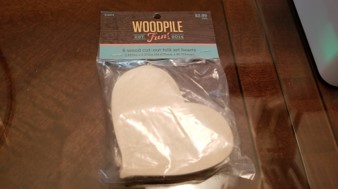
Wooden shapes like these:
Three wooden stamps:

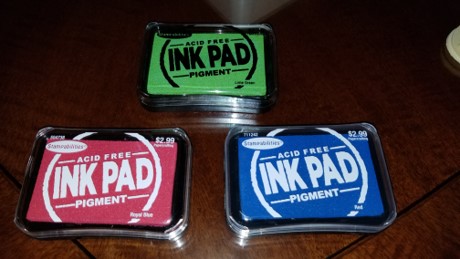
ink pads for the stamps:
Teaching Tips:
Feel free to change paper requirements to suit your class.
Here are some examples of reliable sources to use when writing the essay:
//theinstitute.ieee.org/ieee-roundup/blogs/blog/will-automation-kill-or-create-jobs
Paper Requirements:
- 12pt
- Times New Roman
- Two pages
- Single spaced
- Cite (at least) two sources
Teaching Tips:
Prototype Module Overview
Each group or individual is to program Dobot with the following guidelines:
- 1st Dobot must pick up a cut-out at a permanent location where it will be fed to the conveyor belt.
- 2nd Dobot must color identify it, stamp it, and place it
- The process will be repeated
Questions to provoke thinking
What does full automation mean?
What are the pros and cons of full automation assembly?
What were some of your biggest tasks in the project?”
What else could you do to make the project more efficient?
Prototyping Challenge 2
1. Build the assembly as laid out.
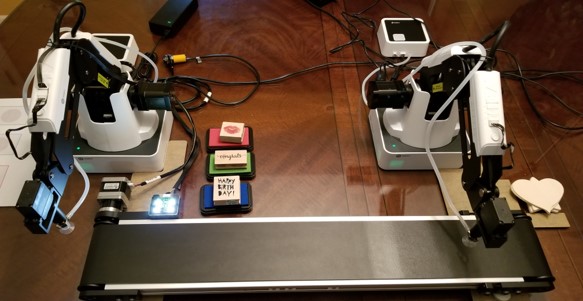
- It is recommended to make sure both robots have a home position coded from where they will each start their process.
2. Cut out and paste color identifiers to help the robot identify colors and/or shapes. For this project we are using it for color and stamp message.
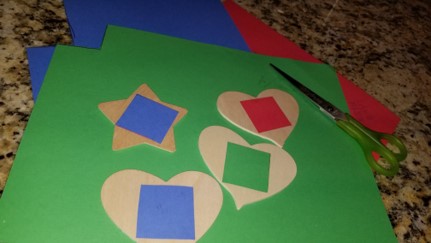
3. Pick a location for your wooden shapes (x,y,z). We recommend using the guides that came with the conveyor belt. As you can see, we stacked different shapes. This will be explained later.
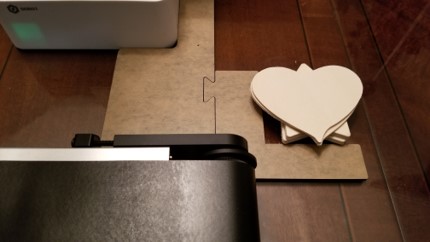
Don’t Forget! You will need to use a variable for your Z coordinate and decrease it each time as the robot keeps going down the stack.
4. Pick a location for your wooden shape placement on the conveyor. This can be done using the operation panel on the software OR by using the TEACHING & PLAYBACK method and observing the X,Y, and Z coordinates.
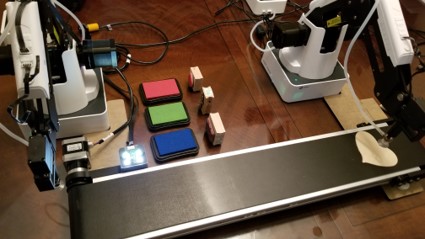
5. Time and notate in seconds how long the whole process takes for the first robot to pick and lay down the shape on the conveyor. This will be the delay time required for the 2nd robot to start the conveyor belt.
6. Time and notate in seconds how long the shape takes to reach the other side where it will get picked up by the 2nd robot. In our example, we chose the location right in front of the color sensor.
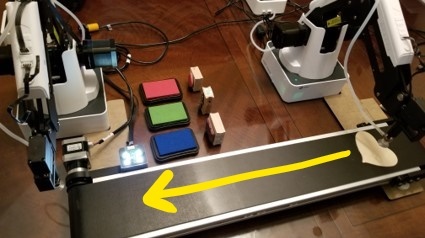
- You might be asking yourself why not use the photoelectric sensor to detect the object and STOP! We can’t use the sensor in this situation because the product (wooden shapes) are flat. So we have to use time synchronization.
7. Notate your x,y,z coordinates for pick up. It well then be transported for color checking of the identifiers you cut out and pasted on the bottom. This will tell the robot what stamp and color you want on that particular shape.
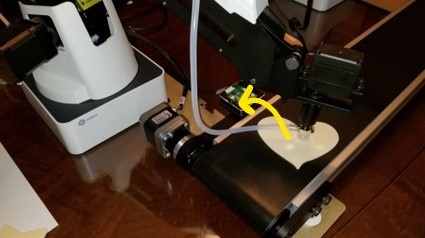
8. When the color (stamp identifier) at the bottom has been identified, the robot is to put the product back onto the conveyor belt and travel to a spot above that particular stamp.
9. When the color (stamp identifier) at the bottom has been identified, the robot is to put the product back and travel to a spot above that particular stamp (as pictured below).
- Spot for Blue Stamp
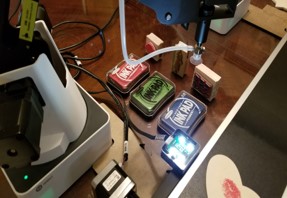
- Spot for Green Stamp
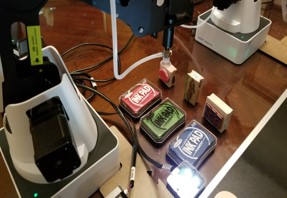
- Spot for Red Stamp
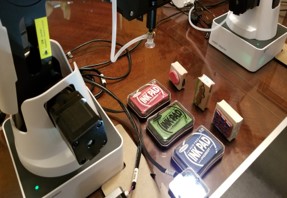
- We highly recommend you execute the code and let robot run the course without actually stamping to make sure everything is aligned and working. This will reduce wasted ink, wood cut-outs, and money.
10. Once the robot reaches that x,y,z coordinate above the stamp it will then proceed to grab the stamp with suction and stamp the product at it’s x,y,z spot.
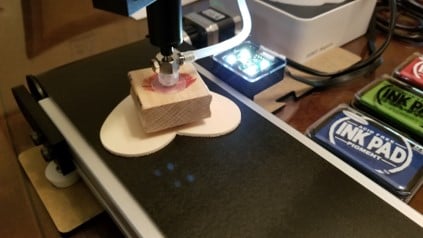
11. The robot arm is to then return stamp and come back to product.
12. Program Dobot to pick up product in a different x,y,x spot to prevent ink smudges while it dries (as pictured).
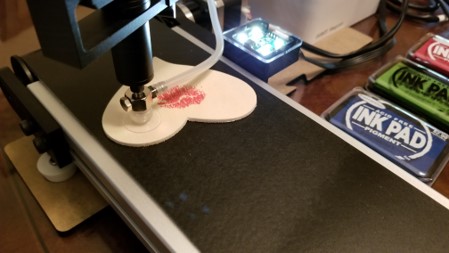
13. The robot arm is to then transport to proper PLACE location for storage.
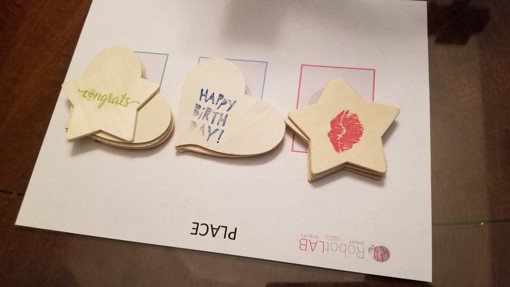
- Don’t Forget! You will need to use a variable for your Z coordinate and increase it each time as the robot keeps stacking on top of the old product.
The whole process is to repeat by using loops and delays in your code perfectly synced in each robot. You will need to time each robot as each runs its course and returns back to the home position.
Here is a video demonstration of the full automation.
Note:
In order to complete this challenge, you will put into effect everything you’ve learned in the previous STEM lessons.
- Pick and Place
Color sensing
Conveyor Systems
Suction Cup System
Stacking product (Z coordinate offsetting)
If you need to look back on previous lessons' code in order to complete the challenge, please feel free.
Teaching Tips:
Now that you have finished your project what do you think about the whole process (plan, build, write code, execute)?
What part of the process did you find to be the easiest?
What part of the process did you find to be the hardest?
Did you find it easy to plan, socialize, build, and execute with a whole new group of people?
What part of the coding process did you find easy?
What part of the coding process did you find difficult?
Think of a way to make this project more efficient.
Do you think adding a 3rd robot would make it more efficient?
Overall did you enjoy the process and have fun?
Would you consider one of the high-tech fields we discussed today?
- all answers will vary for all
- YES
- NO
- YES
- NO
