Lesson Modules
Teaching Tips:
Before you can get started with this lesson, you have to make sure that Choregraphe is downloaded on the computers of your students or lab.
The activity is based out of Choregraphe, therefore, it is important that everyone has it installed. If you don't have it contact us support@robotlab.com.
When you have Choregraphe installed, you can download here the Choregraphe program for this lesson.
During Class
Introduce The Course
Make Nao a Storyteller! (5 minutes)
Introduce the course to the students. Tell them that they are going to make Nao tell a story. You can explain
to them that they are going to write a story piece by piece over 10 lessons. They will make changes to
their story every day.
Note: It is important that students disconnect from the robot after they test their code.
Otherwise, no one will be able to use that robot for 10 minutes.
Introduce The Lesson
Problem Of The Day (5 minutes)
Have a student read the problem of the day. Today that problem is How do you make Nao talk? Today,
specifically they are going to make Nao talk about the setting of their story.
Sample Program: 5 minutes
Run the sample program you downloaded from the link above for the students. The robot is telling the beginning of a story.
Run the sample program and have the students fill out the Robot Story!
In order to tell a story in an interesting way, the robot may use movement, gestures, sounds, music, and colors.
You can decide to show to the class the video of NAO and Pepper playing the star wars story. This optional and can be done at the end of the lesson to give ideas on how to use NAO's features.
Teaching Tips:
Objective- General introduction to the NAO robot and description of the concept of a robot ad a computer program to control a robot.
A robot is a machine that can sense, act and think. A program is a series of action command that a computer can make.
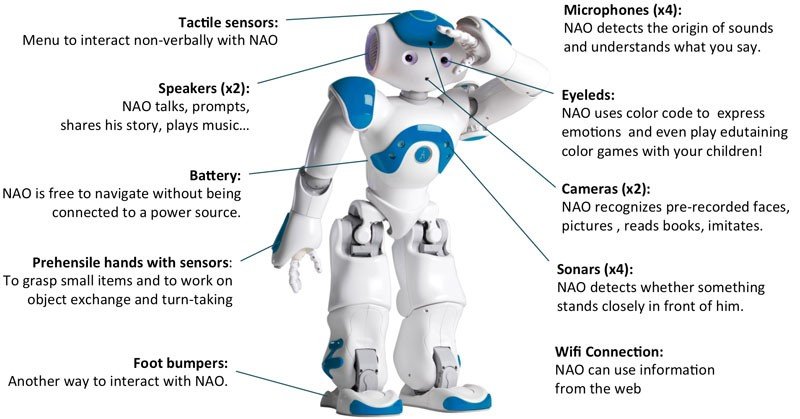
It is a good practice to let the students show on the real robot the sensors and actuators that are represented in the picture.
Tactile sensors: Front, middle and rear touch sensors the can trigger commands when pressed. Can be used as an alternative menu navigation among different commands, or as an emergency stop when pressed.
Speakers: give the ability to speak different languages, playing music or sound effects.
Hands with sensors: can sense a handshake, grab objects, manipulate objects.
Foot bumpers: can sense when the robot has bumped into an obstacle, can be used the same way as the head tactile sensors are used.
Microphones: multiple microphones are used to track the location of the sound, so for example NAO can turn over his head towards the location of the sound. NAO can understand voice commands, may also use the microphones for language translation. Can also record a conversation.
Eye LEDS- light LEDs that can change the color and the freequency (blink). Can be used for mood expression, right/wrong notification and more.
Cameras- can be used to record a video, to recognize objects and faces. Can be used also to identify if a person is standing in front of the robot as a trogger to start communication.
Sonars- are used to sense objects for path navigation.
WiFi- can be used to store data (send the recorded communication to an external server or an email), can be also used to get information from the web.
The robot NAO is a programmable platform that gives a full access to all its features.
Here is a list of the main features of the robot:
- Eyeleds
- Microphones
- Speakers
- Bumpers
Teaching Tips:
You can also download the reference sheet which summarizes all the basic steps:
Let's code!
Make the robot introduce himself.
Follow the steps below to make the robot speak.
First, open your Choregraphe and work on the virtual robot.
In this module, you have all the information you need to know in order to start coding and make the robot talk. You can read it at any time and get back to it when needed.
Once your program is done and works on the virtual robot, in turn, you may connect to the real robot and run your code on it.
Introduction to programming NAO: what you need to know:
Nao is a humanoid robot with sensors, motors, cameras and LEDs!
Choregraphe
Choregraphe is the application that lets you build a program to control Nao.
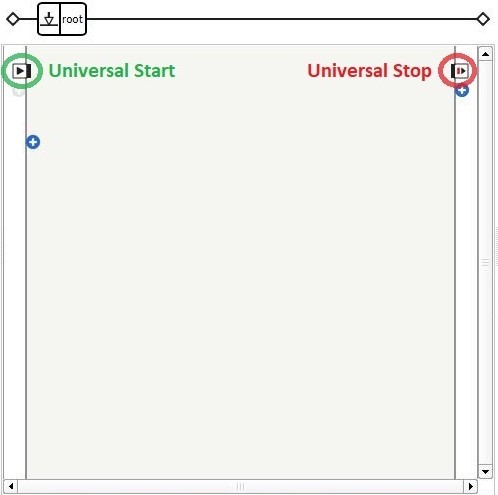
Workspace
The middle portion of the choregraphe screen is called the workspace and is where you will build your code.
On the top left, there's a small box, that is the universal start port. There your program begins.
The universal stop port is the box on the upper right. There the program finishes.
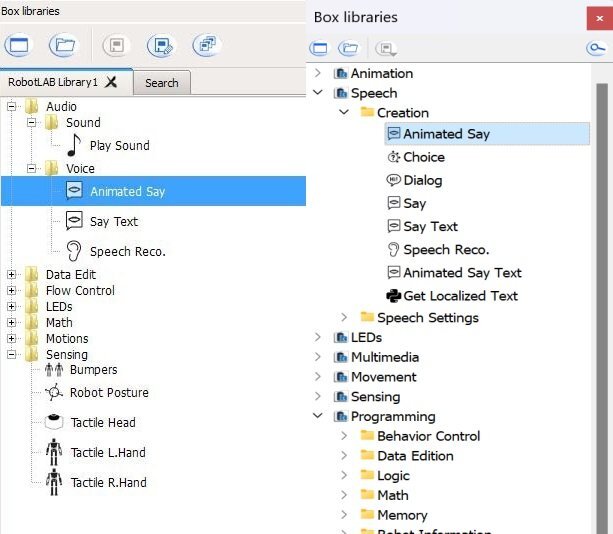
Box Library
The box library is on the left of the choregraphe screen. There you will find all the boxes you need in order to program the robot.
Boxes make the robot walk, talk, move, dance etc. They are the building blocks of your program!
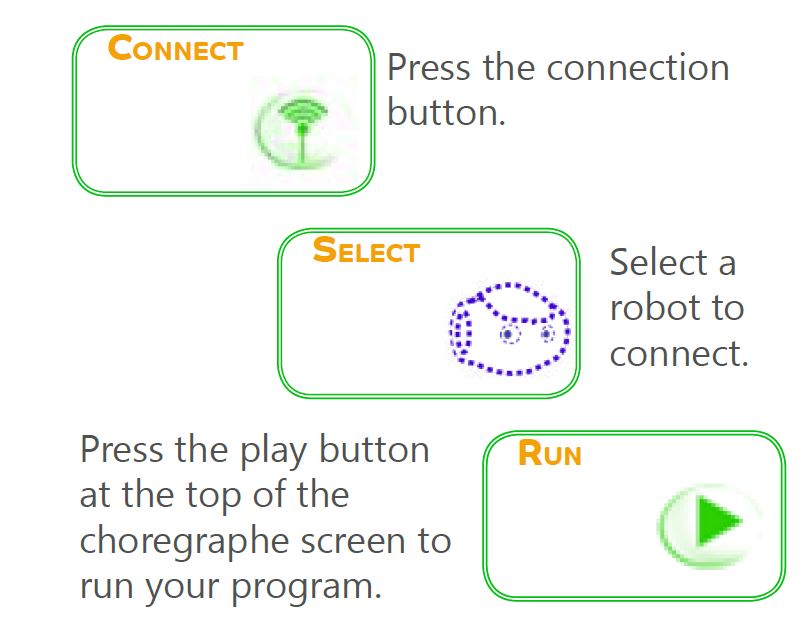
Connecting to the Robot
On the top of the choregraphe screen there are these two buttons.
In order to connect to the real robot, press the green antenna button. The following screen will pop up:
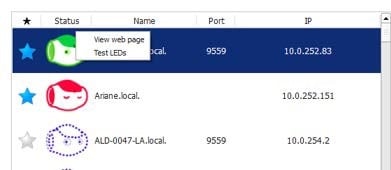
Here is what the icons mean: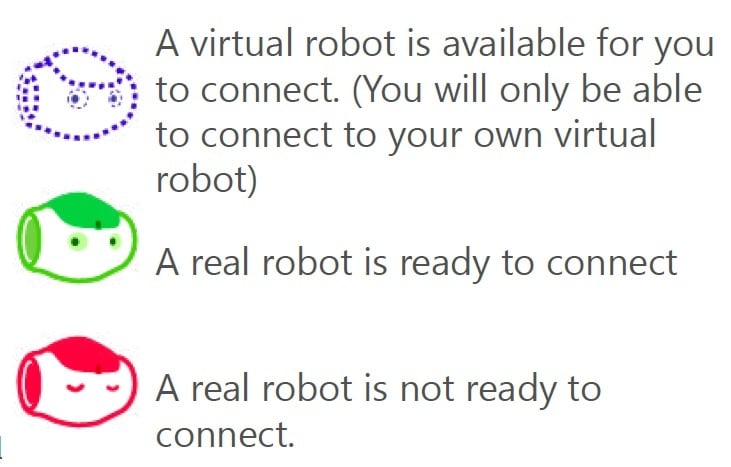
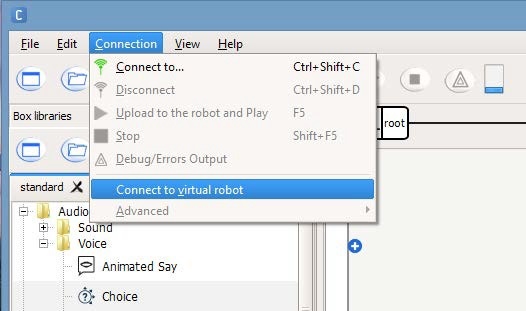
To make sure you connect to your own virtual robot, you can select virtual robot from the connection drop down menu at the top of the screen
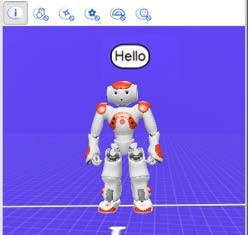
Robot View
On the right side of the choregraphe screen is the robot view palette. This is where you see a 3d version of the connected robot. It even moves and talks!
Before you run your code on the real robot, try testing it on the robot view!
A few functions of the real robot cannot be simulated, but it's a great way to make sure your code works the way you want it to.
Running Your Code
When you are ready to run your code:
Wake Up / Rest
Wake up and Rest are your first boxes! Wake up tells the robot to turn his motors on so that the robot will move during your program!
Rest tells the robot to turn off his motors at the end of the program so the robot doesn’t get too tired.
Connecting Boxes
Now you need to use your first box! Drag the mouse between the two points you want to link.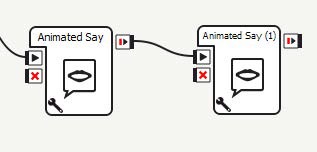
For example, drag the mouse from the onStopped output of a box to onStart input of another box.
Now the program will flow from the first box to the second.
In order to increase some battery time, it is recommended to use the Wakeup- Rest structure on every program.
For Wake Up and Rest, connect as shown below: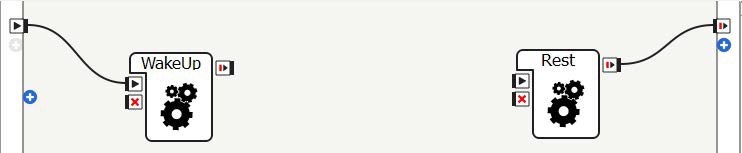
The rest of your program will go between these two boxes.
Animated Say
This box tells Nao to say something while moving his arms and head. Just like a real person!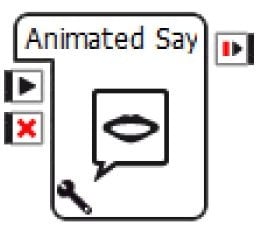
| NAO V4-V5 | NAO V6 |
|---|---|
| In order to change what NAO says, double click the box. | In order to change what NAO says, click the tool at the bottom, and change the text in the "Text" box. |
 | 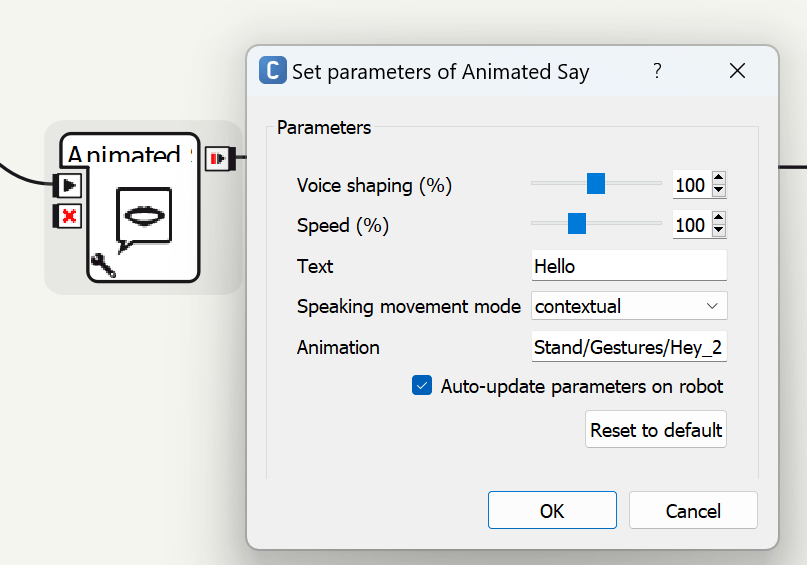 |
Multi-Level Diagram
Now you are inside the Animated Say box. To change what Nao says from the default “hello”, select all the text in the Text Edit
box and type what you want Nao to say! To return to the main workspace, click the root button at the top of the page.

Saving Your Project
Save your work when you are done! Save by pressing the save button at the top of the choregraphe screen.
Give your project a name!
Teaching Tips:
From the lesson, the students should have a sense of what is a robot and what is a program.
A robot is a machine which can make decisions to interact (sense and act) with its environment. A program is a sequence of instructions which tells a computer what to do.
By assessing their understanding in this module you will gain insight on how they perceived what they have been doing in this lesson.