Lesson Modules
Teaching Tips:
At the start of class, the teacher should run the demo code provided, and demonstrate the “remote controlled” car.
https://www.robotlab.com/hubfs/Education.Robotlab.com/Autonomous%20Car/Scratch/lesson1demo.sb2
(Be sure to run the demo code with the car on the ground, so it does not accidentally fall off a high surface.)
If you are not sure how to connect the robot to your computer, see the Quick Glimpse into the Autonomous Car.
Here are some possible answers to the question:
1. What to do at a green light.
2. What to do when it senses another car in front of it.
3. When to turn on the headlights.
Have you ever seen an autonomous car?
How did your teacher control the car?
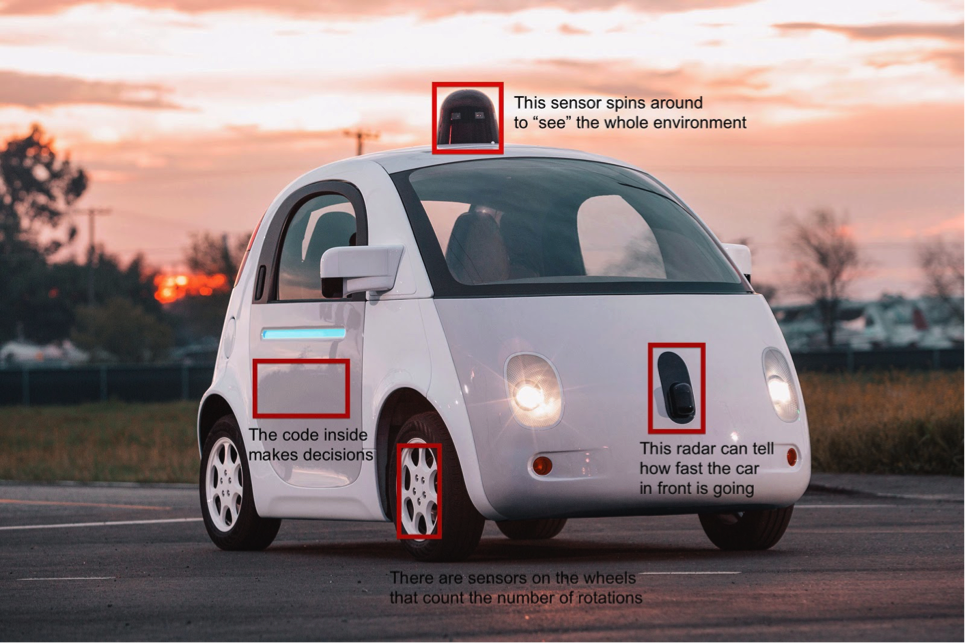
Autonomous cars use sensors to “see” their environment. People use sensors too. We have eyes that see, noses that smell, and ears that hear. But just seeing isn’t enough. The things we see, hear, and smell help us make decisions. Your eyes don’t tell your body to stop when you reach the finish line at a race, your brain does!
Your autonomous car has a brain that it uses to understand the information from the sensors. Instead of a picture, sound or smell, the car gets a number. When a race car is speeding down the track, the driver inside knows when to turn and when to stop due to the information from his sensors. Someone taught him how to interpret the information her gets from his sensors. Autonomous cars need to learn how to drive too. We “teach” them what the numbers they sense mean using code.
Teaching Tips:
NOTE: Before class, double check if any of your students have peanut allergies. If so, you can modify this activity by making a different type of sandwich.
At this point the teacher should do the PB&J experiment as outlined here:
- Bring a loaf of bread, a jar of peanut butter, a jar of jelly and a butter knife to class on the day of the lesson. (Components for other sandwiches and food could work too, but PB&J is simple and cheap)
- Put the students into small groups and tell them to write step-by-step instructions for making a PB&J sandwich.
- Have one group read their instructions aloud, and act them out exactly. EX: if step one is “take a piece of bread and put some peanut butter on it” take a piece of bread and set the whole jar of peanut butter on it.
- After you act out the first set of instructions, have the students revise their lists to be more specific.
- A successful list will look something like this:
Take two pieces of bread out of the packaging, and set them on the desk.
Open the jar of peanut butter using a twisting motion with your right hand
Set down the peanut butter jar, pick up the knife
Put the knife in the jar, and take it out again
Swipe the knife across one piece of bread
And so on.
Here is an example of a tooth-brushing algorithm:
Put toothbrush under faucet
WAIT 1 second
Take toothbrush out of faucet
Squeeze toothpaste onto toothbrush
Put toothbrush on teeth
While (teeth = dirty)
{
Move brush left
WAIT 0.5 second
Move brush right
}
Teaching Tips:
Click these links to download the code and step-by-step instructions for how to write it.
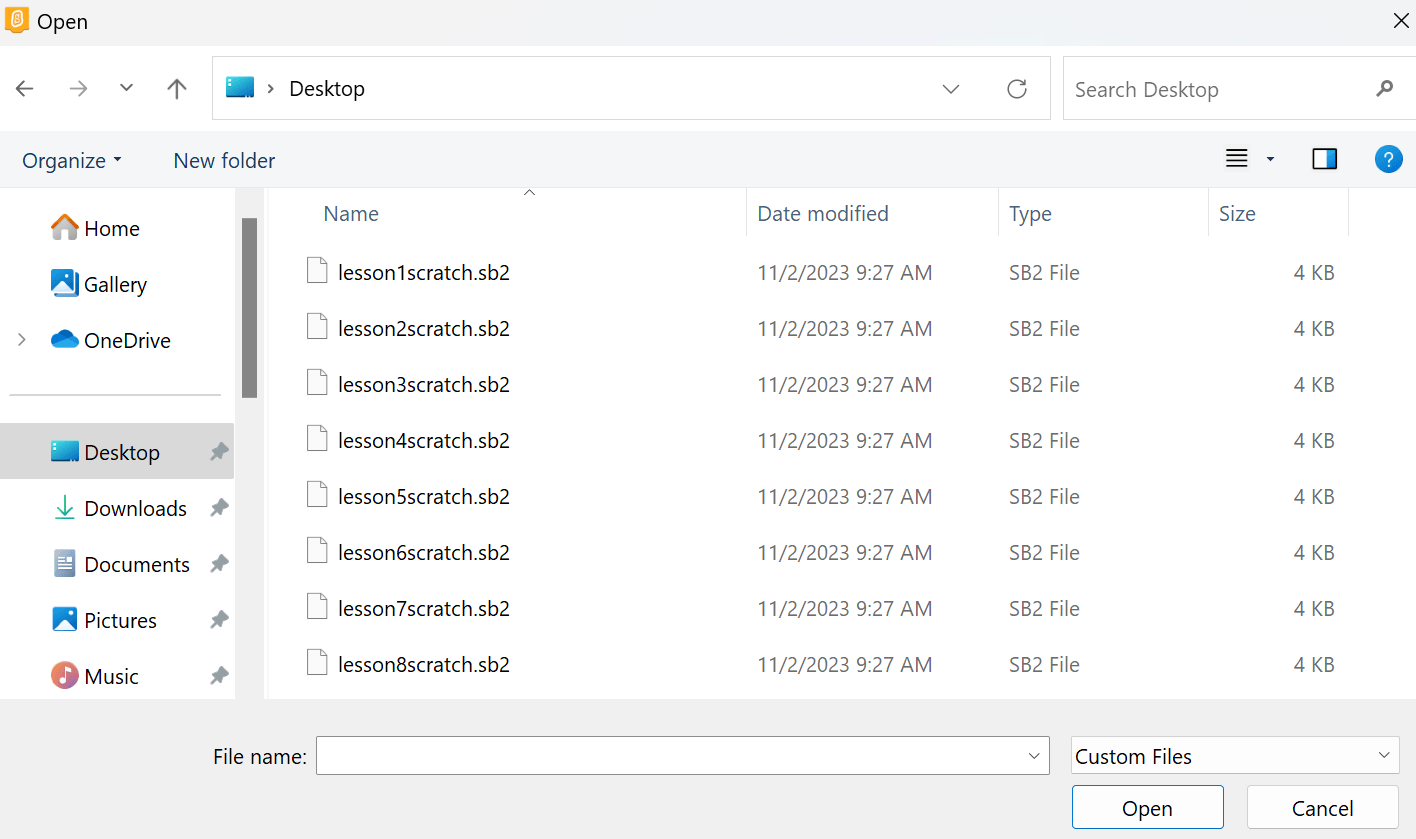
Drag the sb2 file (this is your Scratch file) to your desktop.
Then go to the top right corner of your Orchestra Scratch screen and click "File" - "Load".
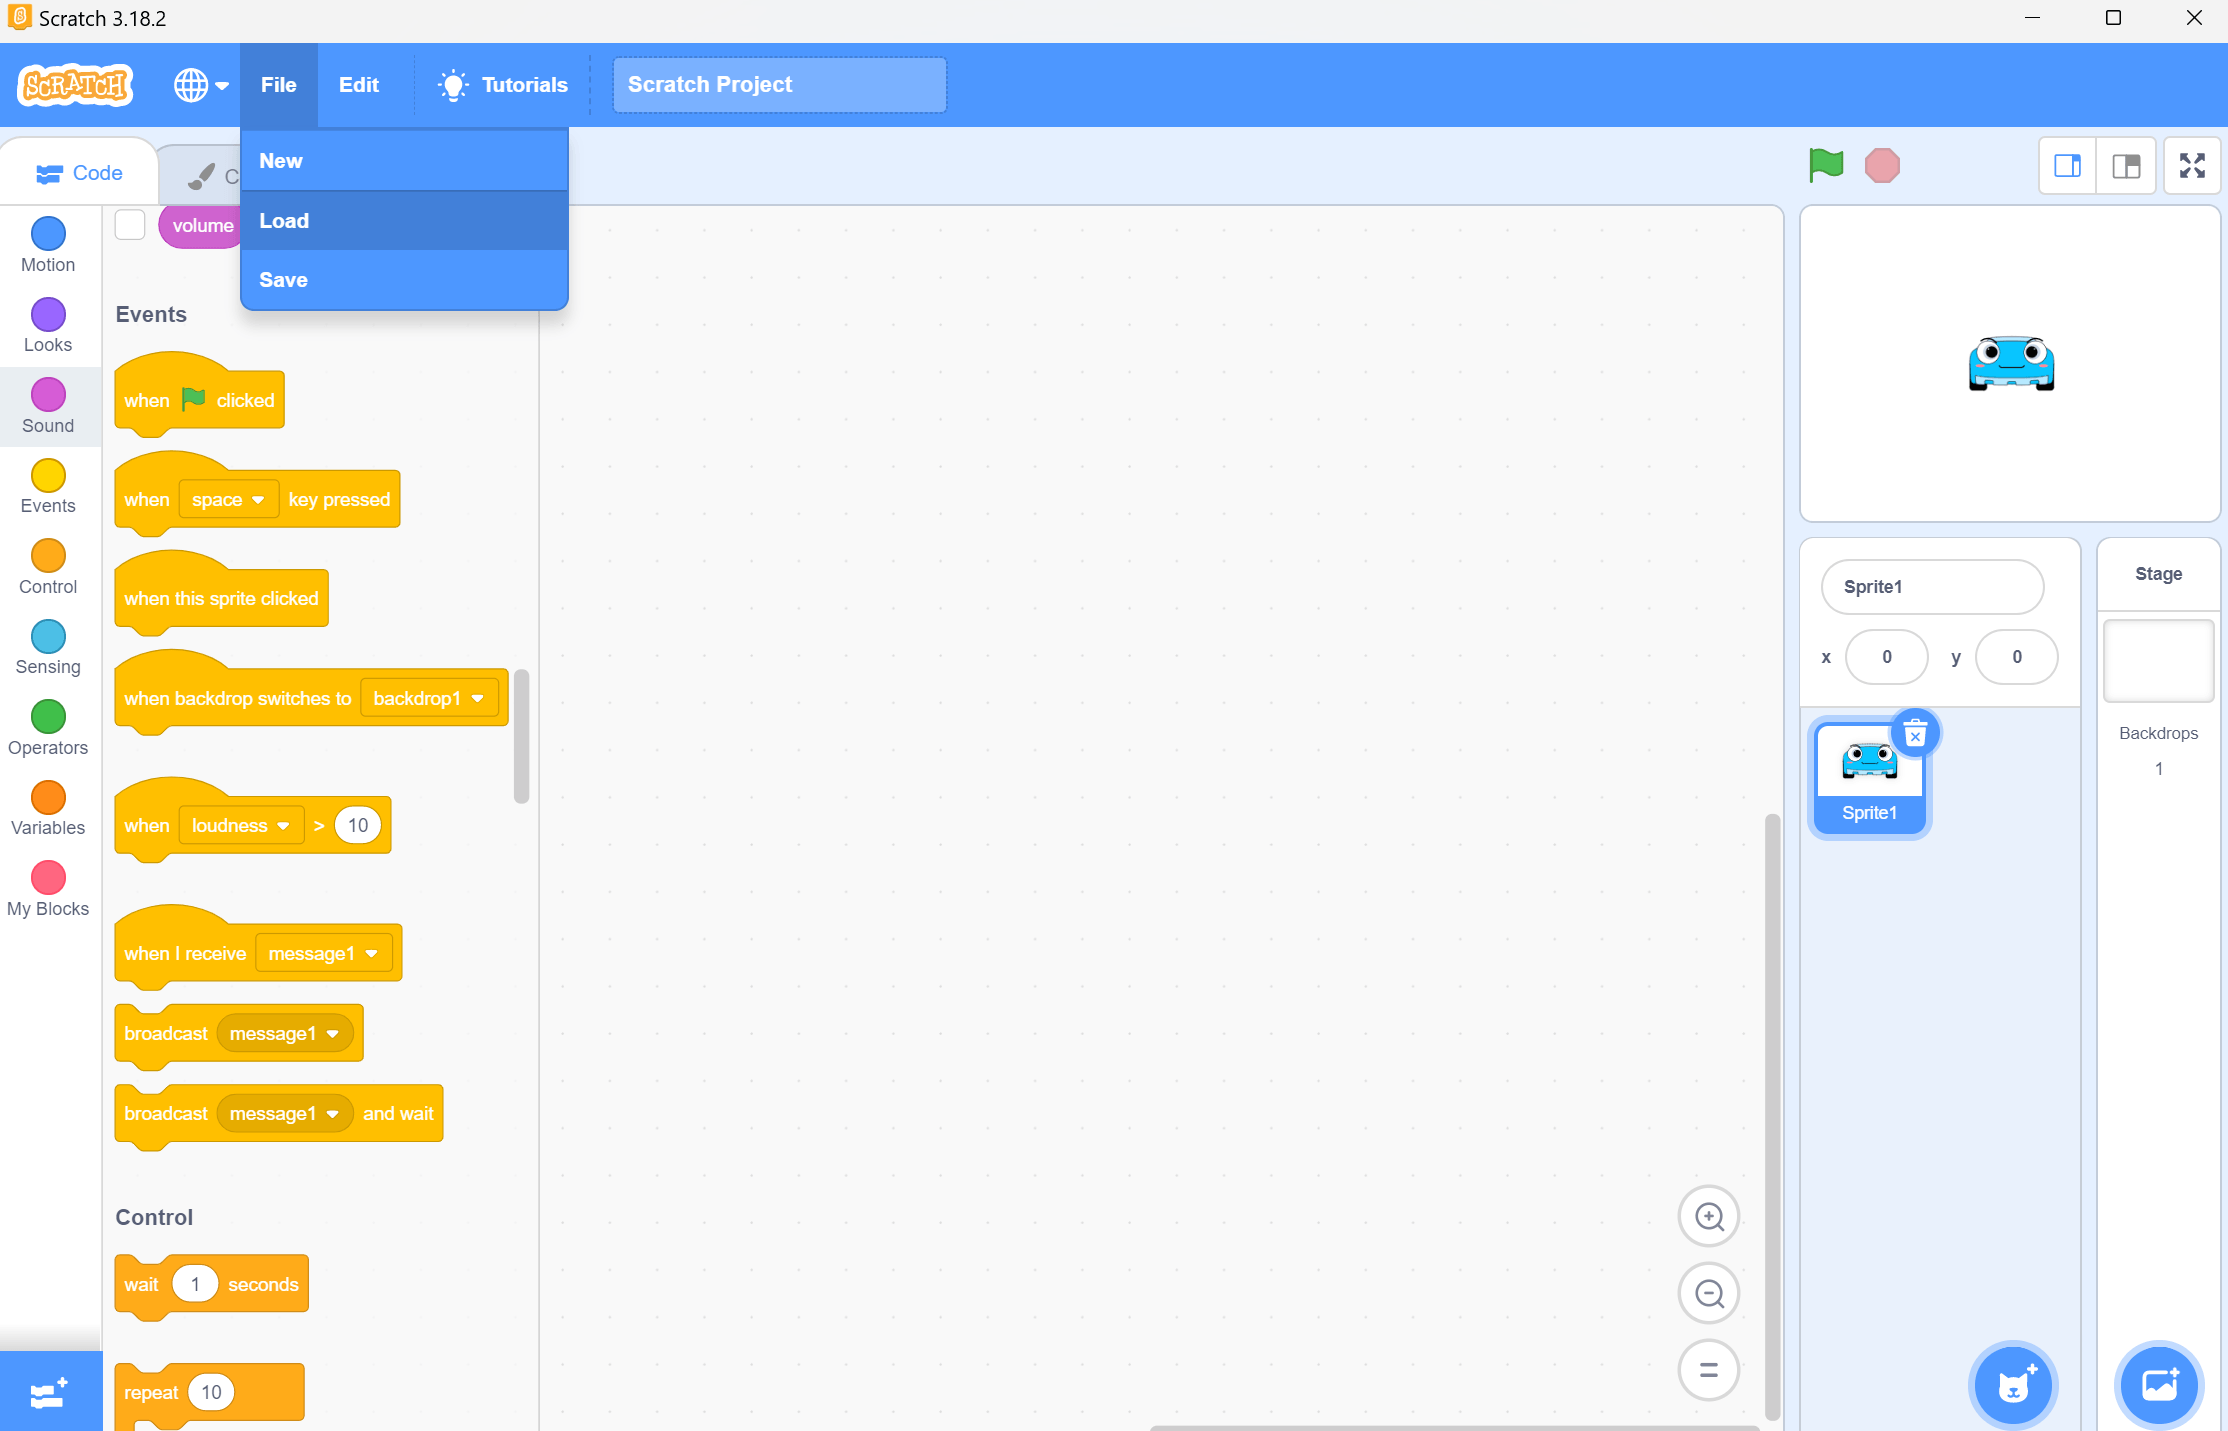
You will see your Lesson 1 file in the list of files you can open. Click on it.
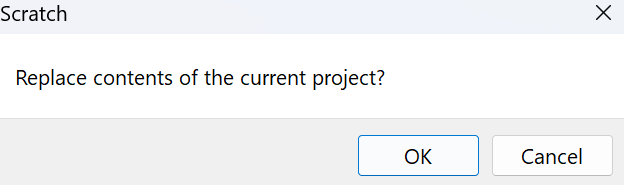
You will see this pop-up, asking if you want the contents of the file to override the contents of your current window. So if you load a project while working on other code, make sure that code is saved or it will be lost!
Here is the code: Lesson 1 Code
Here is a Step-by-Step guide to complete the code: Lesson 1 Code Instructions
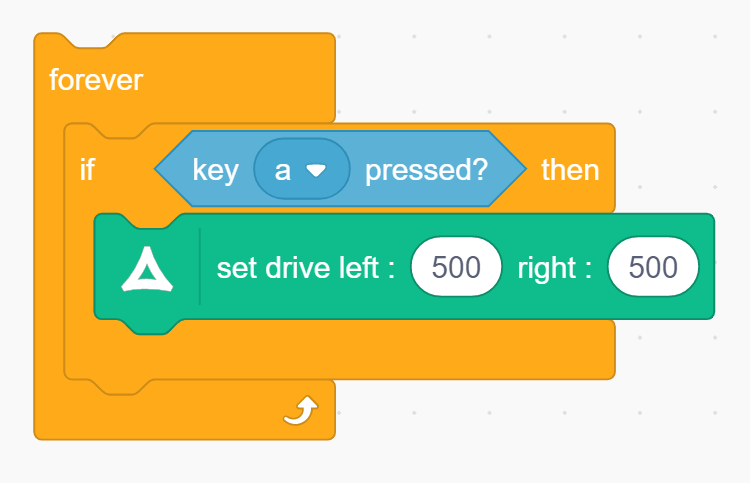
Correct answers are provided here for teachers:
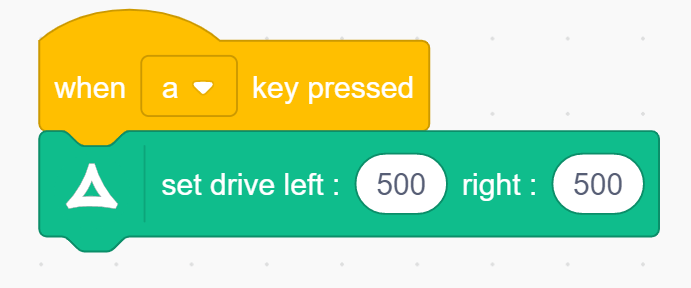
Common incorrect answers are provided here:
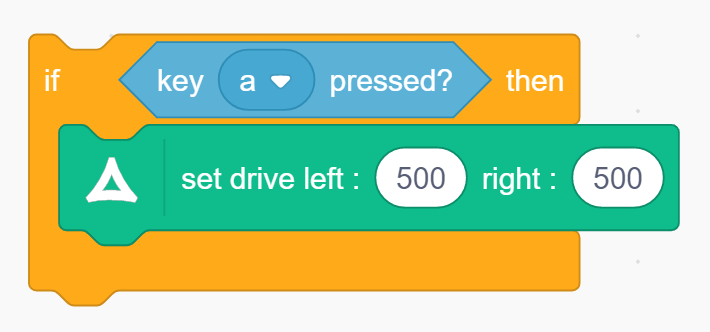
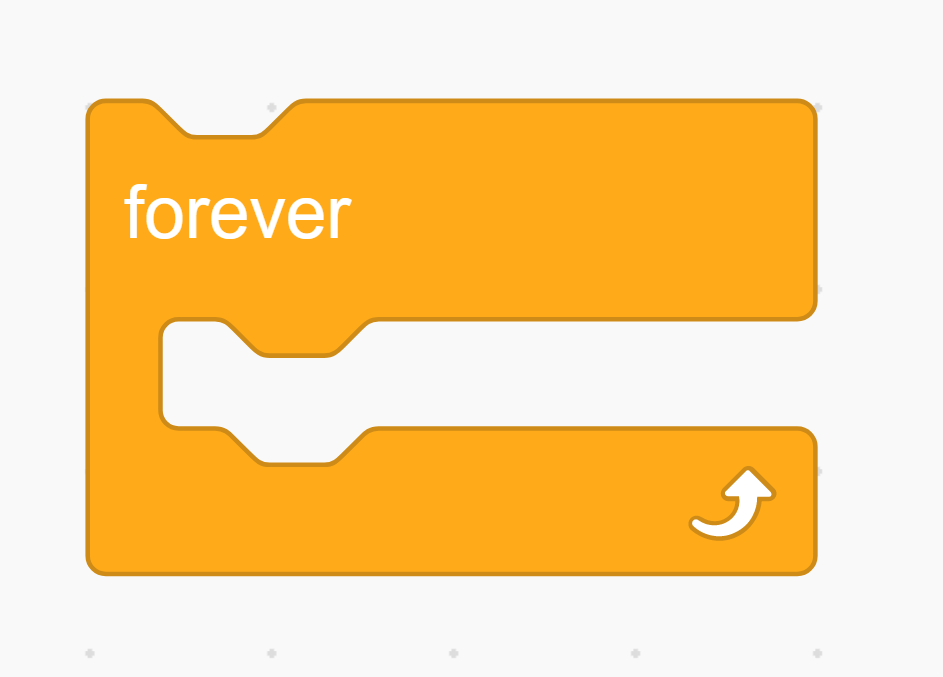
Most of the student’s incorrect answers will make logical sense, and this can be frustrating. If the majority of students are confused, it may be helpful to point out the importance of the forever block. An if block will run only once when the code is executed, but a forever block will run over and over, so it will work whenever you press a.
Another option is to ask a student with a working code to explain their thought process to the rest of the class, or divide students into groups with some students who understand the concept and others who don’t.
Emphasize that most of their answers make logical sense, but the robot is like a toddler. It only knows a few words and phrases, and it’s easy to put things in an order it cannot understand.
Before we make an autonomous car, let’s make a normal car. At the end of this lesson, you will be able to drive this car yourself using your PC computer!
| 1. Bluetooth | 2. Orchestra | 3. Scratch |
 |  |  |
Connect your autonomous car to your dedicated computer via Bluetooth. | Open Orchestra and connect your robot to the program. | Open Scratch from Orchestra |
Step 1
The first thing your car needs to do is stop and go. What algorithm do you need to write to make the robot do that?
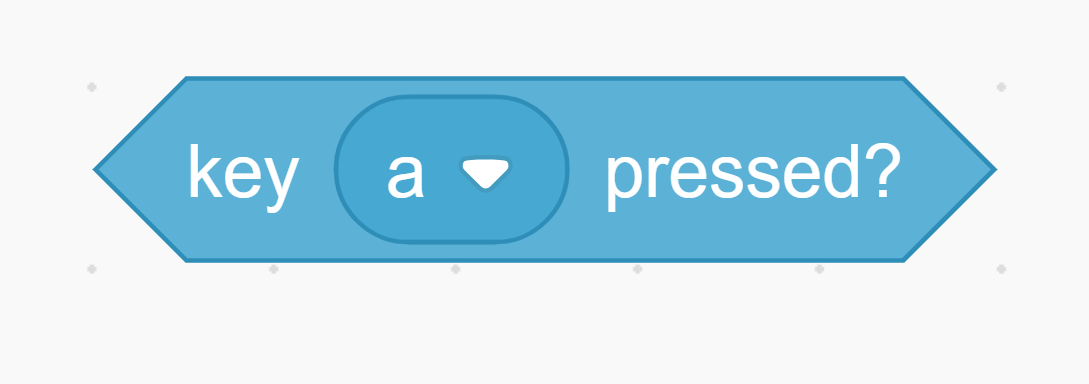
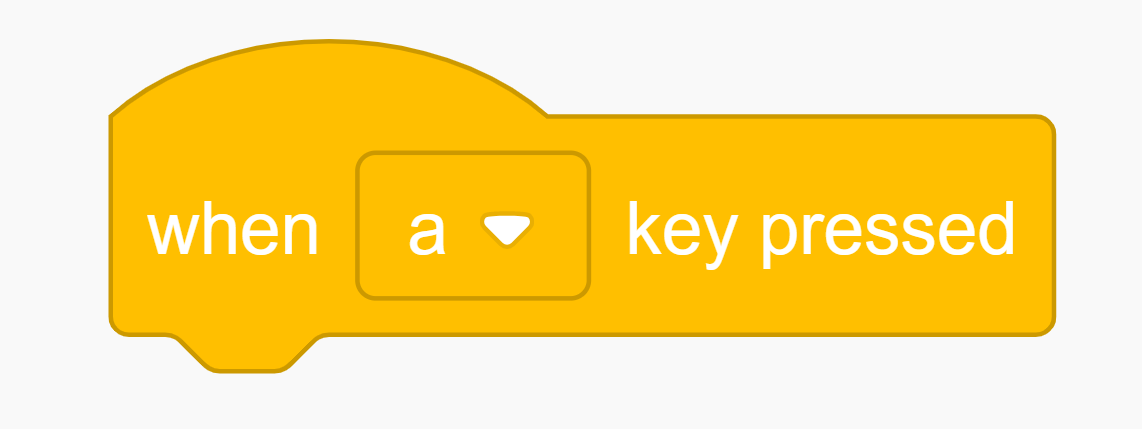
Which block(s) do you think we should use in order to make the robot move forward when you press the “A” button?
![]()
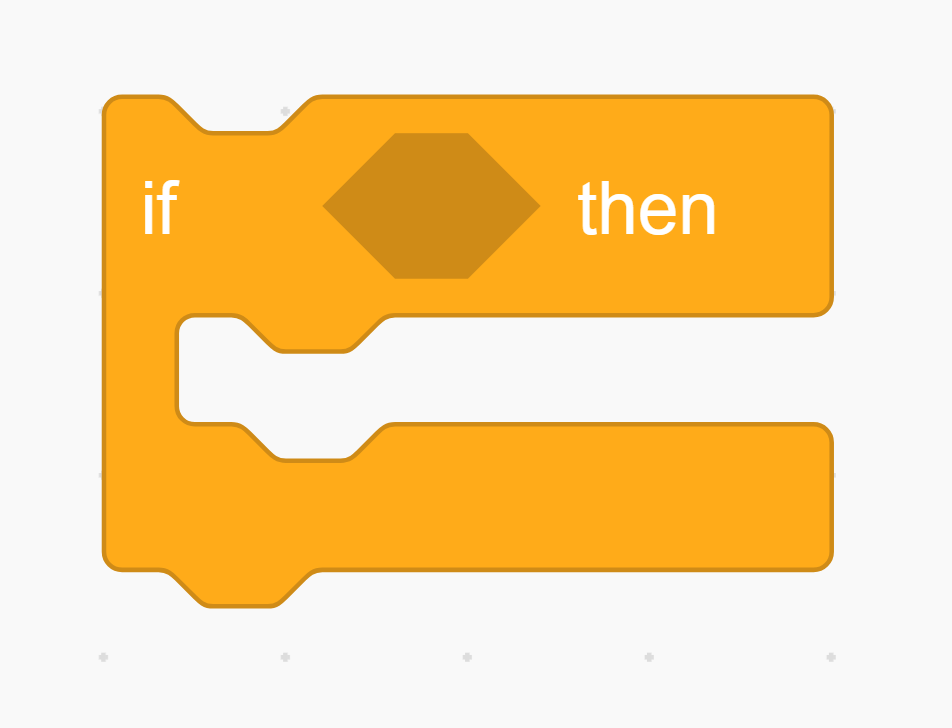
![]()
![]()
Hint: you can do it in just 2 steps
- YES
- NO
If you don’t get it, try again using only these blocks:![]()
Step 2
Knowing what you know about making the car go, what do you think you’ll need to do to make the car stop?
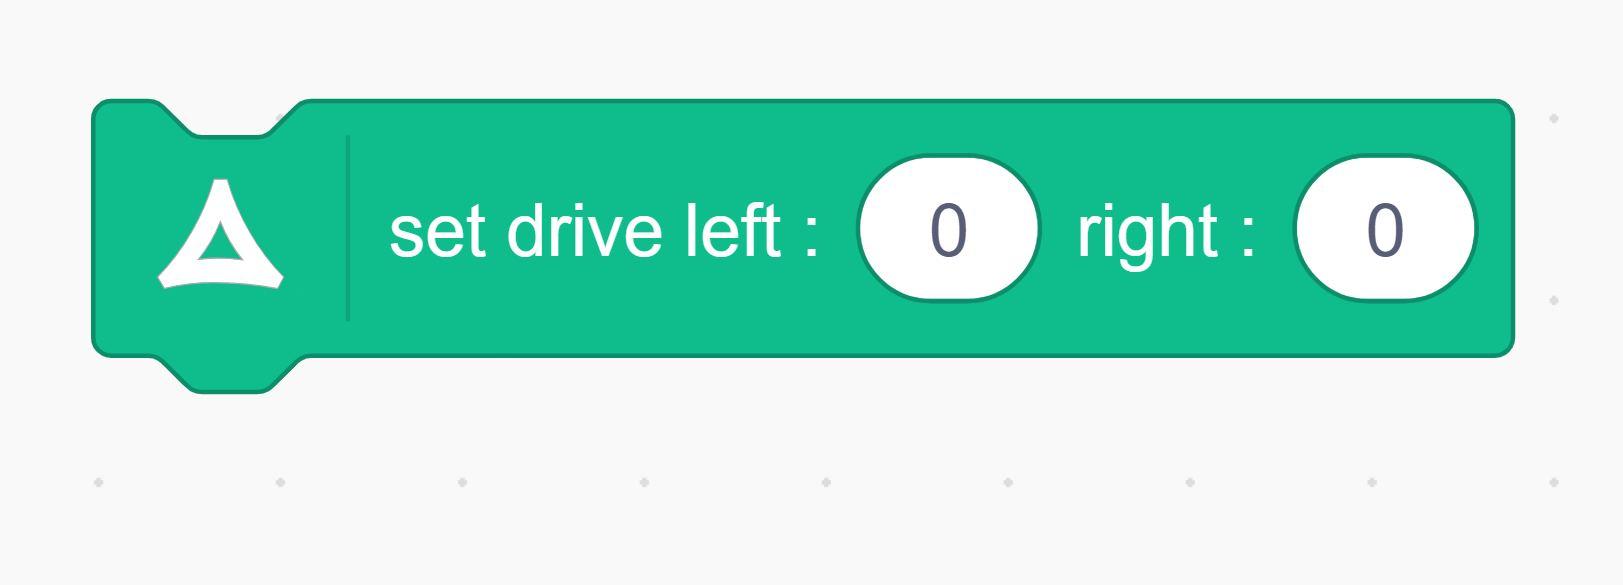
Which block(s) do you think we should use in order to make the robot move backward when you press the “A” button.
Make a guess, code it, and see what happens to Scratch!
- YES
- NO
![]()
Hint: The numbers after L and R are the power levels for the wheels on the left and right sides.
Step 3
Next, we should get the car to go left and right.
Which block(s) do you think we should use in order to make the robot turn left when you press the “A” button.
![]()
![]()
Try it out on the Scratch and see how it works!
- YES
- NO
![]()
Hint: Try clicking this block and look at your options.
Step 4
Knowing what you know about making the car turn left, what do you think you’ll need to do to make the car turn right?
Which block(s) do you think we should use in order to make the robot turn right when you press the “A” button.
Make a guess, code it, and see what happens!
- YES
- NO
![]()
Hint: If turning left is a negative angle, turning right must be a positive angle.
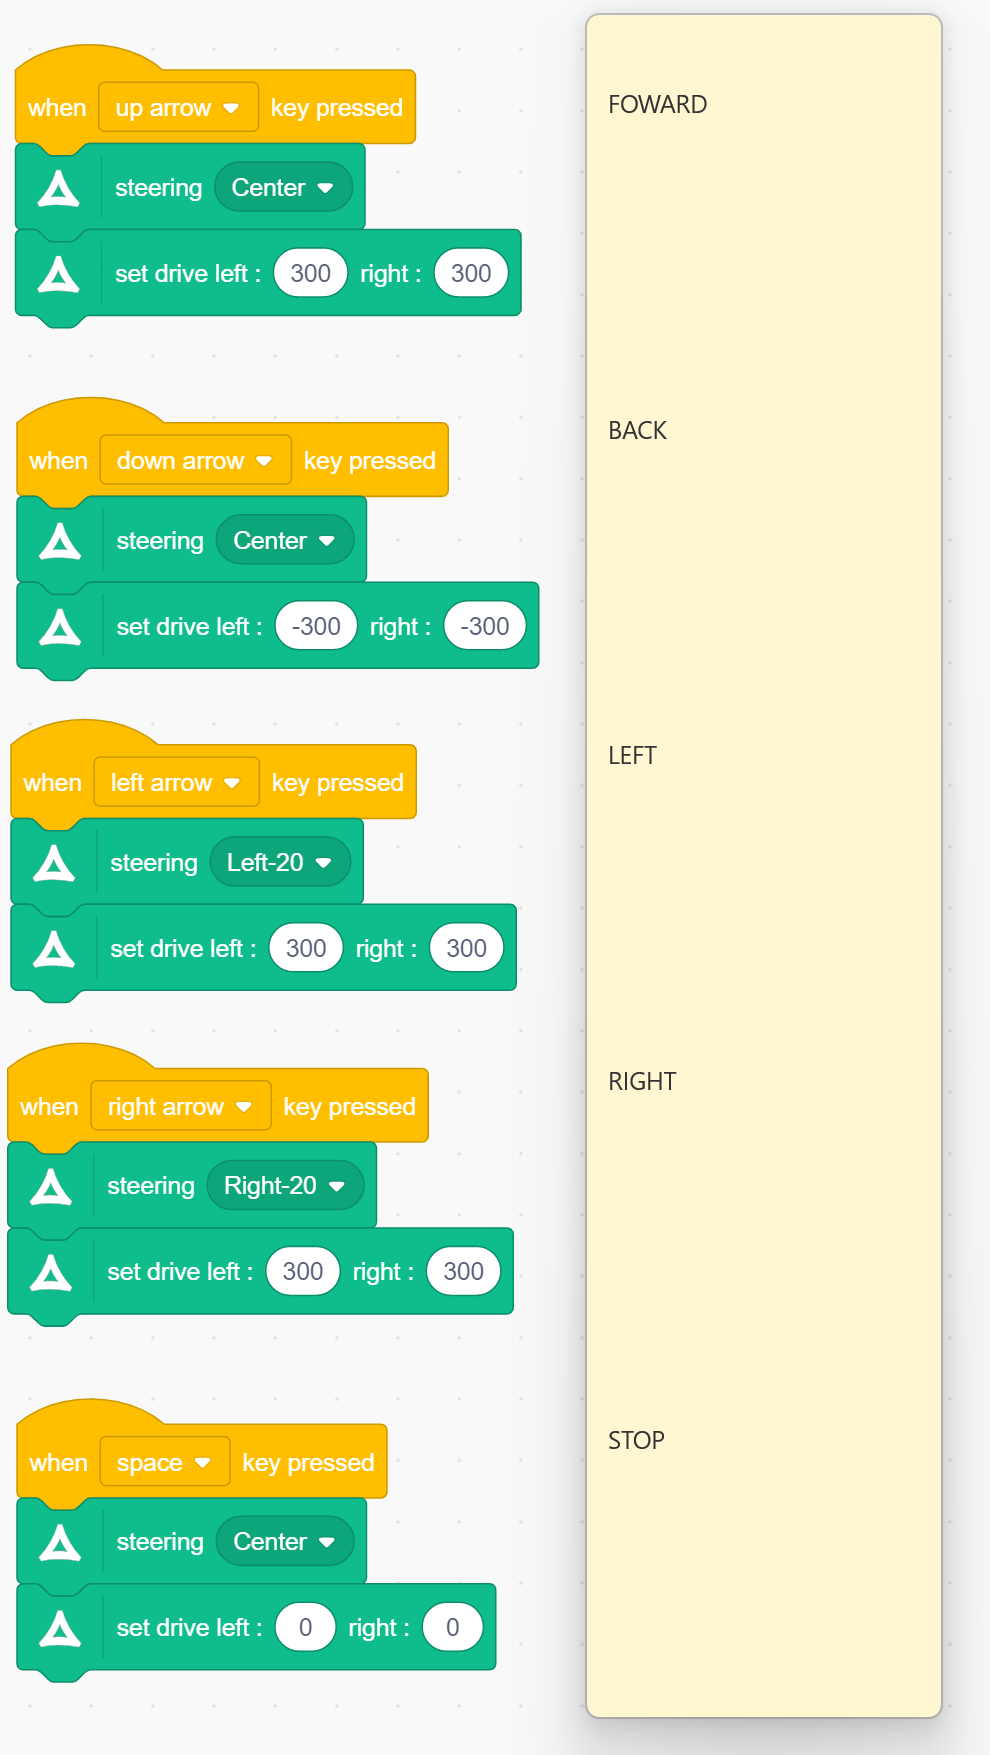
To make your car fully functional, you'll have to assign a different key for each function (forward, back, left, right). Try:
W - forward
A - left
S - back
D - right
Teaching Tips:
Have the students record their car in action and narrate what they are doing and why. This way they can show friends, family, and have a record for themselves.
Share the students' answers with the class. If time is allowed, have a quick discussion about what went well and what could have been done differently better.
Question 1: Check the concepts you understand.
This is the students' self-assessment of their understanding of the material. You will see a bar graph once all the poll answers are submitted.
Question 2: What is an algorithm?
An algorithm is a set of (specific) rules a computer follows to complete a task. (Anything similar to this answer is correct.)
Question 3: Why was the Forever loop necessary for the program?
A forever loop is necessary because if we didn't use it, the program would only one once and then stop, we want it to run over and over as the car drives. (Anything similar to this answer is correct.)
Question 4: What was the coolest thing you learned today?
Any answer will do here. If time permits have a short discussion with students about their answers.
AFTER CLASS
Store Student Files
Put the student files on a thumb drive or store them in some way so that the students can continue working on their project in the next lesson.
Pack Up Hardware
Turn off the robots and computers and pack the robots in the transport case accordingly.
Don’t worry, this isn’t for a grade, it’s just so your teacher can check the classes’ understanding.
- If loop
- Forever loop
- Algorithms