Lesson Modules
Teaching Tips:
We highly recommend that only teachers or trusted upper level students handle attachment installation.
Air Pump
Here are the instructions to complete the air pump installation:
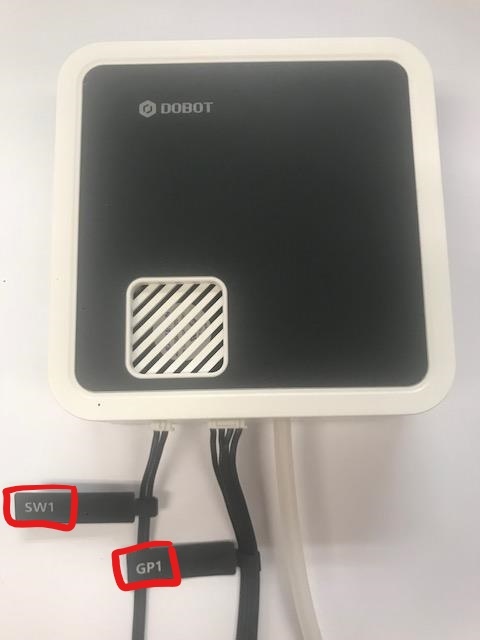
#1 Connect power line labeled SW1 on the pump box with the interface on the Dobot labeled GP1. |
|
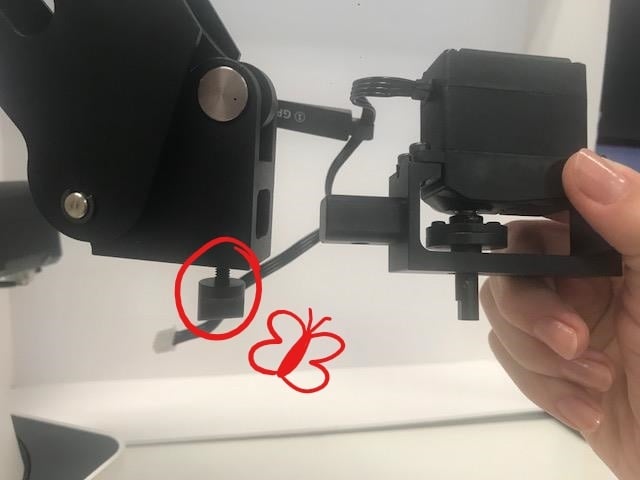
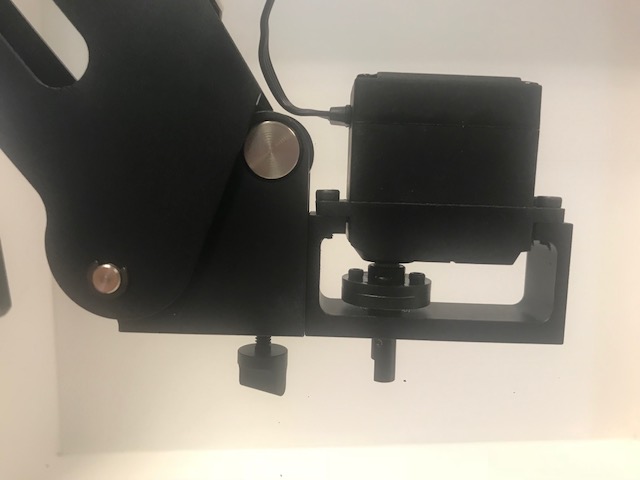
#2 Tighten air pump kit onto the end of the Dobot with the butterfly nut. |
|
#3 Connect GP3 of Joint4 servo line with forearm connector GP3, which should be the connector closest to the attachment end of the forearm. | 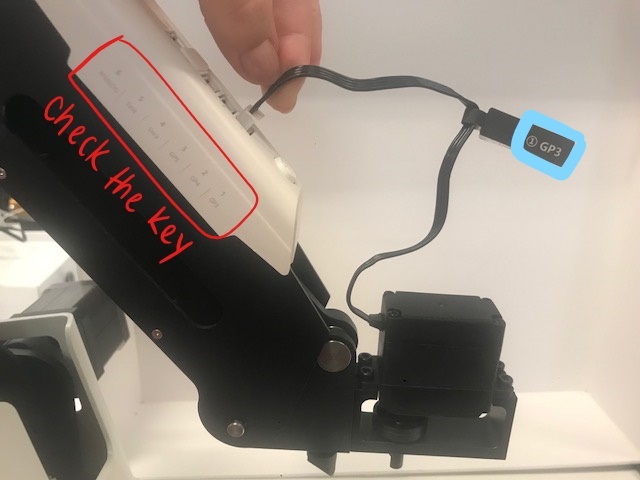 |
Switching between Gripper and Suction Cup
The Gripper kit shares the air pump with the Suction Cup, so switching between the gripper and suction attachments is very simple.
| #1 Remove the gripper by unscrewing it from the air pump. | 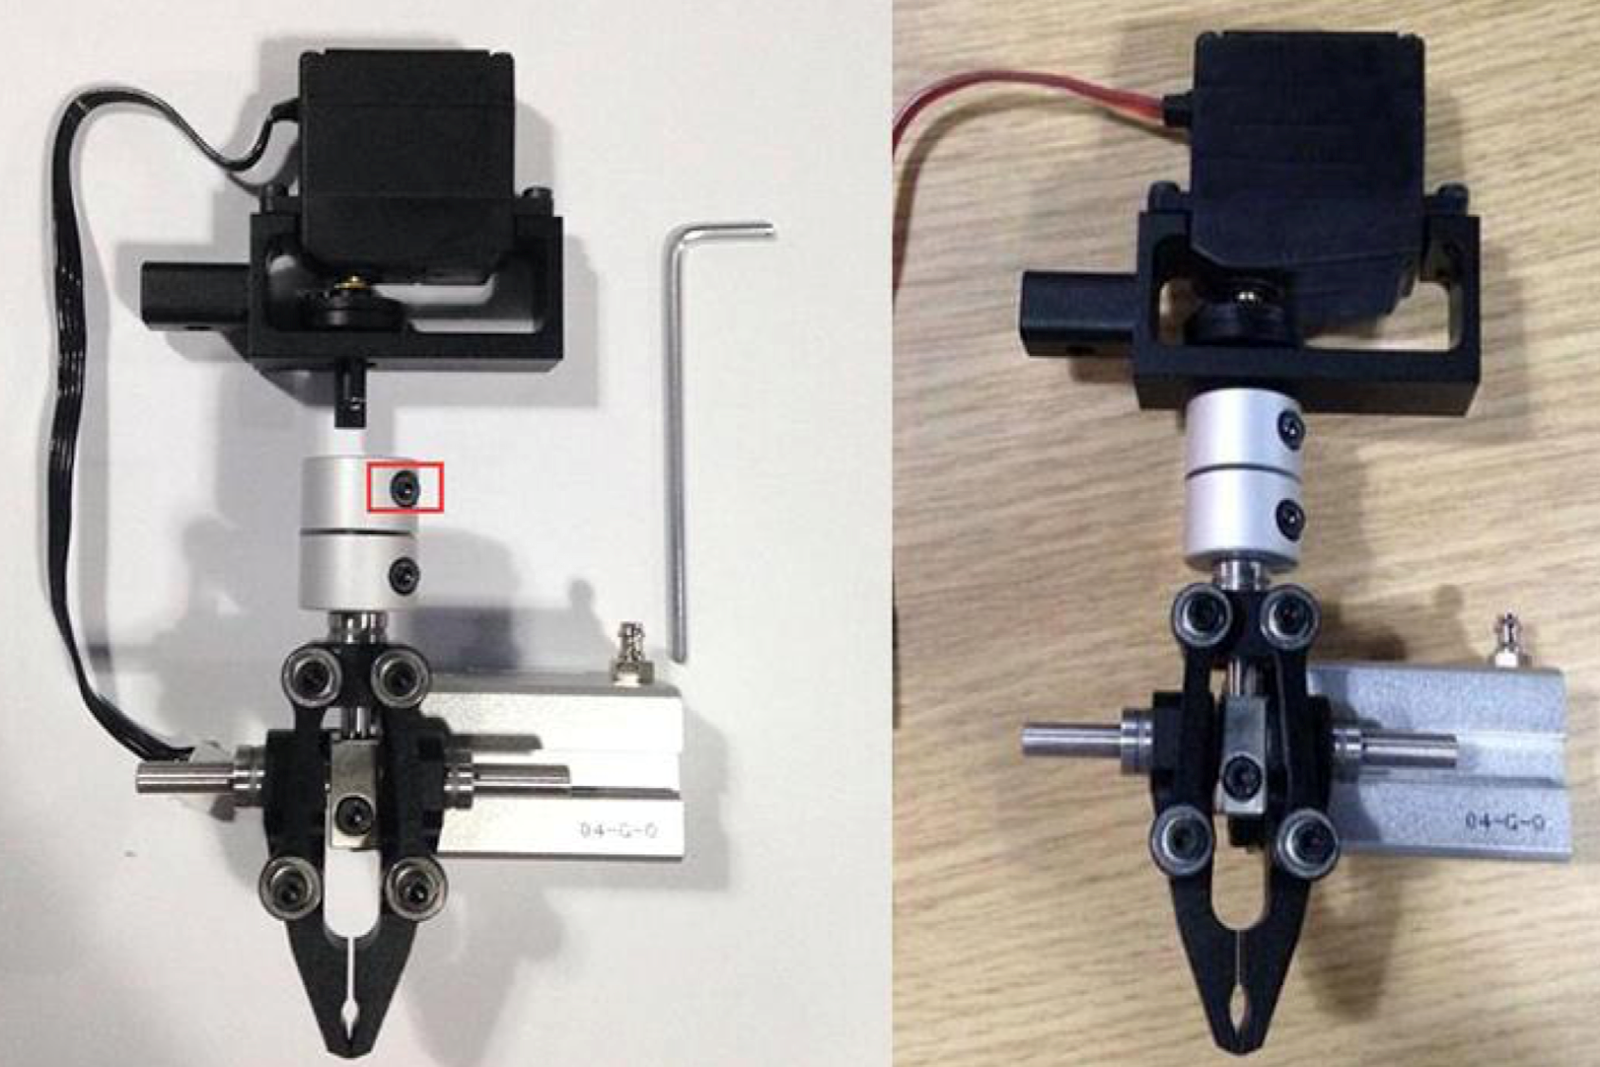 |
| #2 Replace it with the suction cup, and reattach the air pump. | 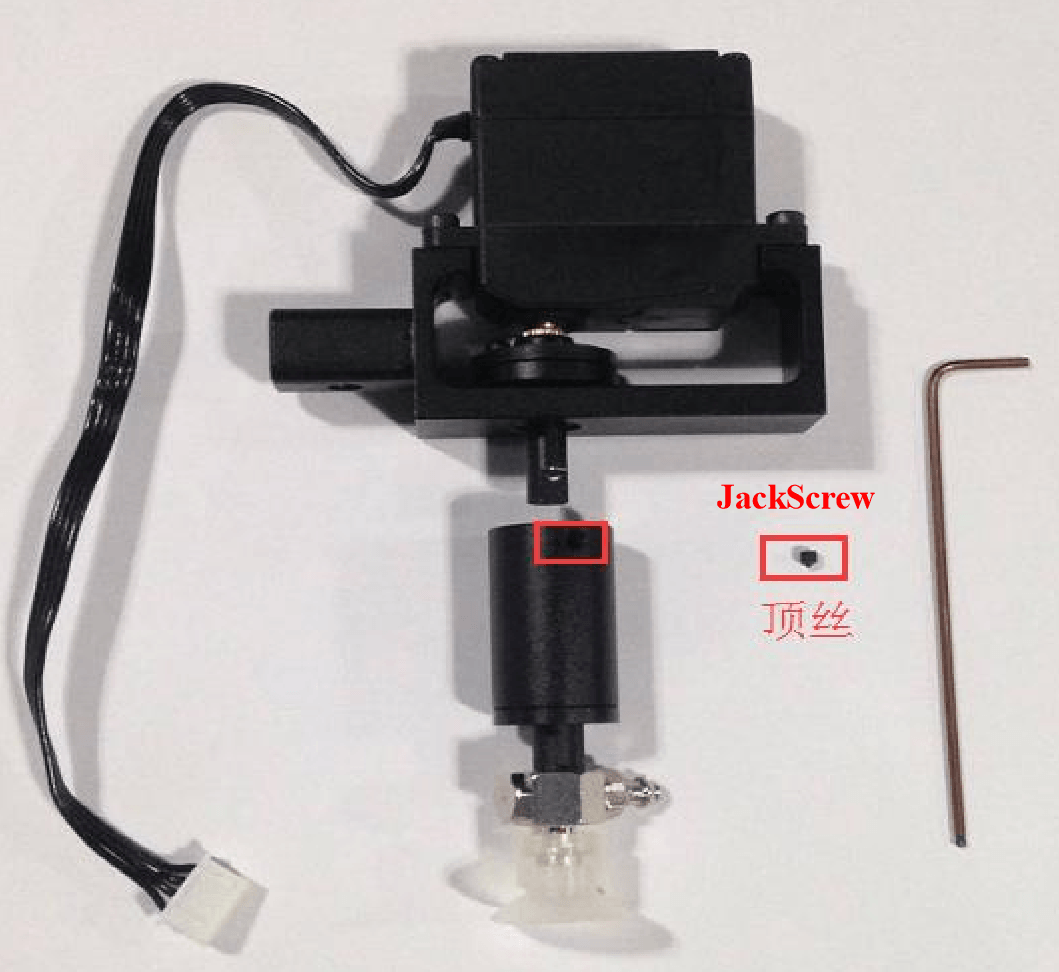 |
#3 Attach the air tube to the adapter. (It isn't always easy to attach the tube, don't worry, you won't break it.) | 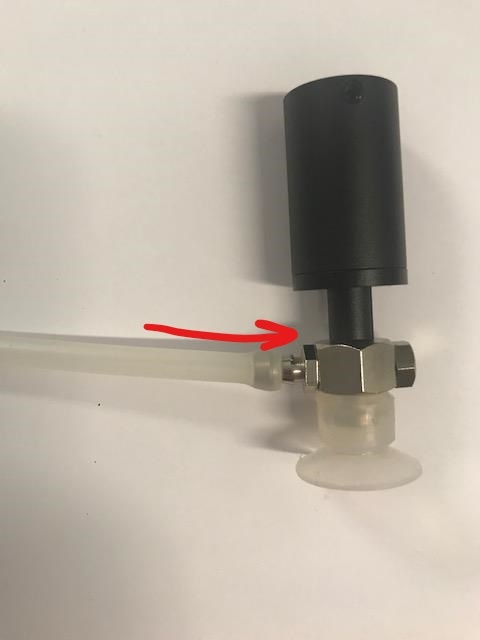 |
Teaching Tips:
General Troubleshooting:
Ensure that your Dobot is:
- Plugged into power
- Powered on
- Connected to your computer via USB
- Connected via DobotStudio
If your Dobot is not moving as you expected, press the Home button and allow it to recalibrate.
Suction Cup Troubleshooting:
The suction cup is properly attached, and I can hear the air pump working, but the suction isn’t working and my Dobot won’t pick anything up.
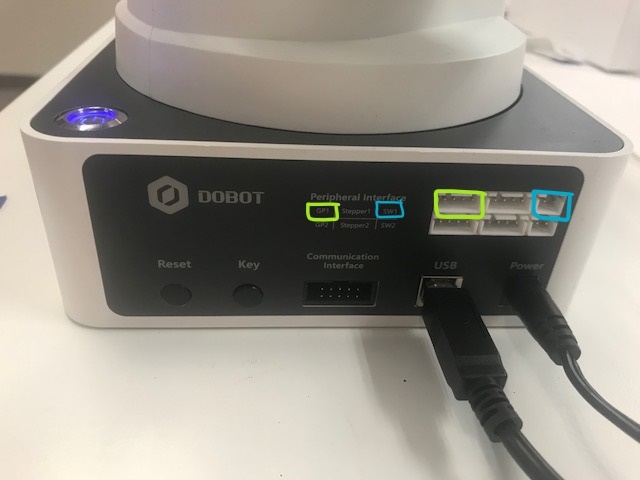
- This is most likely a port connection issue. Double check that your suction cup attachment and your air pump are plugged into the correct ports. The correct port for the suction cup is GP3, which is the input labeled #1 on Dobot’s forearm. The correct port for the air pump is
- This could also be an issue of proximity. You must touch suction cup to the object you intend to pick up in order for it to form a seal and move the object. Try changing your code by moving the arm slightly further in the Z direction.
We highly recommend you have an emergency stop code for the air pump in case a student runs into an error. When a code breaks, the air pump will continue to work if was operating before the code broke. Having a "When 'space' pressed, suction off' block section is a great way to stop the air pump without having to emergency stop.
Challenge Solution
Steps:
- When the Go Flag is clicked
- Set the end effector to suction cup
- Set the suction cup off
- Set up a variable to hold the Y coordinate for the line up
- Set to loop 4 times
- Jump to directly above the block's initial location.
- Turn on the suction
- Wait one second
- Jump to the first line up location, including the saved Y
- Turn off the suction
- Wait one second
- Increase the saved Y variable by 50
NOTE: The values for locations WILL differ depending on student starting and ending locations. Also, there are multiple solutions including different types of movement (using joints vs Cartesian and using jump vs relative move, etc.). The solution we've provided uses a loop and a variable z (if students haven't been taught loops or variable assignment it is understandable the movement blocks will just be repeated and numbers calculated outside of the program). BlockLab image coming soon!
BlockLab
These two blocks control most of the Suction Cup functionality.
Setting > Set End Effector Tell the program what attachment you are using for the Dobot. This block should be placed at the beginning of each program. | |
Motion > Suction Cup On/Off Turn suction from the air pump on and off during the run of the program. |
Here is an example of a responsive program using these blocks:
1. Tell the program what attachment you are using for the Dobot. 2. Repeat the inner blocks (steps 3-8) 10 times. 3. Move to a location you specify. 4. Power on the suction cup. 5. Pause for 1 second (and do nothing during this time) 6. Move to a location you specify. 7. Power off the suction cup. 8. Pause for 1 second (and do nothing during this time) |
Script
Example program in Pyhton code - coming soon!
Challenge (see teacher tips for solution)
Write a program that:
- Picks up a block with the suction cup
- Places it down in a location you specifty
- Picks up another block (from the same location from step 1)
- Places it down 50 units (on the Y axis) away from the previous block
- Repeat this process twice more
When your program is done running, you should have a line of 4 blocks each spaced about 2 blocks apart.
Teaching Tips:
General Troubleshooting:
Ensure that your Dobot is:
- Plugged into power
- Powered on
- Connected to your computer via USB
- Connected via DobotStudio
Check the firmware in the Settings menu, and make sure it matches the task you are trying to complete.
If your Dobot is not moving as you expected, press the Home button and allow it to recalibrate.
Suction Cup Troubleshooting:
The suction cup is properly attached, and I can hear the air pump working, but the suction isn’t working and my Dobot won’t pick anything up.
- This is most likely a port connection issue. Double check that your suction cup attachment and your air pump are plugged into the correct ports. The correct port for the suction cup is GP3, which is the input labeled #1 on Dobot’s forearm. The correct port for the air pump is
- This could also be an issue of proximity. You must touch suction cup to the object you intend to pick up in order for it to form a seal and move the object. Try changing your code by moving the arm slightly further in the Z direction.