Lesson Modules
Teaching Tips:
Each module has differing levels of utility to you as a teacher, so spend as much or as little time as you need in each.
Module 1 is where you will spend most of your time in Engage, since we mainly focus our lessons through the DobotBlock Lab. If your students are more familiar with Python coding, feel free to utilize the Python Lab to control Dobot using Python code instead of the Block lab's drag and drop coding methods.
Module 2 pertains to drawing, laser engraving, and 3D printing. Also note that only Dobot Magician can use laser and 3D printing attachments. Please note, we do not support 3D printing in any of our curriculum. You will have to seek information on that attachment from the manufacturer or elsewhere.
Module 3 focuses on the teaching and playback lab, which is an excellent starting point for any project, and is often used in the industry to best teach the machines the exact points in space they must move if being programmed on-site. Unfortunately, files saved here cannot be opened within the Block or Python lab. This is a useful tool maybe for an introduction, but most students should focus on using Block or Python labs to control the robot for the most beneficial learning experience. You can use this lab for supplemental learning if needed.
Module 4 is only for Magician Lite users. Within the virtual simulation, you can choose a number of different virtual scenes and whether students will use the Block or Python coding system. The lab is mainly used to better visualize scenarios in the digital space, as the other labs only have a separated sprite system which does not directly correlated with the physical robot. This can be very useful for visual learners to connect their work to real world scenarios.
There are 7 applications available to control Dobot within DobotLab. We have split them into 4 groups based on their functionality, so you can find the information you need for your class without having to parse through instructions that aren't useful to you.
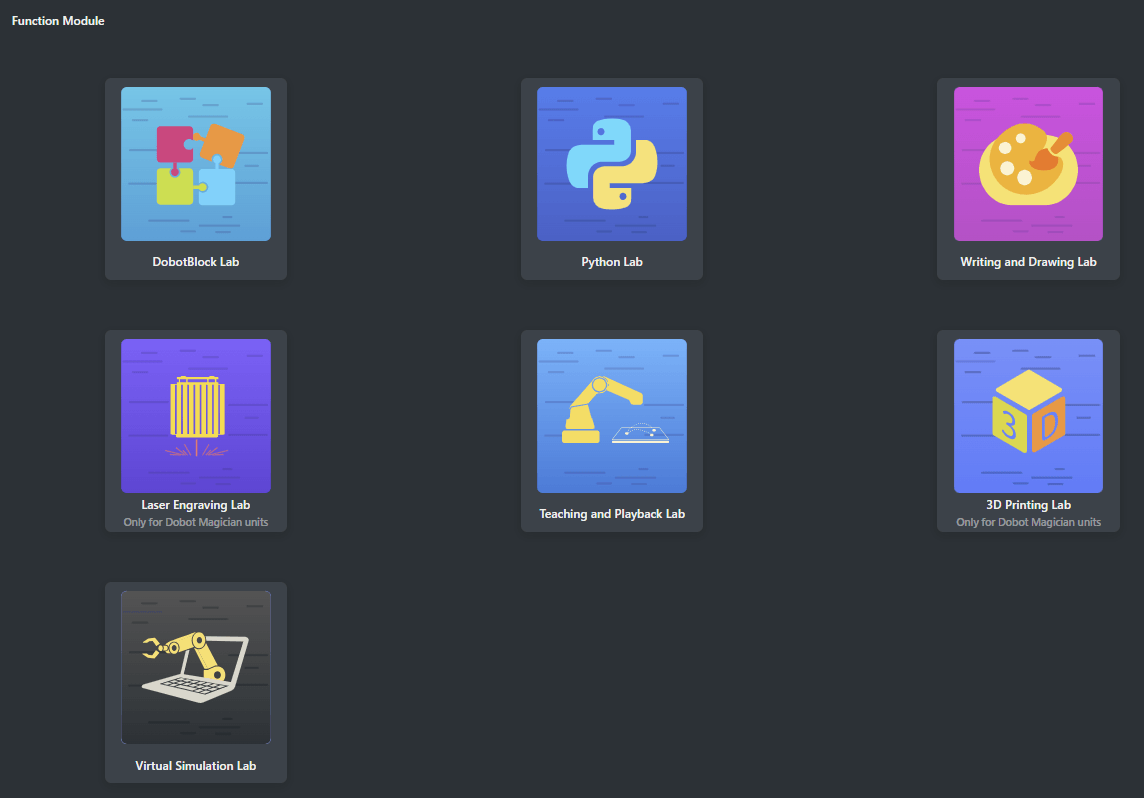
Module 1: Programming
Block Lab
Python Lab
Module 2: Automated Image Tracing
Writing and Drawing
Laser Engraving
3D Printing
Module 3: Pose and Save
Teaching and Playback
Module 4: Magician Lite Only
Virtual Simulation Lab
Title Bar
![]()
Every application has this same title bar at the very top for easy navigation and file saving purposes.
A) Menu - drop down menu that will open the following:
Currency - opens virtual tour of the current screen, providing similar information to this table.
Help - contains links to different documentation on Dobot and DobotLab.
Feedback - opens pop up to send Dobot, the manufacturer, an email with feedback on DobotLab.
About - opens pop up about DobotLab version, copyright, and separate parts and licenses.
B) Home - returns the user to the home page. Provides a pop-up reminder to save.
C) File- drop down menu containing the following functions:
New - make a new file (make sure to save anything you want to keep before you click this button).
Open - Open one of your saved files.
Save As - Name and save a file you have been working on in DobotLab.
Save to Local - Name and save a file you have been working on to your computer's hard drive.
Upload from Local - Open a file from your computer's hard drive into the Block Lab.
D) Project Name and Save - a textbox to name or rename your project and a button to save your work on DobotLab under the current project title.
E) Language - drop down selection of English, (Simplified) Chinese, Danish, Czech, or Spanish.
F) Account - a drop down containing your nickname, user type, ID, account level, and the following places to navigate to:
Personal Center - details on your account, ability to change information, change settings, and monitor AI data usage.
All Courses - a page that lists all premade courses on DobotLab
My Works - a complete list of all the projects saved on your DobotLab Account.
Logout - logs out of your account.
Teaching Tips:
It is up to your course whether you will be using the Block Lab or the Python Lab. For first time coding, or simply a more shallow learning curve to first time Dobot users, we recommend using the Block Lab, at least at first. Both Labs do have access to manual arm control, though the Python Lab's is hidden with a button rather than automatically in the display.
Block Lab
To get to the Block coding environment, open DobotLab and click the Block Lab button.
The different parts of the environment and their functions are outlined below.
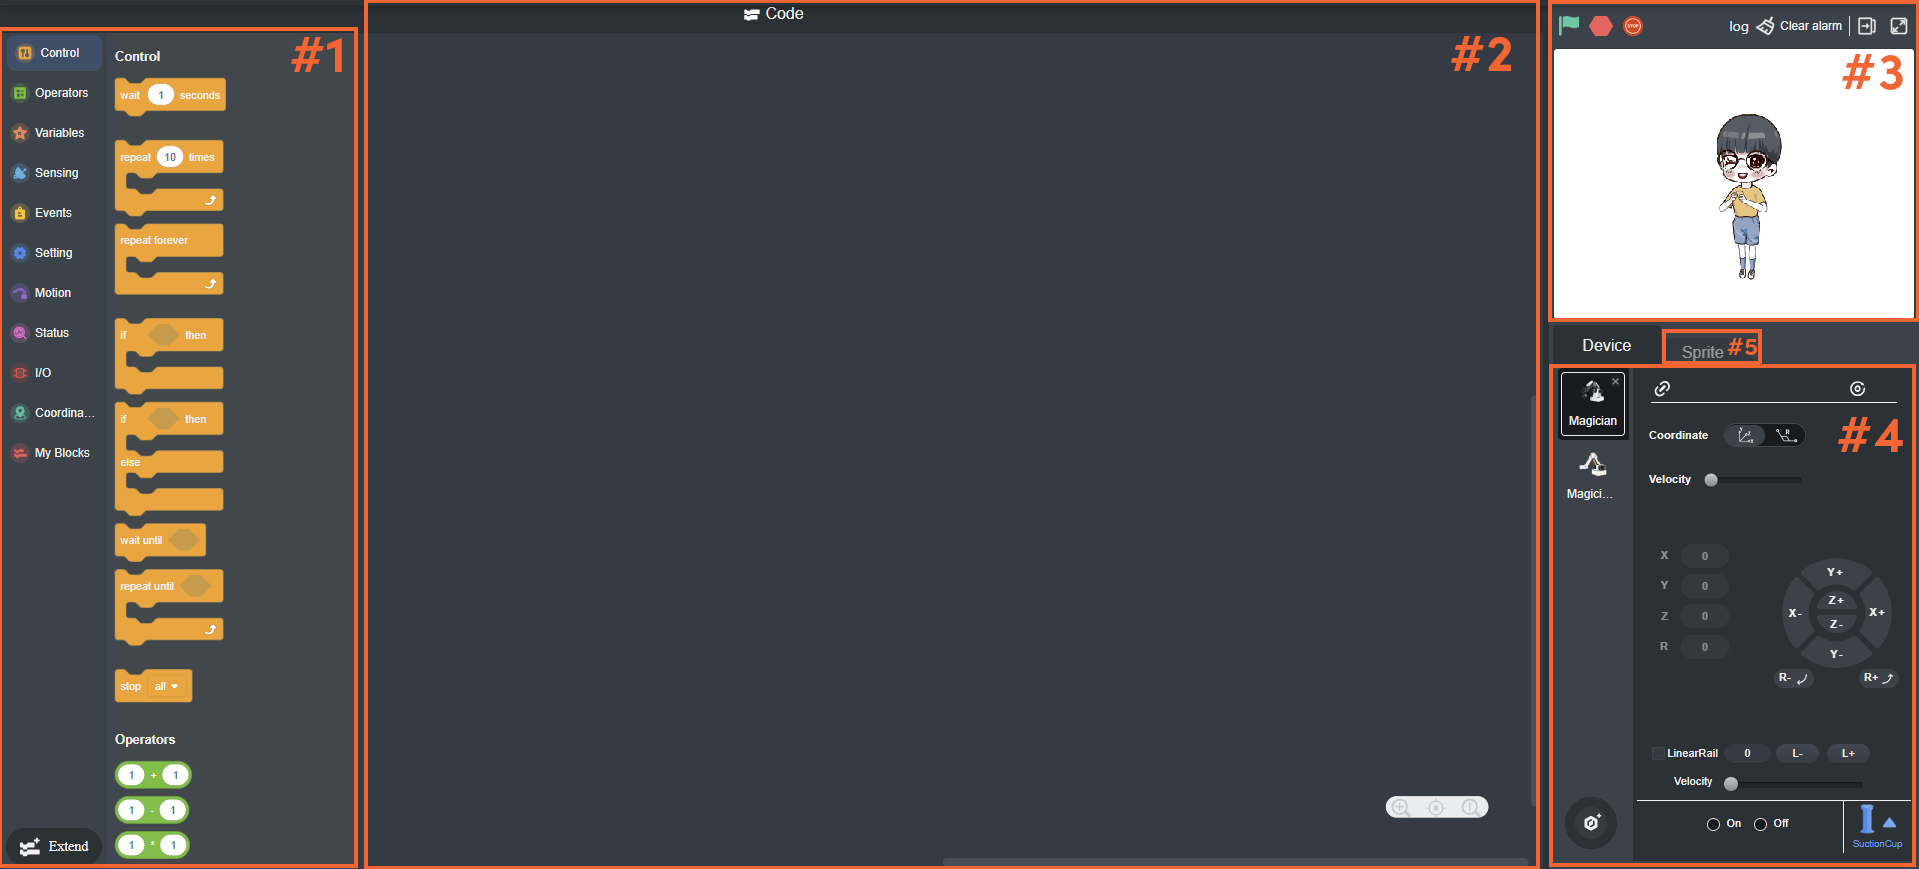
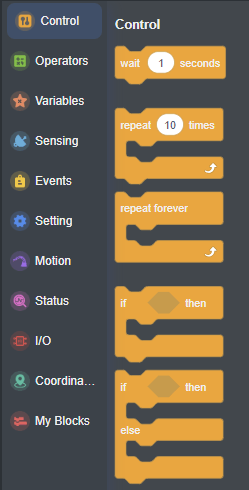
#1 Block Area This is the menu where you will find all the Block Lab blocks. These blocks can be combined to create thousands of programs. For a detailed description of the blocks and to see sample programs, please refer to DobotLab Programming Manual in the help menu. |
|
#2 Code Area This is where you will drag the blocks to create your programs. |
|
#3 Display Area Displays the sprite and your variables here. Contains the following buttons:
|
|
#4 Device Control Two tabs display a virtual control system. The Device tab allows you to connect your Dobot, recalibrate your Dobot to home, select your device (in this case Dobot Magician or Magician Lite), the type of coordinate system you'd like to use (Cartesian or Joint), the Velocity of the arm, and the manual controls for the arm, dependent on your chosen coordinate system. The LinearRail, if active, also has manual and veloctiy controls. Lastly, the end effector can be selected (SuctionCup, Gripper, or Pen) and manually controlled here. |
|
#5 Sprite Tab (Mode) The Sprite tab switches control from a physical device to the virtual sprite in the Display Area. From this tab, you can manipulate sprites and backdrops, choosing their visibility, position, and size. The circles are menus for sprites and backdrops, giving you the following options:
Selecting the Sprite tab also changes the appearance of the entire Block and Code area, giving it three tabs: Code, Paint (Costumes or Backdrops), and Sound. The Code tab has an all new set of blocks in the Block Area. The Paint tab is pulled up from the paint option in the sprite and backdrop menus. You can add sounds to be manipulated in the Sounds tab, as it uses a similar menu to the sprite and backdrop with an added record option if you want to record a sound directly into DobotLab. |
|


Python Lab
To use Python code to control your Dobot, select the Python Lab.
The layout of the environment is similar to the layout of the Blockly Title Bar and Code Area. You still have the run program, emergency stop, log, clear alarm, and device connection. However, instead of the Block Area, you have access to easy help documentation concerning commonly used functions.
Teaching Tips:
WARNING: Only enable the laser when these safety conditions are met:
- Safety glasses on (for everyone in the room).
- Sign on the door warning that a laser is in use and eye protection is neccesary to enter.
- Laser pointed toward the object you want to engrave.
And remeber to never place any part of your body in the path of the laser!
NOTE: 3d printing is not supported in any of our curriculum.
Write & Draw, LaserEngraving, and 3DPrinter
Write & Draw, LaserEngraving, and 3DPrinter all work very similarly, but they are each optimized for a different attachment.
Write & Draw
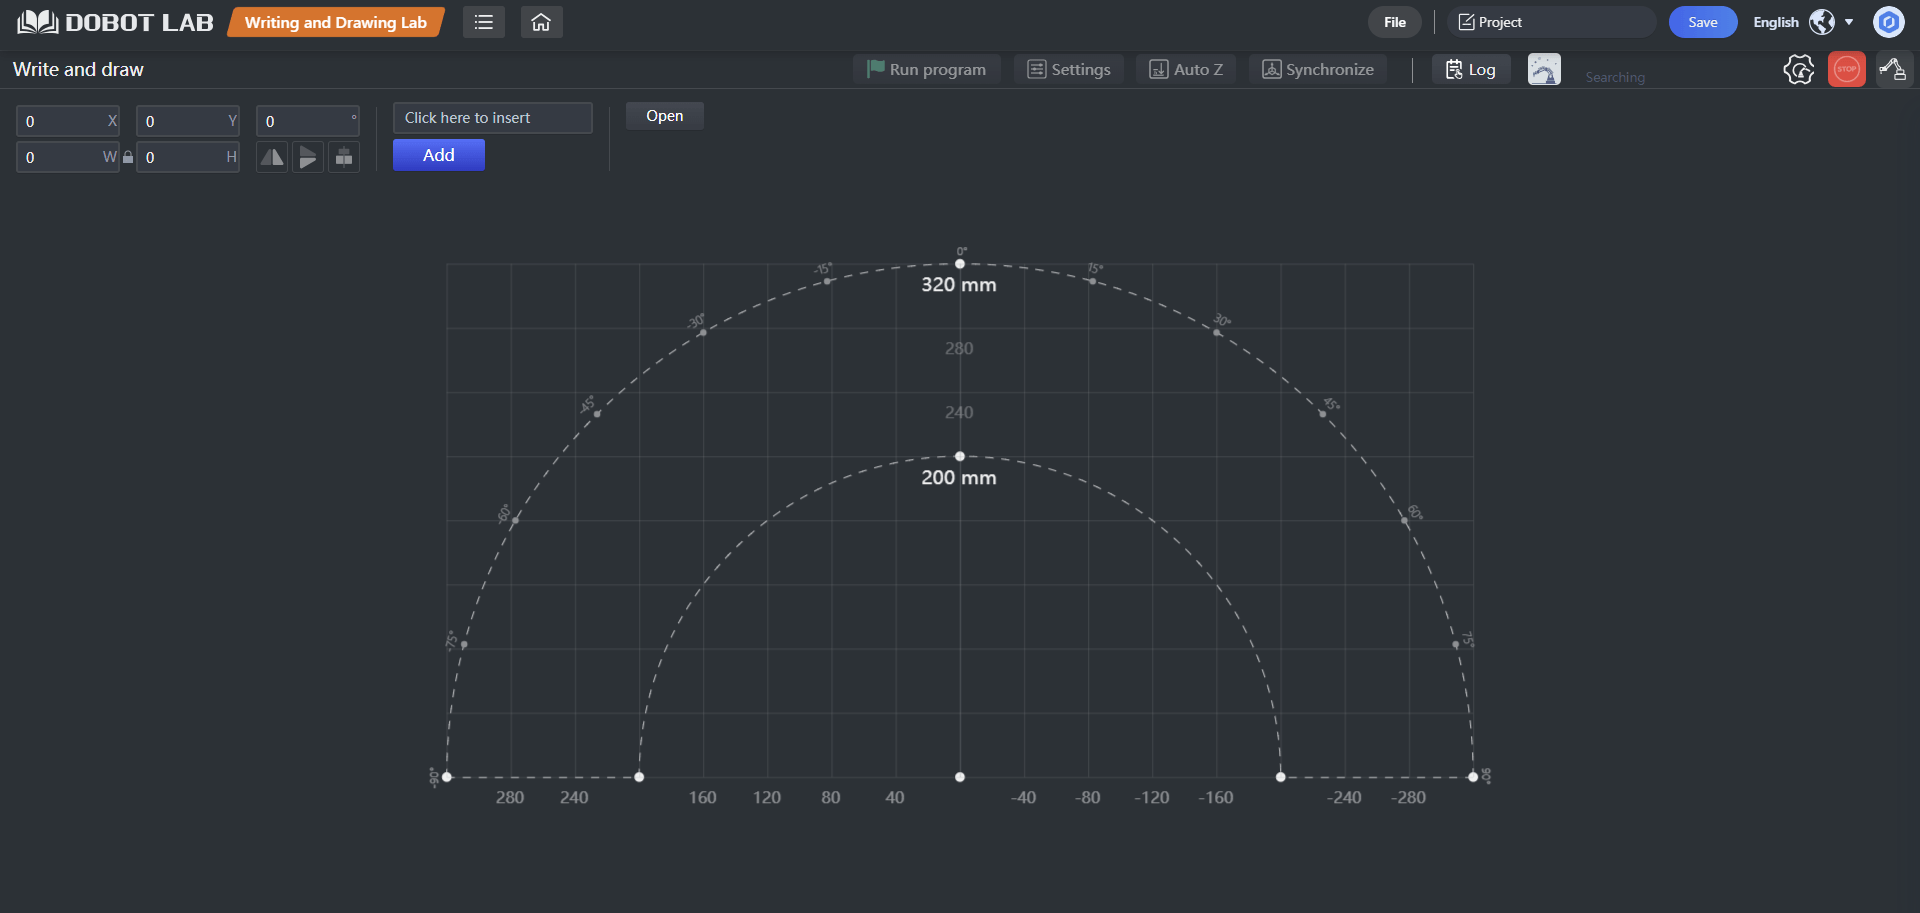
Use this app when you want to draw with the Pen attachment.
You can add text by typing it into the "Click here to insert" textbox (up to 20 characters) and pressing the Add button. Once this is done, DobotLab will create a block letter outline on the grid. You can add more text or select the current text to modify it. You can also add images from your computer with the Open button. Once an image on the grid is selected, it can be manipulated by x, y, w, h, and rotation.
Dobot's default arm height is likely not where you have set up your paper. To change the height where Dobot will begin drawing, simply move the arm to where you'd like it to begin, then press the autoZ button (located in the top menu bar).
When you are ready to draw, hit the SyncPos button, and Dobot will move to the X and Y coordiantes at the top left of your image, and the Z coordiante you specified with autoZ. This is where Dobot will begin to draw.
Make sure to keep your image in a range where Dobot can draw it. If you place the image outside of the acceptable range, it will be highlighted red. If you place the image within the acceptable range, it will be highlighted blue. Synchronize will throw an error pop up if not all images are within the workspace.
Press the Run Program button to begin printing.
LaserEngraving
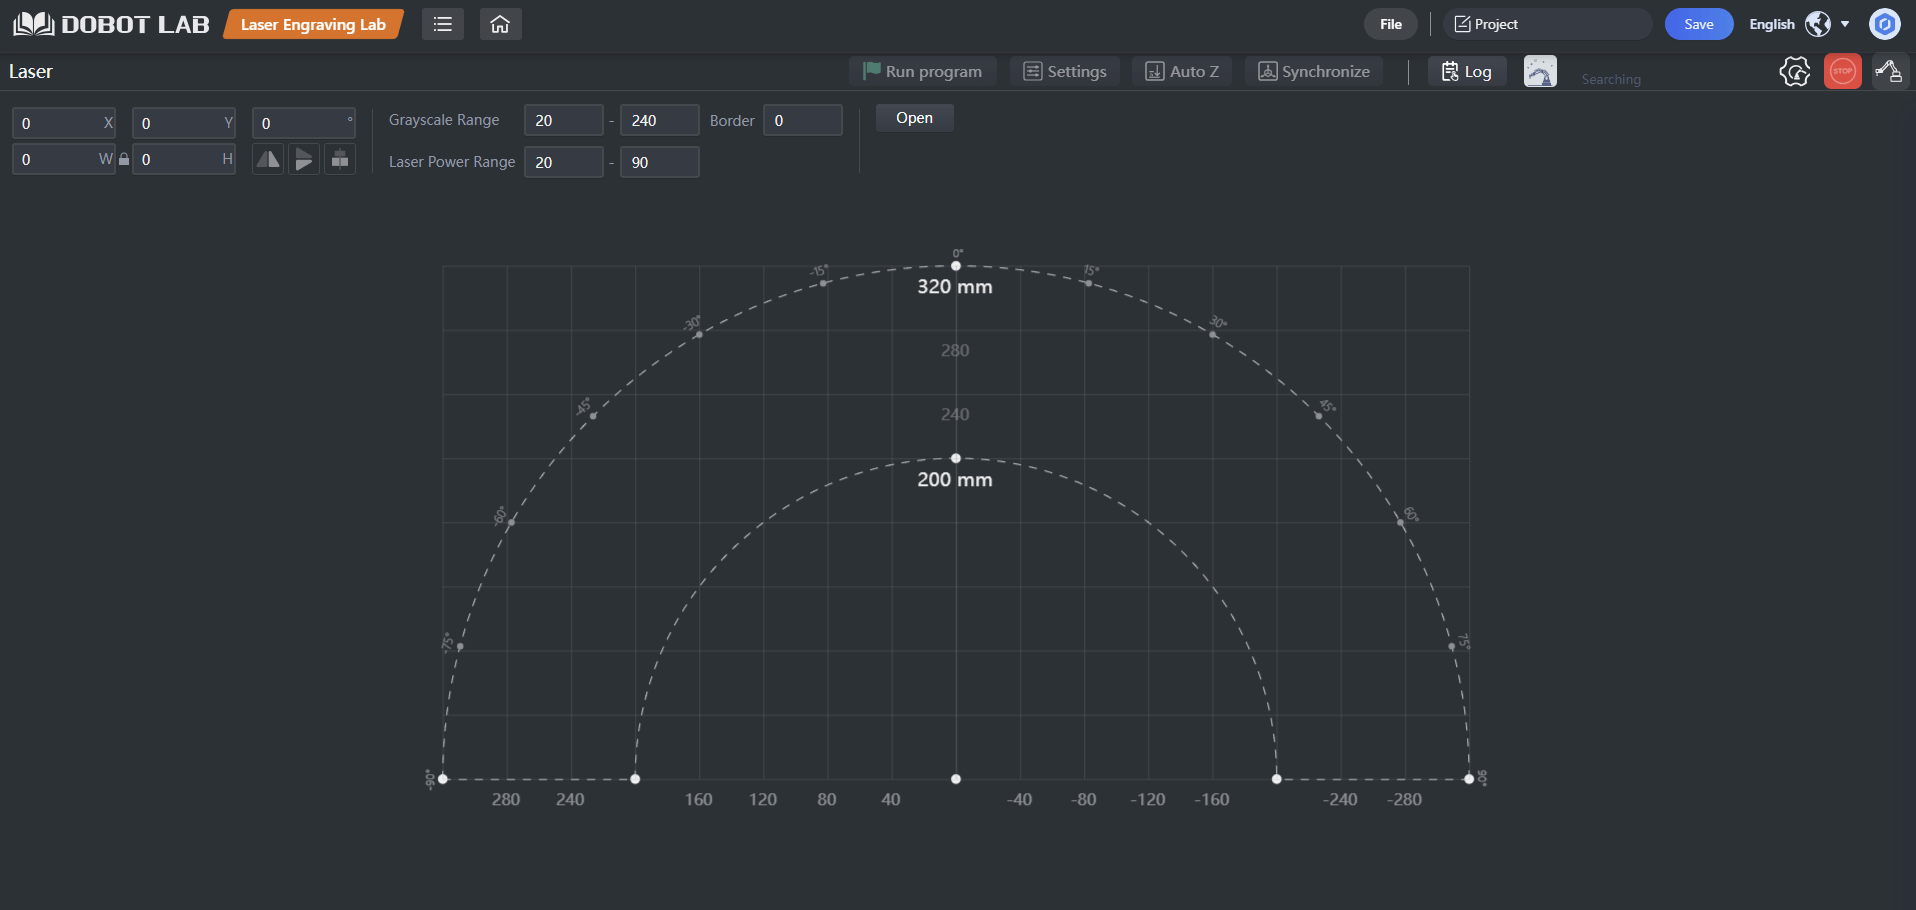
Use this app when you want to engrave cardboard with the Laser attachment.
This app works almost identically to Write & Draw, but you need to set the end effector to laser. Do this by pressing the arm control panel button in the top right corner and select the end effector at the bottom of the panel. You can set the grayscale range and laser power range, as well.
WARNING: Only enable the laser when these safety conditions are met:
- Safety glasses on (for everyone in the room).
- Sign on the door warning that a laser is in use and eye protection is neccesary to enter.
- Laser pointed toward the object you want to engrave.
And remeber to never place any part of your body in the path of the laser!
Press the Run Program button to begin printing.
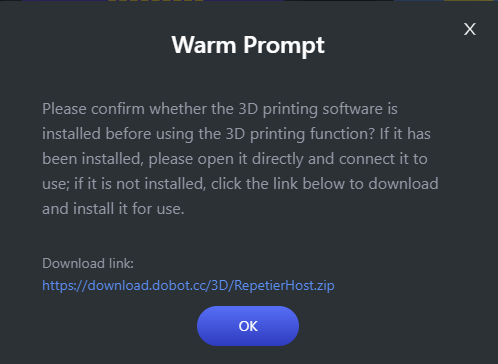
3DPrinter
Use this app when you want to 3D Print.
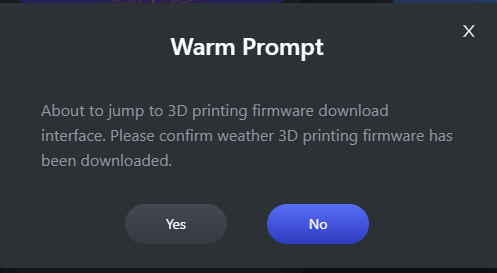
Click the 3D Printing Lab, and you will be asked to confirm that the firmware has been downloaded. No will open the firmware burning software, while yes will ask you to confirm that the software has been downloaded, providing you a link to the software if not.
Once the firmware is updated and the software has been installed, the 3D printing environment will be opened for you.
Watch this video for a full tutorial on 3d printing (note this is an older video but the basics should still apply):
NOTE: 3d printing is not supported in any of our curriculum
Teaching Tips:
The Teaching & Playback is a very common way for people in the workforce to operate robotic arms in the field. However, this method is not conducive for teaching programming, so be aware how your students utilize this method. This can be a nice tool to help them visualize their thought process and plan steps, but emphasize the need to learn the programming side of things for when working remotely and when working with robots or computers that aren't so easily teachable.
Teaching & Playback
Teaching & Playback is a great way to prototype movements for Dobot and model how Dobot should interact with surrounding objects.

There are four types of movement from which you must choose before saving points:
- MovJ moves using the joints of the arm which causes the path to be curved.
- MovL moves in a straight line.
- Jump moves increasing the z position first then moving to the x,y coordinate before lowering back to the new z.
- Arc moves using MovJ, MovL, or Jump but in a perfect arc.
To start, press the unlock button on Dobot.
Move Dobot to the first position you want to teach it, then release the unlock button.
If the yellow exclamation point message above the Save Point button is checked, you will see one step appear. Otherwise, you will need to hit Save Point every time the arm is moved.
Repeat this process until you have "taught" Dobot the entire sequence. Then hit Run Program to watch it repeat the steps.
Use the settings and Loop in the top bar to control the speed, acceleration, and number of iterations. Use the command panel to add more complex steps such as wait time or an end effector, such as the gripper opening or closing.
Teaching Tips:
This Lab is for the Magician Lite model only.
Virtual Simulation Lab
The Virtual Simulation Lab is meant for Magician Lite only. Once selected, you are given the choice of 5 different scenes that the Lab will simulate.

Once a scene is selected, you can open it with Block or Python labs for programming options. Now, the programming lab will appear on the left, and the virtual simulation will appear on the right.
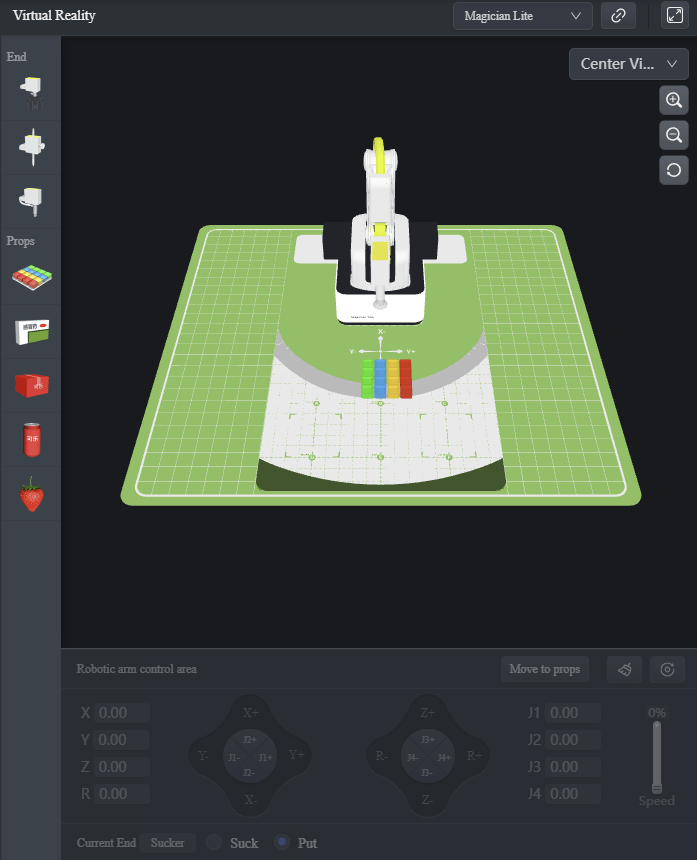
The virtual reality panel on the right gives you a list of end effects as well as virtual props for the scene. Now, you can see the magician lite within a "real-world" virtual environment performing tasks rather than simply at a desk in an educational environment.