Lesson Modules
Teaching Tips:
The following materials are needed for this lesson. Read the modules before conducting this lesson and modify the contents as they best suit your students.
- PC computers and the Internet connection.
- Orchestra program.
- Download this zip file to the computers.
- Export the zip file.
- Run "Orchestra Portable_1.1.3.exe".
- If you already have the file on your computer, don't download it again. Open the Orchestra Portable_1.1.3.exe.
- RobotLAB autonomous car (optional).
- Print the Pseudocode Worksheet.
- Glue or tape, and scissors.
- Your PC computer and the Internet connection.
- Orchestra program.
- Download this zip file to your computer.
- Export the zip file.
- Run "Orchestra Portable_1.1.3.exe".
- If you already have the file on your computer, don't download it again. Open the Orchestra Portable_1.1.3.exe.
- RobotLAB autonomous car (optional).
- Print the Pseudocode Worksheet.
- Glue or tape, and scissors
Teaching Tips:
Show the video to the class and ask the following questions:
- How does the car "know" there is a ball running onto the street?
- How does the car "know" when to stop?
- Do you think you need a short amount of time between seeing something and actually stopping?
- Does the car work in the same way?
- If the car drives faster, would the car stop at a further distance?
Give some time for the students to think, then have them answer with their thoughts on the question. Tell them they must type their answer in one word otherwise the system won't recognize it in the word cloud.
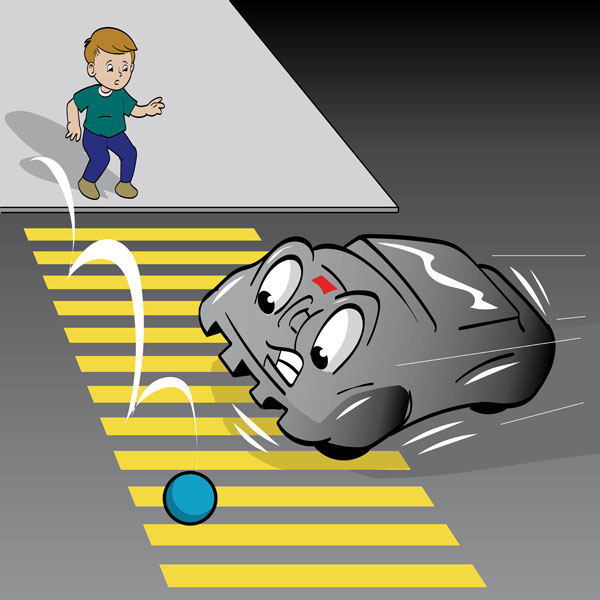
Watch the video and think about the questions below.
The autonomous car drives as programmed. How does the car "know" there is a ball running onto the street and to stop to avoid hitting the ball? Do you think you need a short amount of time between seeing something and actually stopping? Does the car work in the same way? If the car drives faster, would it stop at a further distance?
Our goal today is to program the autonomous car robot to stop when it detects an object in front of it. Think for a moment and answer the following question.
Teaching Tips:
Have a discussion about the gap between the time the sensor detects something and the time it reacts to it. Have the students experiment with a piece of paper (if there is enough time). Detailed directions are below.
- Have the students pair up. One of them is student A, the other student B.
- Student A holds his/her hand open like holding an invisible cup. It should look something like this:
- Student B places the middle of the cup on a piece of the paper that is level with Student A's thumb/pointer.
- Student B is going to let go of the paper.
- Student A’s goal is to catch the paper before it falls just by closing their fingers.
- They are not allowed to move their arm.
- Now Switch!


Have students play with the interactive tools for AA similar triangles and the application of Pythagorean theorem to solve the challenge individually or in a small group.
When you sense something, or see something with your eyes, it takes time for you to react to it before you stop or try to catch it.
The autonomous car works in the same way. Once the car detects an object in front of it, it tells itself to stop (if programmed such a way). But because it is not immediate, the car will still drive a little bit before it stops. That's why we need to consider a safe-following distance when driving.
That being said, even if the car detects an object in front it, it may be too late for it to stop before it hits the object.
So, how much is safe and how much is unsafe, or "too late"? What is a safe distance and what is not? Does the speed matter?
It is pretty intuitive to think that if you drive faster, you'll need more distance to stop. Play the interactive tool below.
The green triangle represents the region where the car can see and the red triangle represents unsafe zone. The “unsafe zone” means that even though the car sees something in front it can still hit the object within the unsafe zone since it takes some time for the car to fully stop.
Look at the table below to answer the following question.
| power | speed (cm/s) | cm to stop |
| 300 | 5 | 0.5 |
| 400 | 19.5 | 2.5 |
| 500 | 35 | 7 |
| 600 | 46.5 | 15.5 |
| 700 | 59.5 | 21 |
| 800 | 80 | 33 |
| 900 | 95.5 | 40 |
| 1000 | 133 | 45 |
Teaching Tips:
Have students play with the simulation and monitor how they interact with it.
When they are ready to program the autonomous car with Scratch, make sure the cars are connected to the dedicated computers using Bluetooth.
Lead the discussion about the order of the statement and have the students complete the worksheet.
Use the Scratch programming reference for this activity or download this Scratch file.

Have students try to run the car with different surfaces and powers.
The students will collect the data and plot the values on the coordinate plane.
Simulation
Use the table below to predict each trial of the simulation.
| power | speed (cm/s) | cm to stop |
| 300 | 5 | 0.5 |
| 400 | 19.5 | 2.5 |
| 500 | 35 | 7 |
| 600 | 46.5 | 15.5 |
| 700 | 59.5 | 21 |
| 800 | 80 | 33 |
| 900 | 95.5 | 40 |
| 1000 | 133 | 45 |
Now, consider the car is running on an icy street. When the street is slippery, we know that we should drive slower. Have a quick discussion with your team members why you need to drive slower when the street is icy.
Use the table below to predict each simulation trial on the icy street.
| power | speed (cm/s) | cm to stop |
| 300 | 10 | 1 |
| 400 | 39 | 5 |
| 500 | 70 | 14 |
| 600 | 93 | 31 |
| 700 | 119 | 42 |
| 800 | 160 | 66 |
| 900 | 191 | 80 |
| 1000 | 266 | 90 |
Time Interval
Step 1
Step 2
Step 3
Step 4
Speed :
0.0cm/s
Time Interval :
0.0s
Total Time :
0.0s
Distance :
0.0cm
Total Distance :
0.0cm
Try with the Autonomous Car Robot
- Pseudocode
Before we jump intto programming the car without an idea, let's first think about what you want the car to do.
With your group, select statements below and place them in the correct order for the car to follow.
- sense something in front of it
- stop
- drive at a certain speed
- turn the headlights on
Place the statements in the correct order for the car to follow. Type the alphabets only.
- Let's look at the distance sensors with which the car is equipped. The car has 6 distance sensors around the vehicle. The diagram below shows where they are.
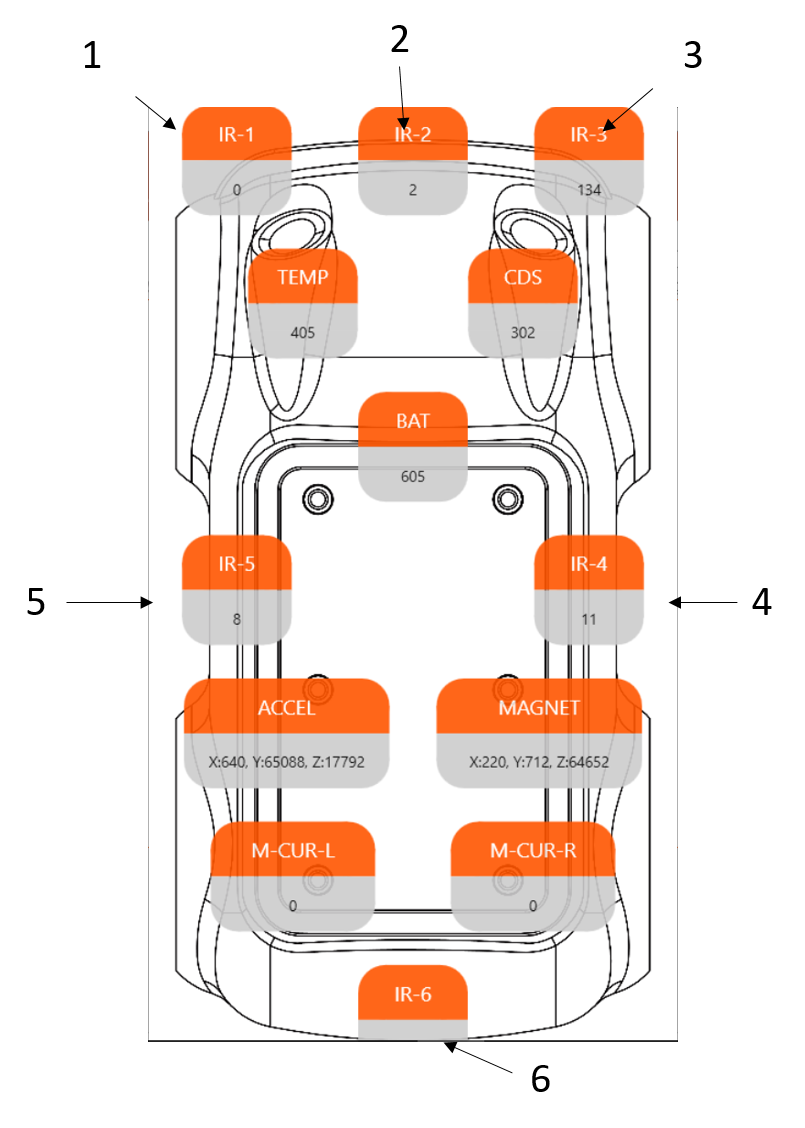
IR stands for InfraRed lights that we humans cannot see. Although IR sensors are distance sensors, the raw data is NOT about the distance. The data tells you how much light that has been bounced back from the objects around. Therefore, the closer the objects are, the bigger numbers the data will be. In short, the distance data tells you how close the objects are. 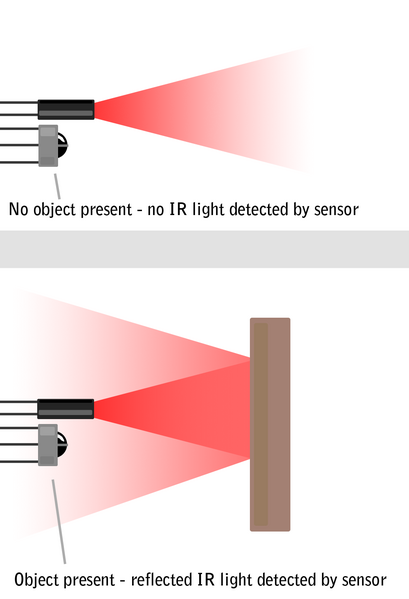
Now you know the sequence of the commands you need to program and understand the distance sensors. Think of what Scratch blocks you will need to use and what numbers to use for the sensor and powers. Think of the questions below before programming the Scratch.
- Which IR sensor should you use?
- What speed do you want the car to run at?
- What power should you use for the motors? Note that the speed varies depending on the surface. For example, if the car is on a carpet or surface with small bumps, it requires more power than a flat surface. You can use anywhere from 0 to 1000 for the powers of each wheel (left and right).
- Scratch Blocks
- With your group, place the statement in order (top to bottom) in the left column of the table.
- Select the matching blocks for each statement and place them in the right column of the table.
- Connect
- Connect your autonomous car to your computer with Bluetooth. Make sure you connect the right device by using the ID attached to the bottom of the car.
- Run Orchestra to program the car robot.
- Find your device by using the ID in Orchestra.
- Open Scratch from Orchestra.
- ENJOY PROGRAMMING!


Speed as a Unite Rate
As mentioned earlier, the car can run at a different speed, depending on the surface, even if the same power is provided. Try the car on different surfaces and with different powers.
Collect data and organize it in a table. Plot the values on the coordinate plane.
Here is an example:
Use these interactive tools for this activity.
Collect the data and make a table.
Use the values in the table and plot them in the coordinate plane below.
Teaching Tips:
Give students quiet time to answer the questions. Have the students respond individually.
Share the word cloud results to the class to have a quick discussion.
You have access to the students' responses in your dashboard.
REFLECTION
Take some time to think about the following questions individually and go ahead to answer the questions. Just be honest with yourself, no one will judge you on your reflection. Your input will be used by your teacher for the future lesson planning.
- Not at all
- Not really
- Kind of understood
- Pretty much understood
- Totally got it
CLOSURE
Disconnect the Bluetooth and turn off the autonomous car robot to pack up. Handle carefully since the robots are delicate and expensive. Follow your teacher's instruction to help close the robots and computers.