Lesson Modules
Teaching Tips:
Make sure to download the Sphero Edu App in your phone before the class, and make sure students also count with the app in their groups. This app is compatible with all the new versions of Sphero, including the Star Wars versions.
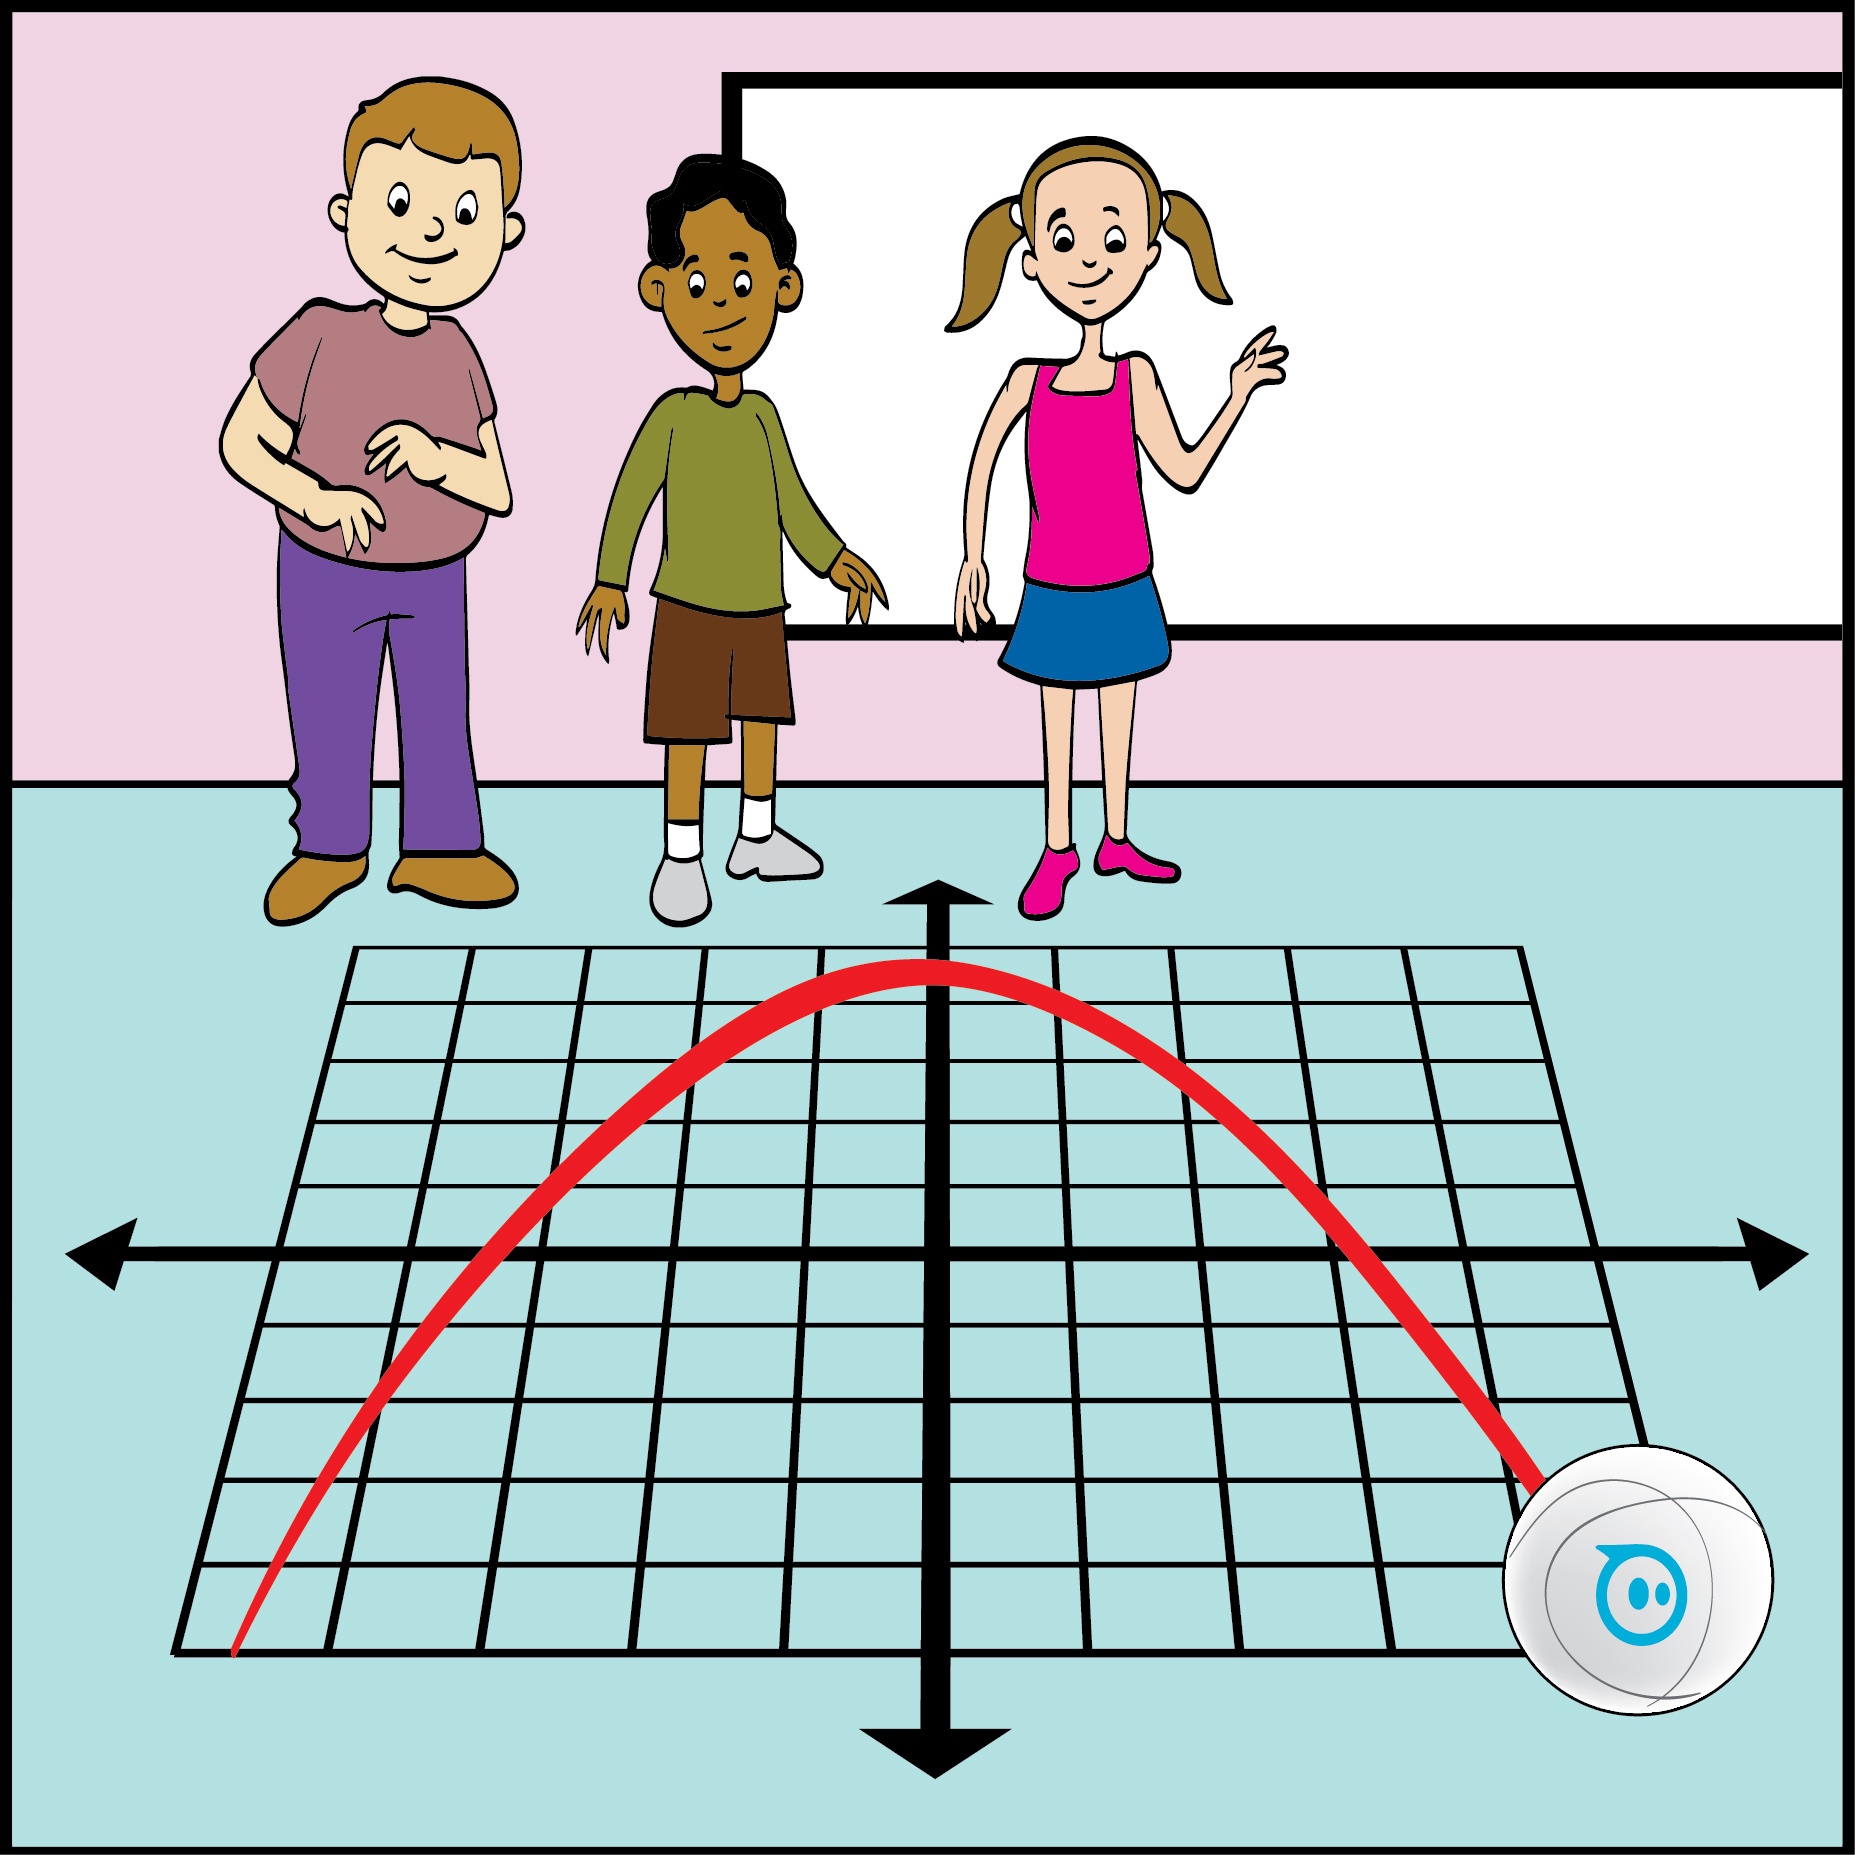
Make sure to connect and aim the controller. You can create new programs with different functions. Once you press the start button, you will count with different graphs that can help students to analyze the slope and the different components of the function. This coordinate system is necessary to see the path that the robotic ball is moving along.
The first graph will always consider the starting point of the Sphero as the 0-coordinate. However, you can use Geogebra [make link to the page] in order to analyze a function with different intercept values.
Next we need to make sure Sphero is charged and turned on. To charge Sphero, you simply place it in the cupped charging receptacle.
It takes three hours to fully charge Sphero, but many times you can get through the lesson with less than a full charge.
Once Sphero is charged, you can shake the robot to turn it on. The ball will briefly light up - signaling it is on.
When you have connected and positioned Sphero properly it is important to treat Sphero somewhat gently. If you bump Sphero too hard or shake it too quickly it can throw off the internal calibration and the lesson must be restarted.
Lastly, we need to position Sphero in the proper orientation before beginning the lesson. To do this, place Sphero in the proper location signified on the mat.
The initial rotation of the ball is also very important. This orientation is used to internally calibrate the robot.
When you first connect to Sphero, a small blue dot will appear on the surface of the ball. Align this dot with the arrow on the mat.
The mat can be used to a better understanding of the cartesian plane.
Sphero will now use its orientation as the initial calibrated position and from this point onward you are free to move the ball around as you wish. Sphero will maintain this calibration as long as you don't move the robot too rapidly.
___________________________________________________________
Present this video, answer any questions from the students.
Teaching Tips:
Explore
The app allows us to quickly familiarize ourselves with the lesson to see how it operates. By changing the values of the angle in the first block of the program, we can adjust the characteristics of the linear path that Sphero will move along. As we adjust the value of the slope in our code, we can see the path of the line change in the diagram.
Sphero will move along the slope that you have entered, however if you change the intercept of the ball, you will need to physically re-position the ball prior to movement.
By moving Sphero along the mat you can determine the intercept. Sphero will move, and observe to see if the ball moves along the intended path. For more intercept values, you may repeat this investigation as many times as you wish.
As we mentioned before, with the help of Geogebra, with the help of this platform you can easily display a graph of the path that you have chosen for Sphero to drive along. Note how this linear relationship is nearly identical to what is shown on the mat.
[Determine a way to do quadratic functions in the app]**
___________________________________________________________________________________
Go through Sphero with the students, explore the linear equation components, analyze the graphs and let students to explore the equation through the robot. Do not forget to respond their questions, and ask more to guide their curiosity.
Teaching Tips:
Quiz Answers- Sneaky Quadratic Vertex
- The direction of the creature changes along the path of the equation because the rate of change of the variable x in relation to y is not constant. This is a non-linear formula.
- A
- B
- A
- D
- C
- D
- B
- D
- A
- D
- a
- b
- c
- d
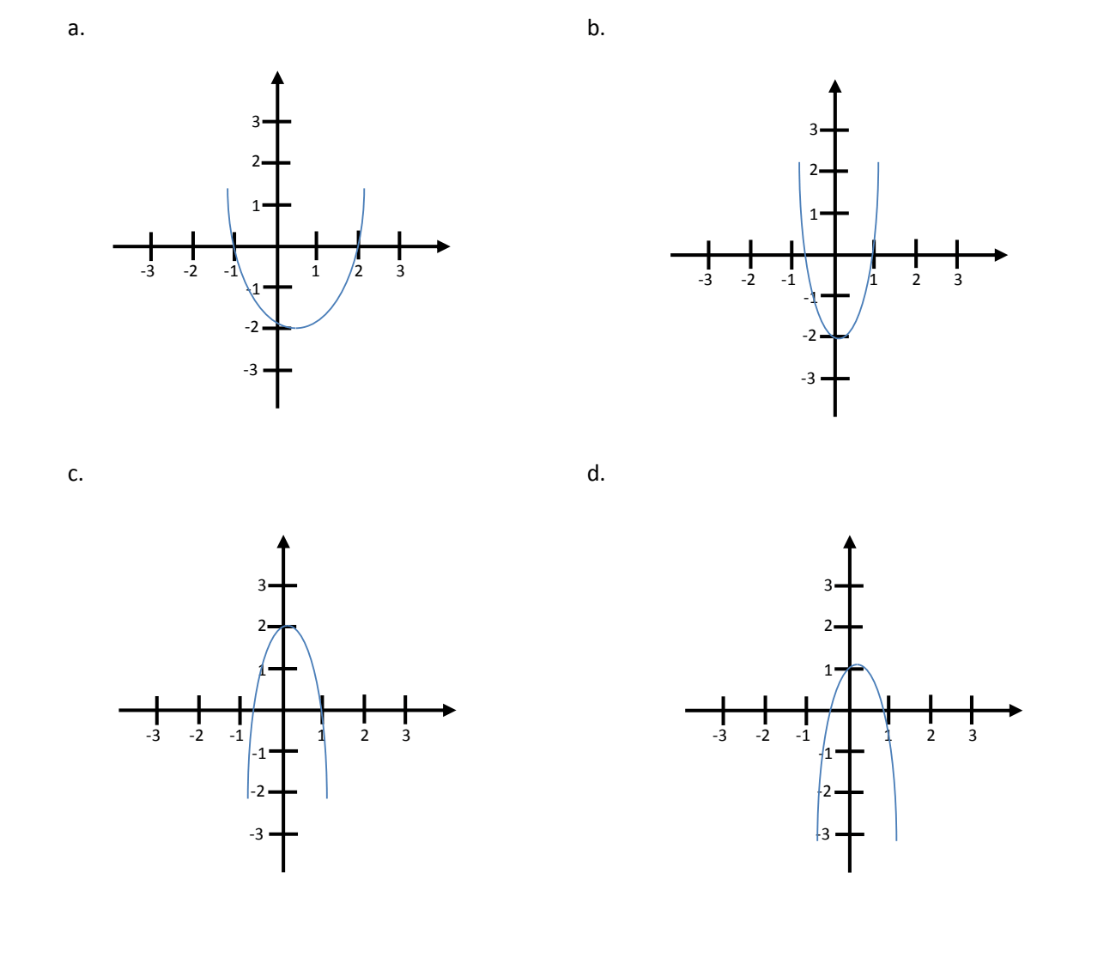
- a
- b
- c
- d
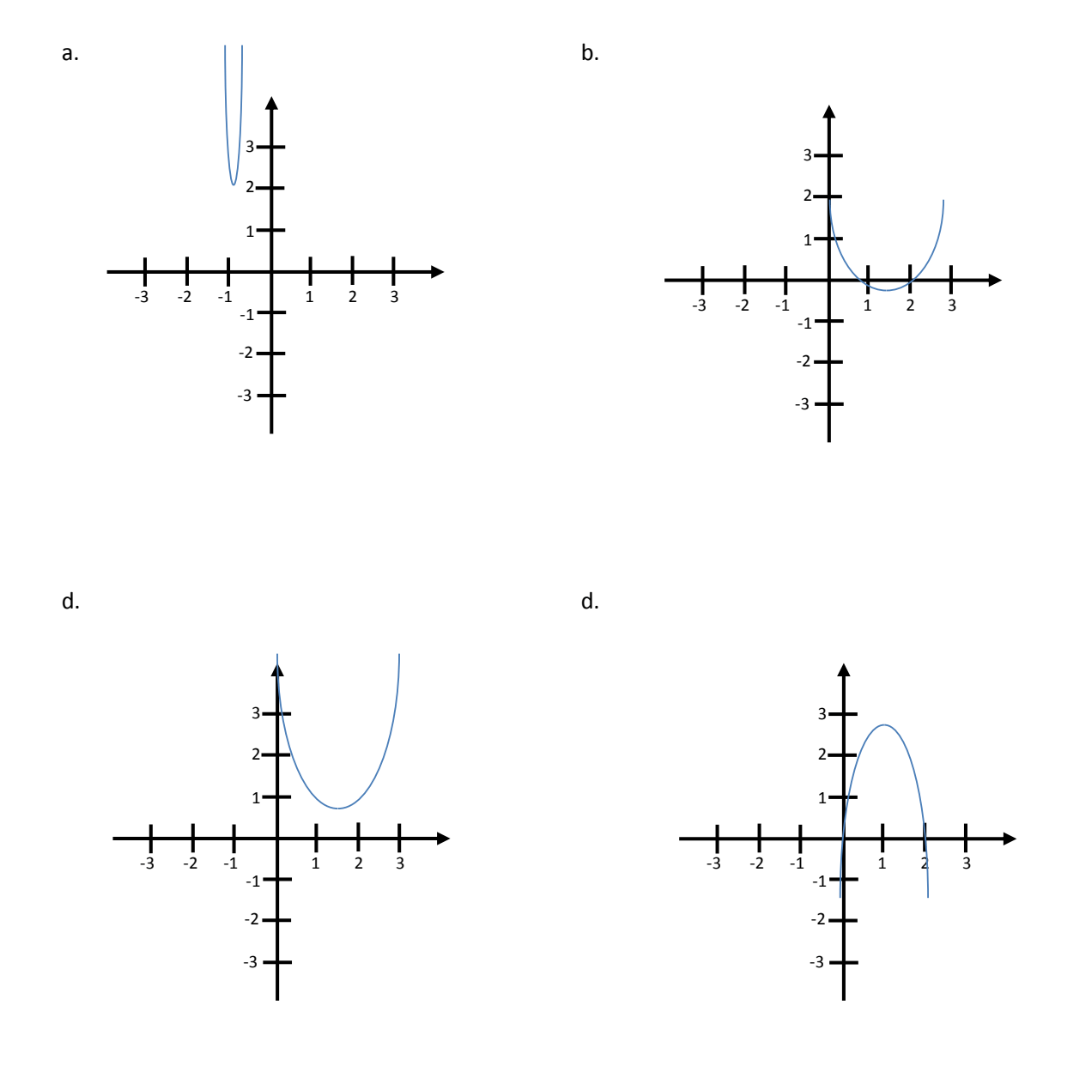
- c=-1, a>0
- c=-.5, a=-1
- c=1, a<0
- c=-1, a<0
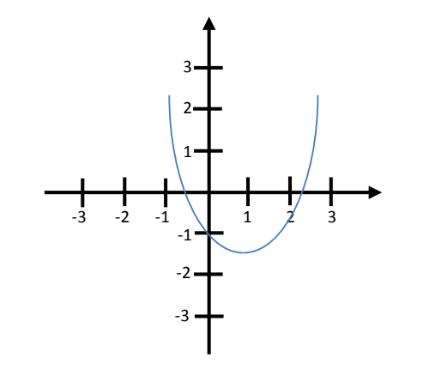
- a
- b
- c
- d
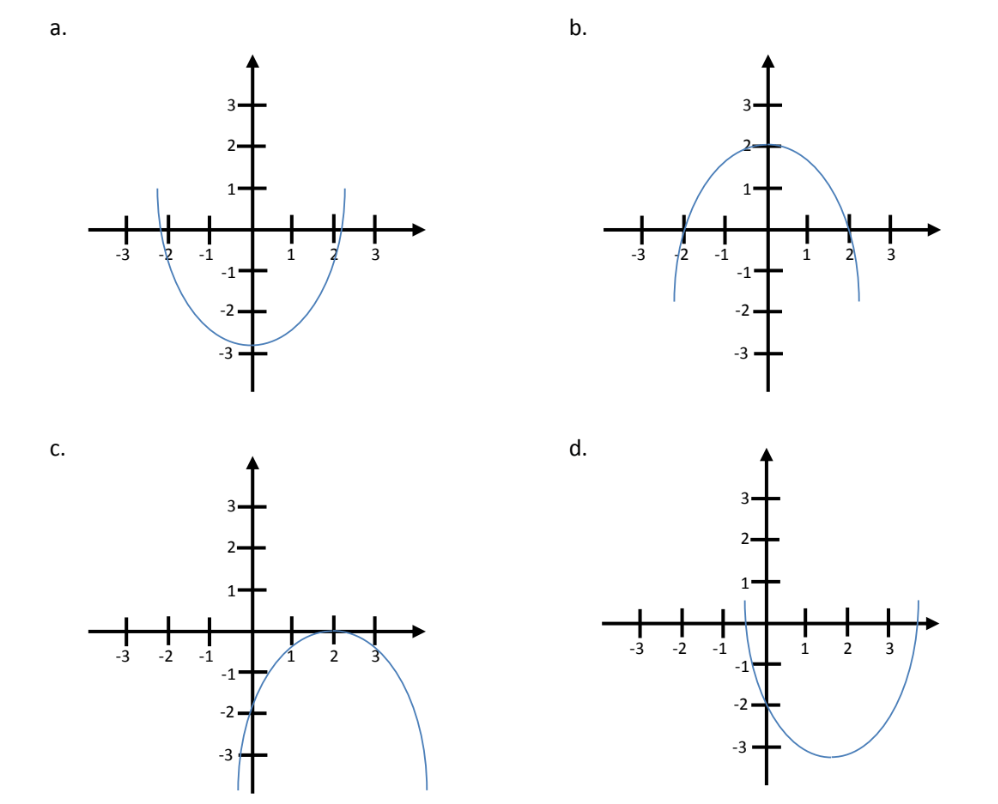
- (0, 0.25)
- (0, -0.25)
- (0.5, 0)
- (0, 0.5)
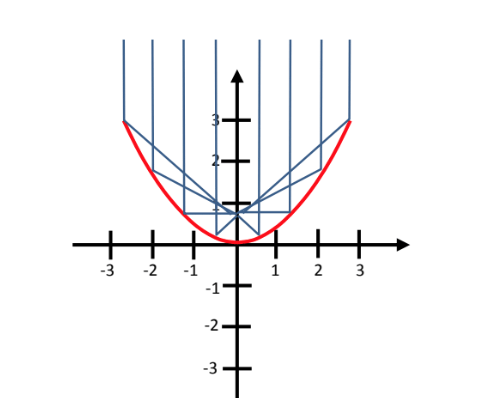
- y = (x + 5)2
- y = (x - 5)2
- y = x2 + 5
- y = x2 – 5
- x = 0
- x = 10
- y = 10
- y = 0
- (0,16)
- (0,-16)
- (0,4)
- (0,-4)
- x = -5 and x = 6
- x = 5 and x = -2
- x = -5 and x = 2/3
- x = 5 and x = -2/3
Teaching Tips:
Ask for volunteers to sketch their results on the board. Ask for a student to summarize these on the boards for students to write down.
