Lesson Modules
Teaching Tips:
PROCEDURE
Caution: NEVER wire anything to the Dobot Magician Lite or the Magic Box while it has power on. ALWAYS turn it off before making connections or damage to the robot could occur. Be sure to ask your instructor if you have any questions.
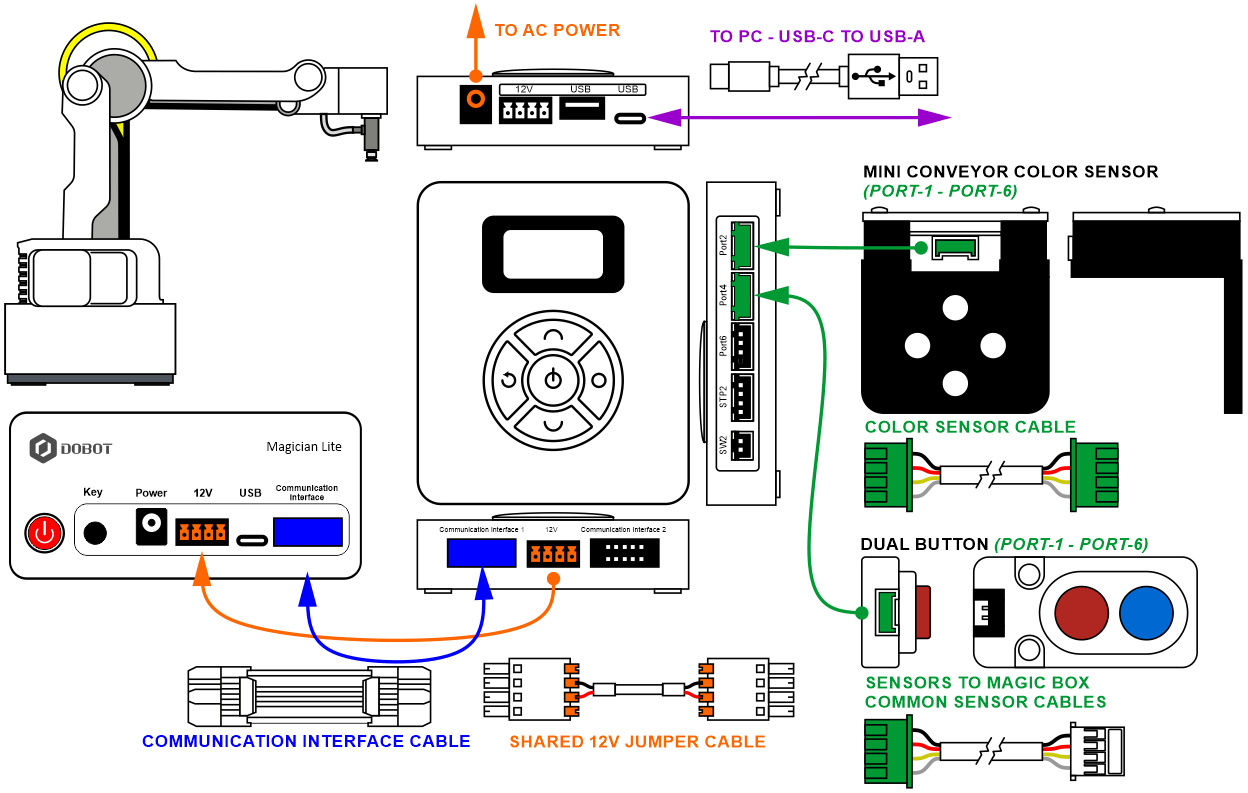
1. Set up the robot with a suction cup
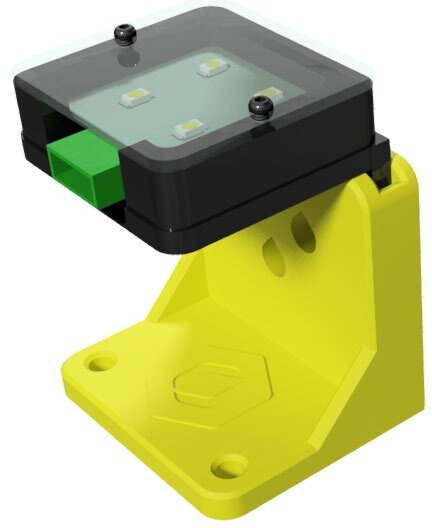
2. Wire the MAGIC BOX with the Color Sensor plugged into PORT 2
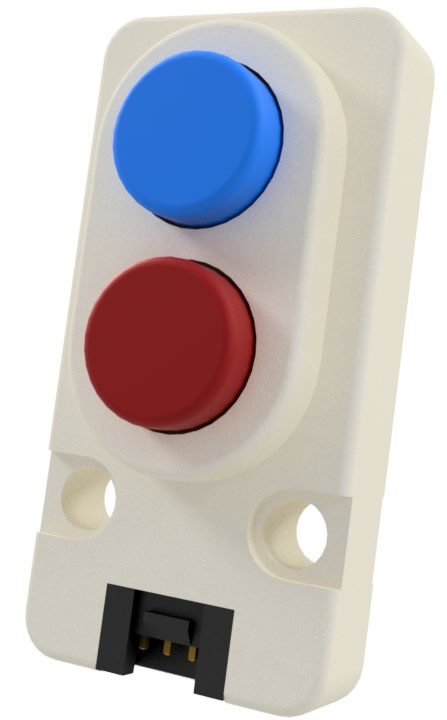
3. Wire the MAGIC BOX with the Dual Button plugged into PORT 4
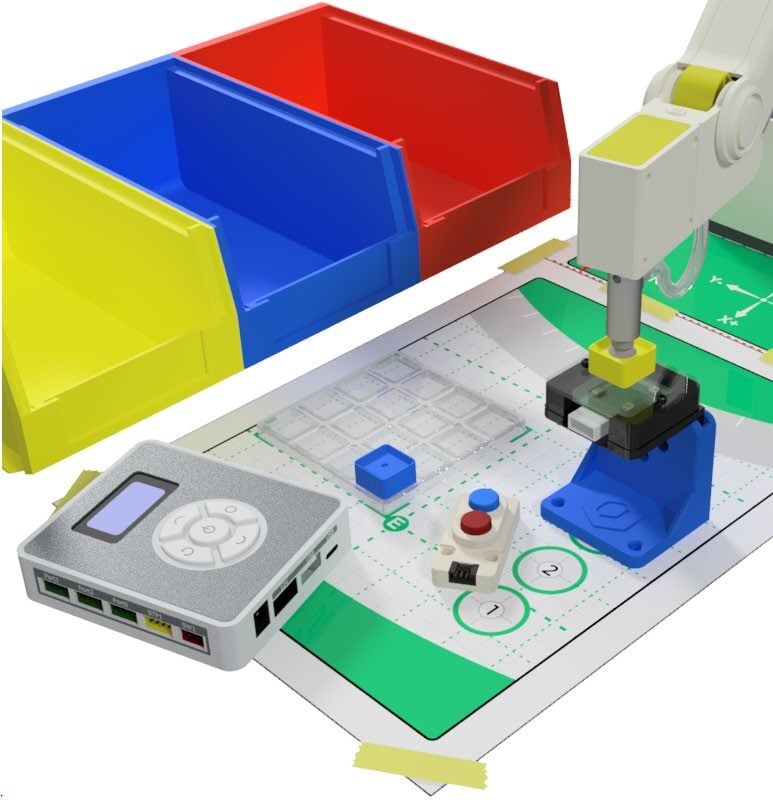
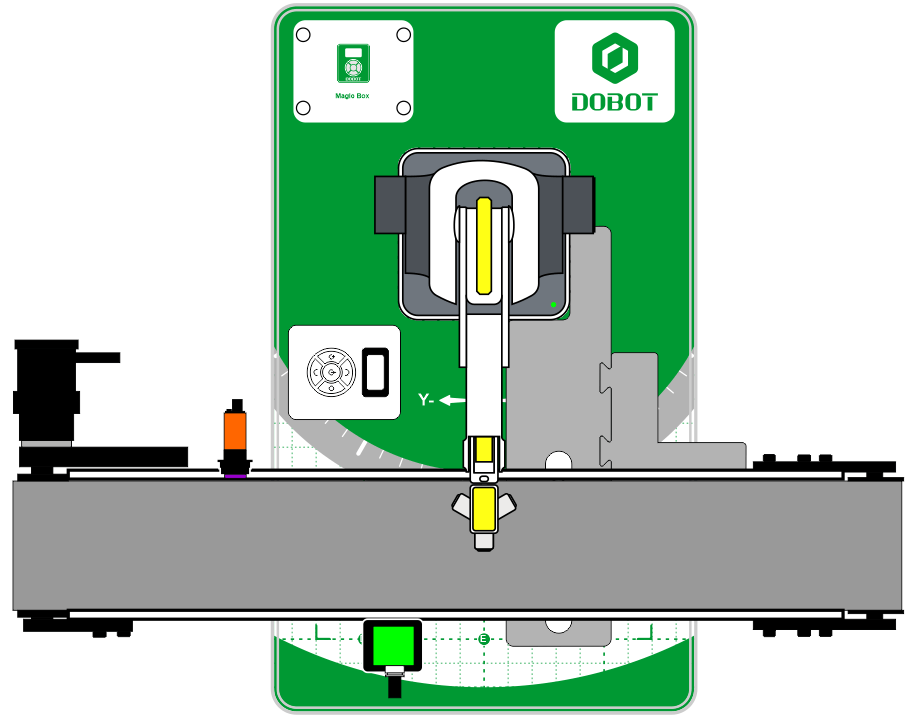
Set up the robot, conveyor, and color sensor as shown in the diagram below:
Set up the robot, conveyor, and color sensor as shown in the diagram below:
![]() The only part of the conveyor that you will be using for this activity is the color sensor.
The only part of the conveyor that you will be using for this activity is the color sensor.
You do not have to connect anything else to the robot at this time. Just the color sensor.
Order of operations
- Start with the robot in a safe/home position.
- Place a single cube, one at a time for the robot to pick up from a common location.
- A limit switch will be used to call for the robot to come and get the block for evaluation.
- After determining its color, drop the cube off at a specific location for that color.
- Manually remove the cube once it has been placed and send the robot to its home position.
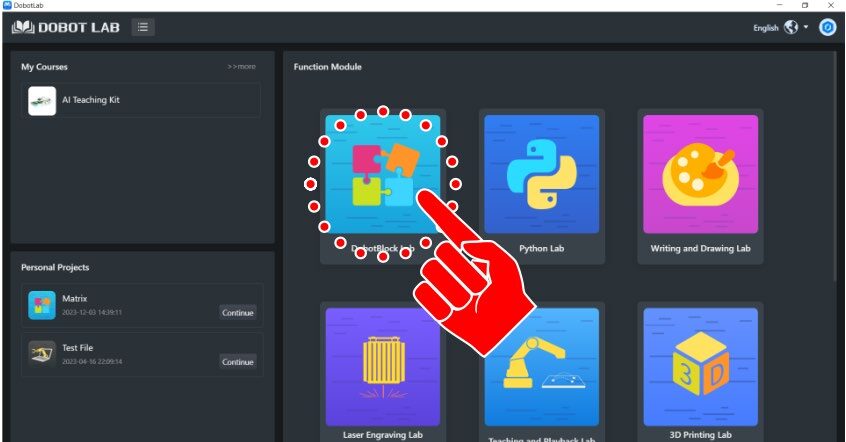
Open a new file for DobotBlock Lab.
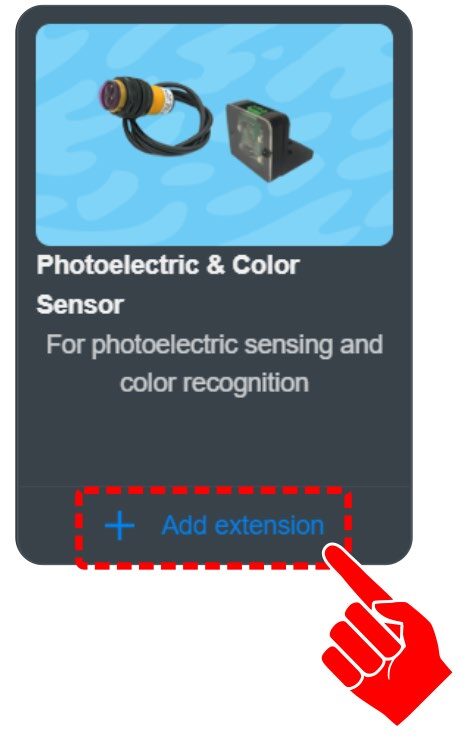
For this activity, you need to add an EXTENSION to use the COLOR SENSOR. Click the EXTEND icon in the bottom left corner.

Click on “+ Add extension” for the Photoelectric and Color Sensor
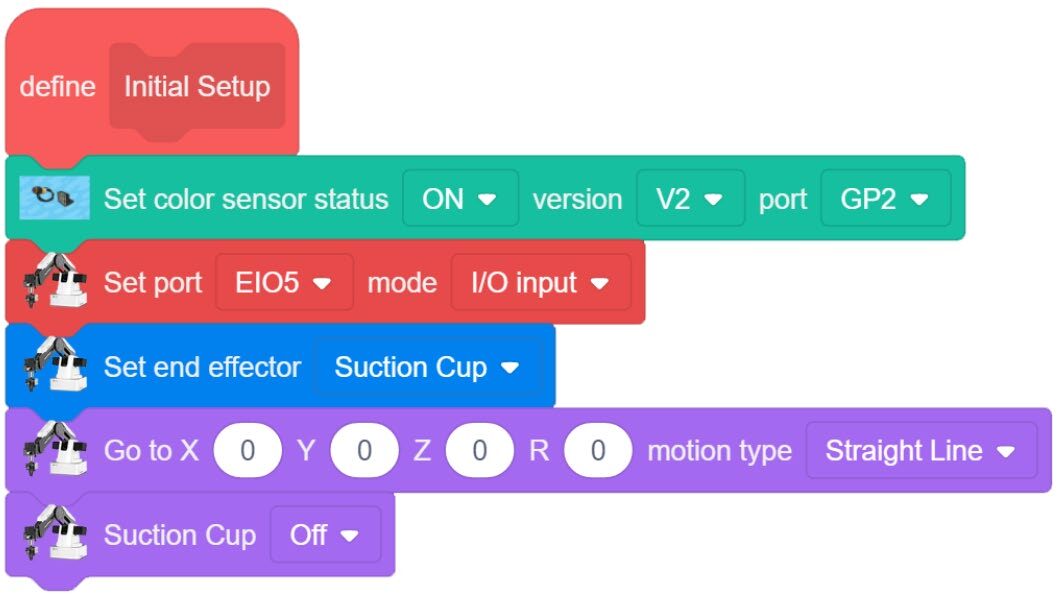
The first step in programming this activity is to set up the inputs.
You need to teach the program which sensors we are adding and which port they are plugged into.
Color Sensor Extended Toolbox:
– SET COLOR SENSOR STATUS
Settings: ON, V2, GP2
Next, set up the limit switch as we have done in past activities.
SET PORT GP5 EI05 I/O INPUT
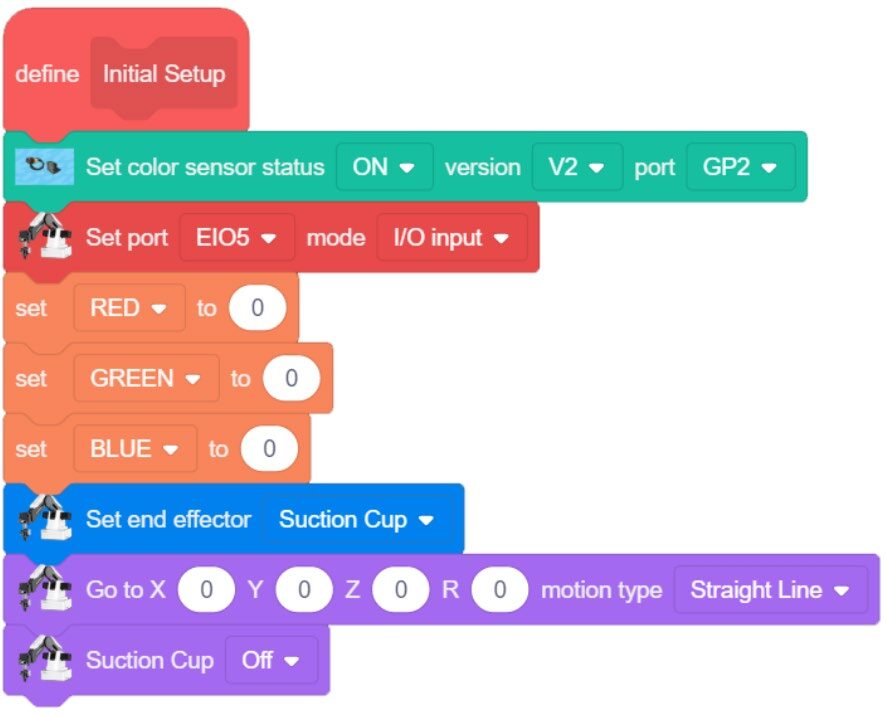
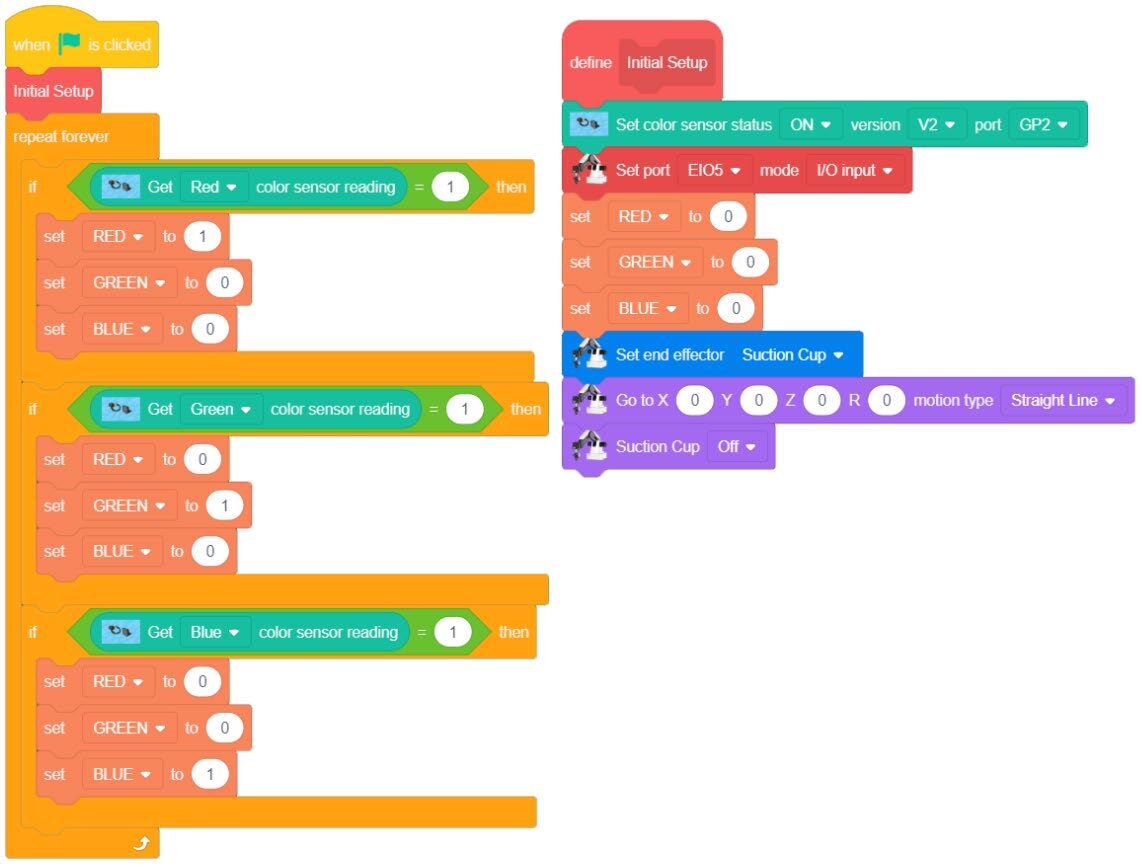
Add these setup blocks to our typical Initial Setup MY BLOCK


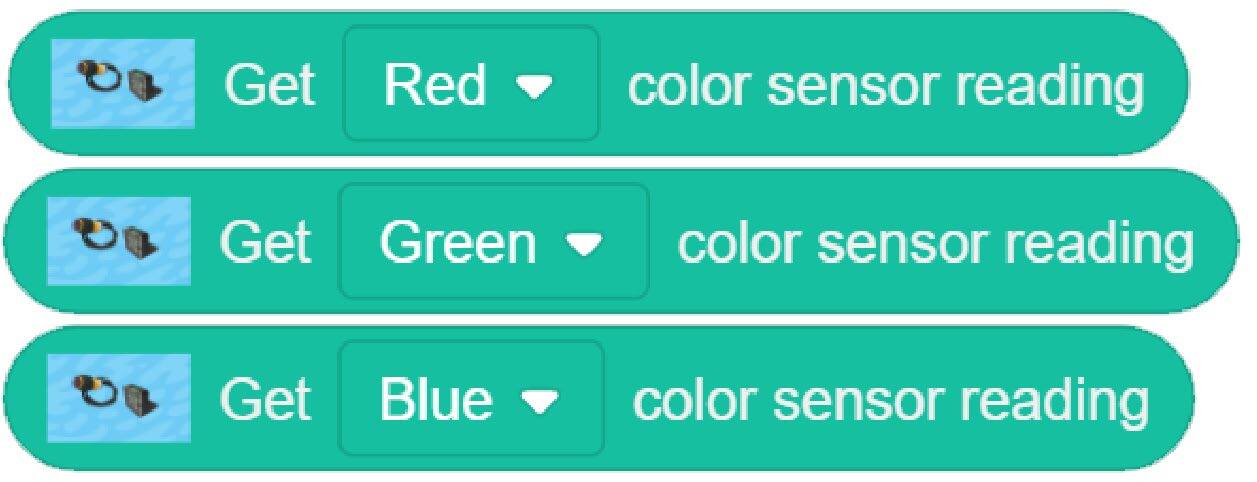
Now that the INPUTS are setup, the COLOR SENSOR needs to be tested to make sure that three colors are read correctly.
The color sensor should report what color it is currently reading.
This sensor is only setup to read RED, GREEN, and BLUE.
(The values for the different colors are preset in the blockly codes so they cannot be seen or changed).
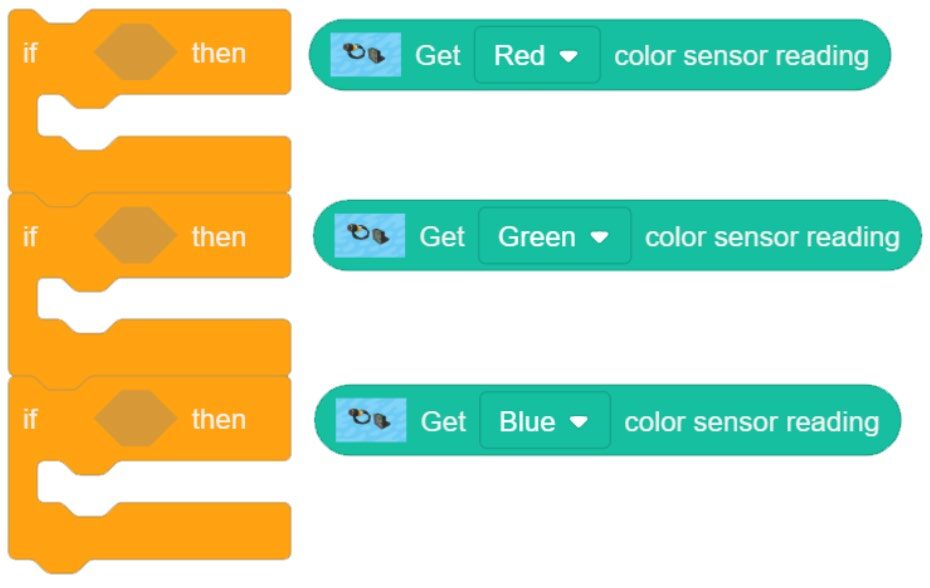
Create a loop that will show the value currently being reported
- IF the color is RED
- Or IF the color is GREEN
- Or IF the color is BLUE
This can be done by creating an IF/IF/IF Loop.
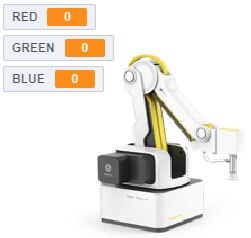
In order to allow us to see which color is “TRUE”, we will create three different variables; one for each color.
We will be able to watch the values change in the SPRITE window.
![]() Can you change the sprite to a Magician as shown in the diagram?
Can you change the sprite to a Magician as shown in the diagram?
Add these variables to the INITIAL SETUP and set their initial values to zero.
Next create three separate true statements that will go into each IF STATEMENT.
Use the EQUALS condition as has been done in the past and set the SENSOR READING equal to one (1).
Place the conditions into the IF STATEMENTS.
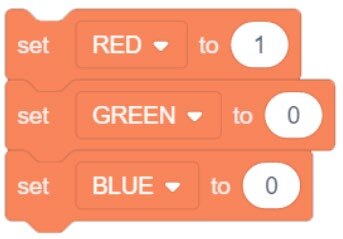
Place code inside each IF STATEMENT that will show us which color the sensor sees. Use the variables we just created to do this.
In order for this to work correctly, turn on one variable and turn off the other two.
Remember: in the digital world, 1 = ON, and 0 = OFF
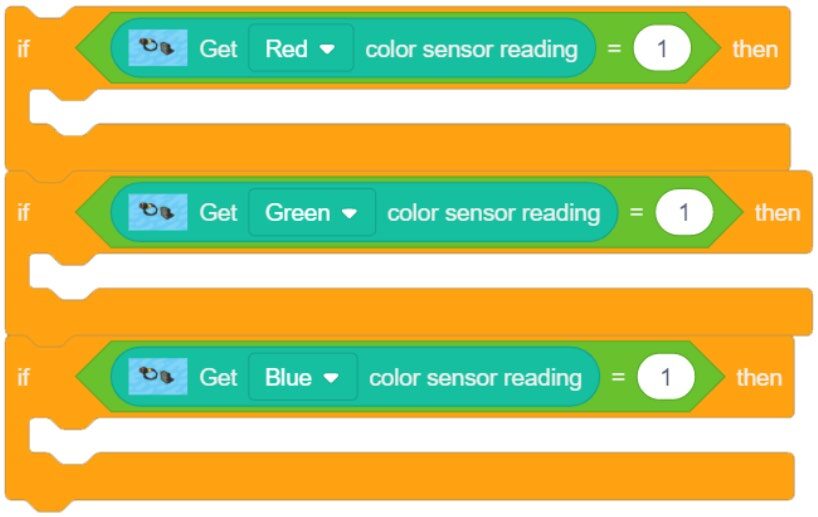
Put the IF STATEMENTS in a FOREVER LOOP, otherwise the program will only be checking for color once.

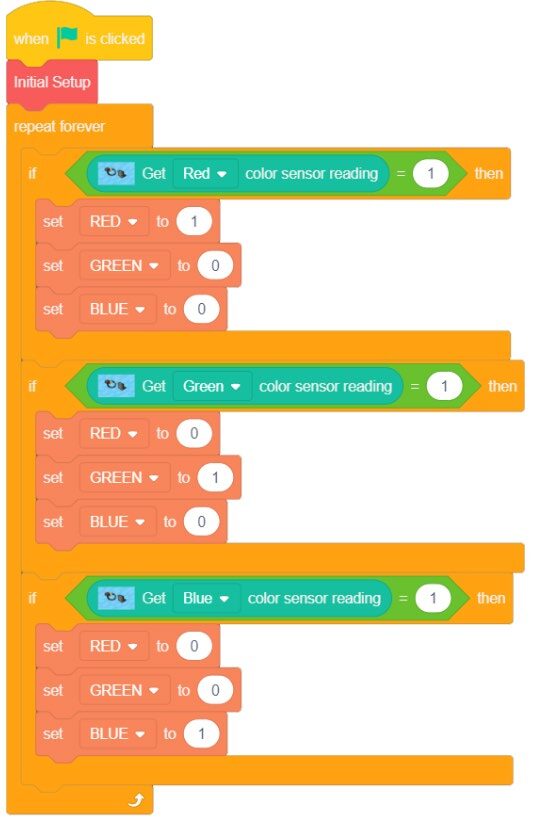
Put together everything and this is what it looks like
Once the program is completed, run it and see if it works correctly. Every time you put a colored block in front of the sensor, you should see the correct color reported in the running log. If it does not work, troubleshoot it until it does.
Points for discussion:
- What does the sensor read when there is no cube placed on the sensor?
- What happens if you put the yellow cube on the sensor?
- What type of reading do you get as you raise the cube up and away from the sensor?
- Sometimes you will get a random incorrect reading as it changes between colors. Why?
![]() You may notice that the sensor seems to report a certain color, even when there is no cube present.
You may notice that the sensor seems to report a certain color, even when there is no cube present.
Is this because of the order of the IF statements, and which color comes first? Try changing the order of the IF STATEMENTS.
Do you get the same results? Did changing the order affect the readings?
If you noticed there was never any option in the program telling it what to do if none of the values were seen, try adding one additional IF STATEMENT that turns off the VARIABLES if none of the colors are reported from the sensors.
Something like the codes below:
Sensor Readings are NOT TRUE (RED and GREEN and BLUE)

Sensor Readings are FALSE (ALL ZERO) (RED and GREEN and BLUE)

But there is an alternate solution.
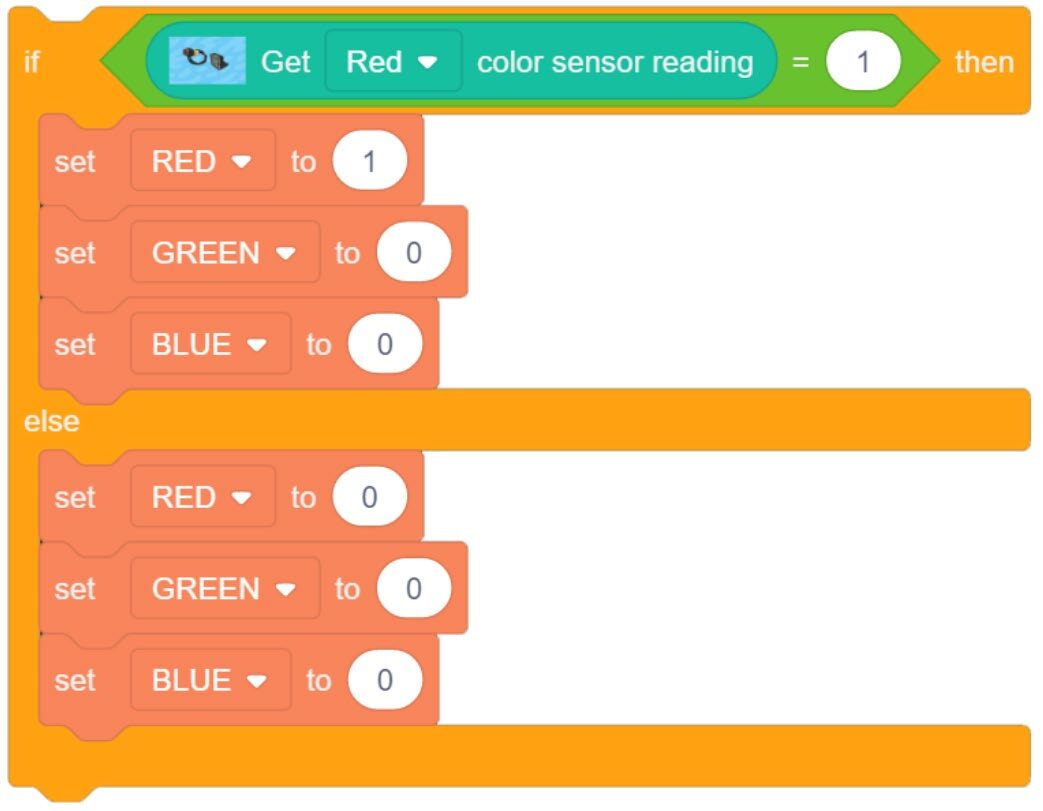
If you use three separate IF/ELSE STATEMENTS (Variable on if TRUE, all off if NOT TRUE)… this may not make the program any shorter… if anything, it may even make it longer.
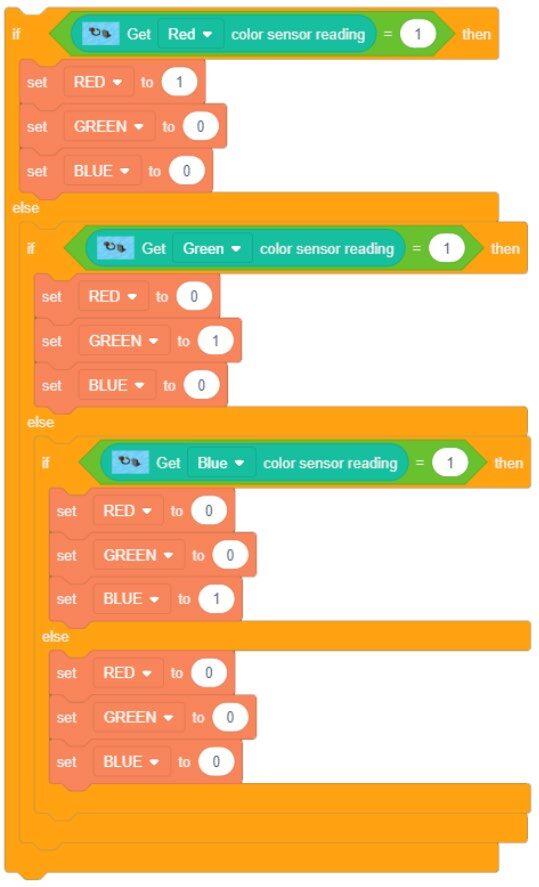
Instead, try nesting a few IF/ELSE statements. The final ELSE will be ALL OFF.
If your setup is like ours… it did not help. It seems to fluctuate a little less often. You could even try to put some micro waits in the program to slow down each cycle and look for the sensor value at a slower pace. The IF/ELSE Statements are better code theory, but since you cannot see the raw data from the sensor you cannot change how it works. As long as you know how the sensor is going to act, this will work as long as the robot does not drop the cube (no cube present when testing the color).
![]() The color sensor works best if the object is held at a consistent distance from the sensor.
The color sensor works best if the object is held at a consistent distance from the sensor.
Dobot suggested distance = (0 mm to 10 mm) or (0 to ⅜ inch)
![]() The different versions of the conveyor kits can come with different shades of colored cubes. The V2 sensor (GREEN COLORED PORT) tends to be more forgiving when it comes to shades of colors.
The different versions of the conveyor kits can come with different shades of colored cubes. The V2 sensor (GREEN COLORED PORT) tends to be more forgiving when it comes to shades of colors.
Now that we have the color sensor reading correctly, you can develop the rest of the program.
In order to keep the program short and organized it will be easiest to use several MY BLOCKS (functions/voids).
Use a manual input to start each loop.
Process Flow
- Start at HOME
- Get a block from a common location
- Take the block to the color sensor station
- Evaluate the color
- Drop the block off in one of three bins (one for each color)
- Return HOME and wait for a new signal (a new block is in place and ready for evaluation)
MY BLOCK – INITIAL SETUP
Use what we have already developed. Add any additional Variables as needed.
MY BLOCK – PNP
– Create a Pick and Place routine.
- Wait for INPUT SIGNAL
- Start with the robot at a Home position
- Pick and Place – Get the block and put it on (near) the color sensor.
- ADD a 1 second wait at the end of the PnP routine before looking for the color (allow the reading to become a solid reading)
MY BLOCK – EVALUATE
– Evaluate the COLOR
Use the IF / IF / IF Statements we used earlier
There are so many different creative ways you can proceed with dropping the cube off in their correct colored bins once the color is known. Using what you have already learned, implement one that works for you.
Be sure to consult the Dobot Input/Output Guide if you want to use other inputs and outputs, as damage to your robot or your other equipment may result.
Once completed, run the program and see if it works correctly.
If it does not work, troubleshoot it until it does. If there are issues with the colors, try using different blocks of the same color. Does this make a difference?
If your setup did not work correctly the first time, what did you have to do to make it work?
Teaching Tips:
CONCLUSION
- What happens if a block isn’t there when the color sensor is told to get a color with the current program? Give a reason why.
- How might you keep track of how many blocks there are of each color?
GOING BEYOND
Finished early? Try some of the actions below. When finished, show your instructor and have them initial on the line.
- Randomly arrange cubes in a 3×3 palletized matrix for the robot to pick from. After determining its color, drop the cube off at a specific color location. Manually remove the cube once it has been placed. _________
- Have the robot stack the cubes in columns by color. _________
- Color the 9 squares on the Dobot field diagram either red, blue, or green. You will then write a program that takes cubes from a cube matrix and puts the respective color cubes on the colored squares. _________