Lesson Modules
Teaching Tips:
PROCEDURE
Caution: NEVER wire anything to the Dobot Magician Lite while it has power on. ALWAYS turn it off before making connections or damage to the robot could occur. Be sure to ask your instructor if you have any questions.
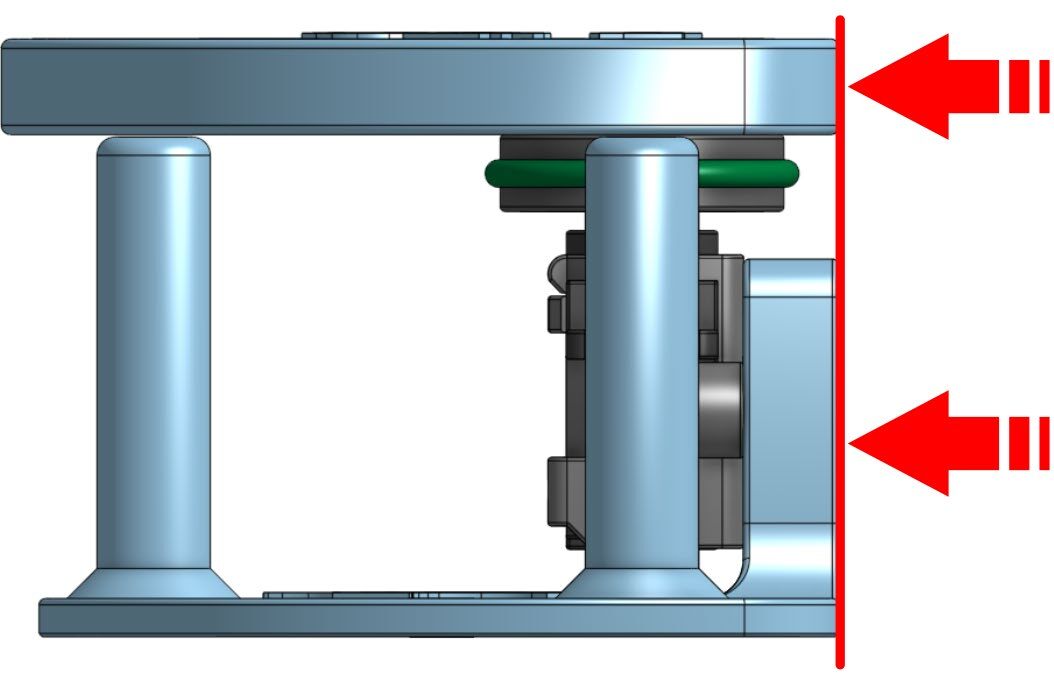
1. Set up the robot with a suction cup
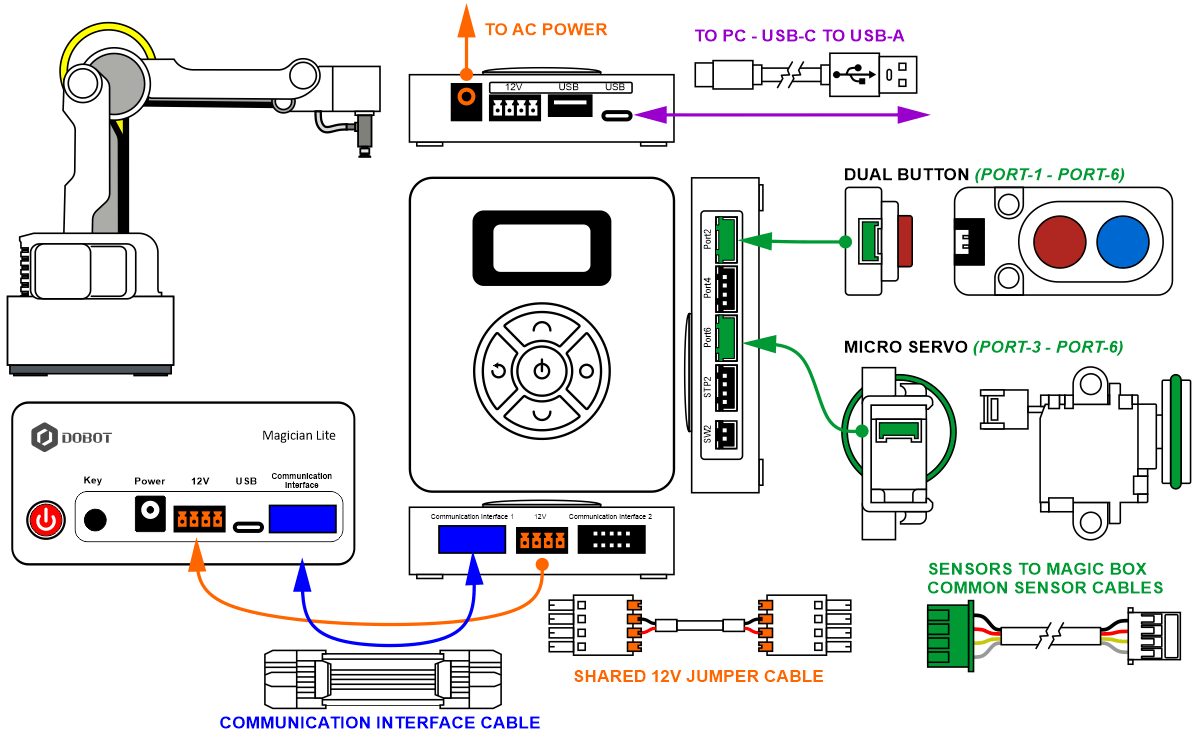
2. Wire the MAGIC BOX with the Dual Button plugged into PORT 2
3. Wire the MAGIC BOX with the Micro Servo plugged into PORT 6
4. Download the STL files for the Magician Lite Part Feeder here: Click here for link to the folder and print them with your 3D printer.
Alternatively, design one on your own, or make this one better, reprint, test it and share your ideas with the class.
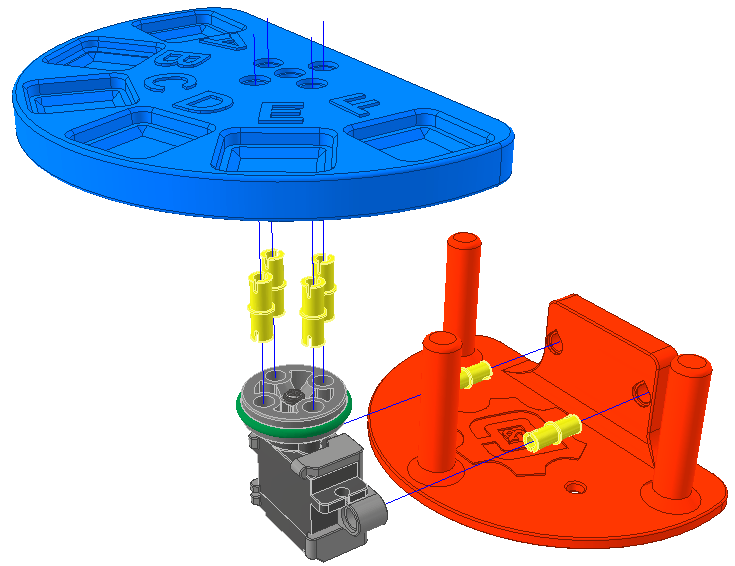
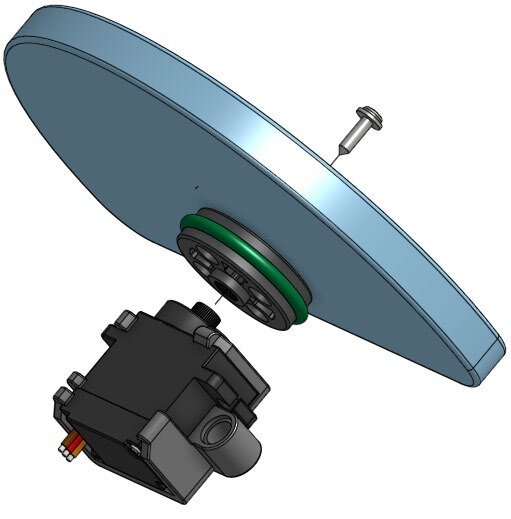
5. This feeder was designed to have six parts placed into it, and when you program the servo to move to 0 the top and bottom plates should be aligned.

If you write a short program to make the servo move to angle 0, you can then complete the following steps to be sure the feeder is aligned.
- Write the program to make the servo move to angle 0.
- Run the program.
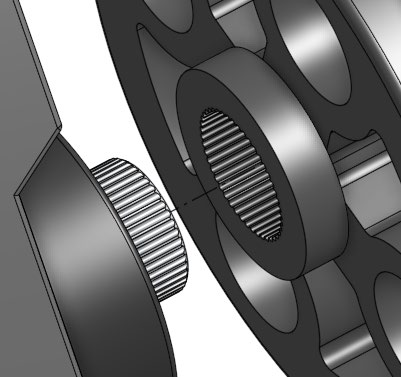
- Carefully remove the top of the feeder from the servo.
- Align the two parts as shown above.
- Push the top of the feeder back on.
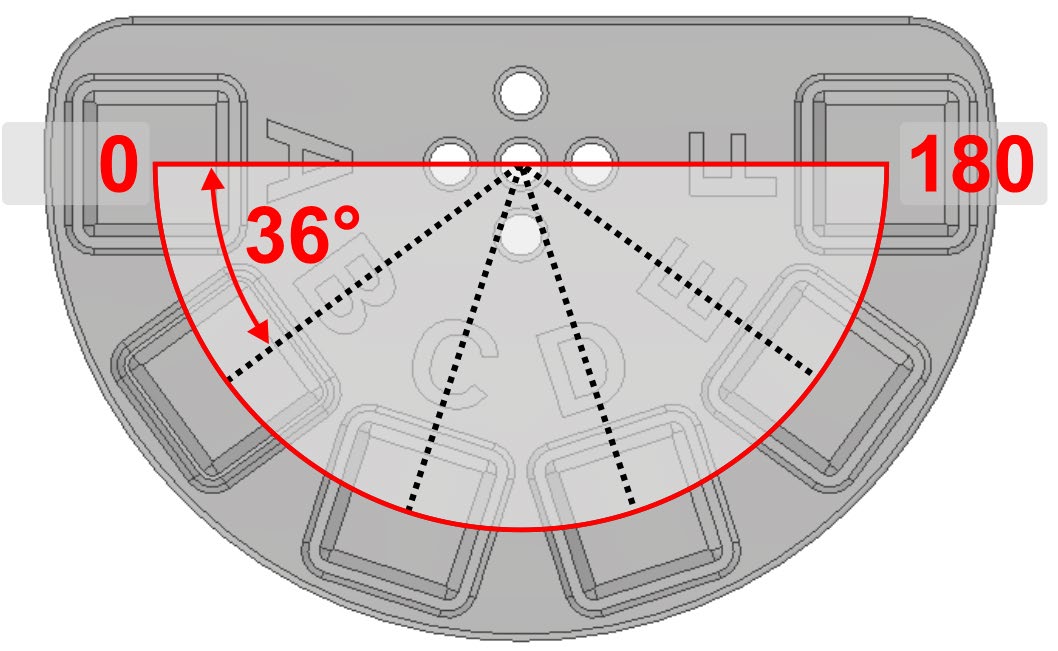
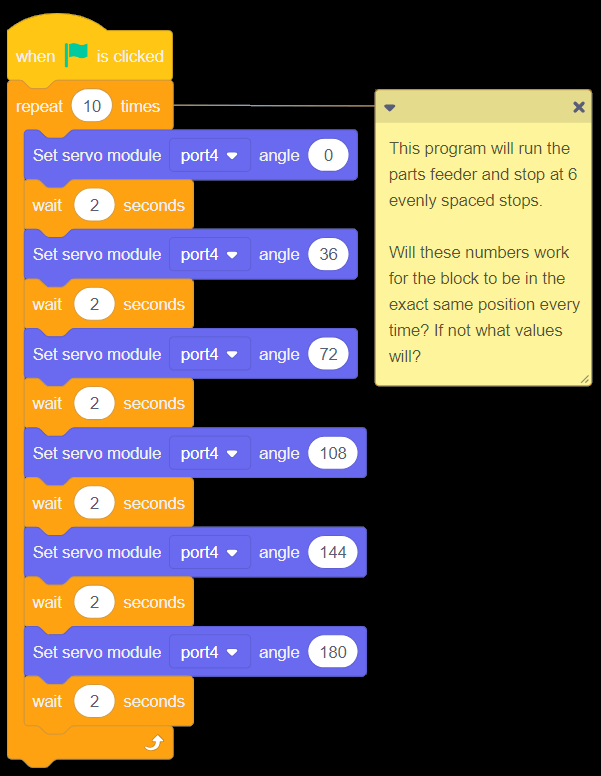
6. This simple program will make the feeder move through 180 degrees with six stops. Notice there are six blocks on the feeder.
If the math is right, the servo should put the block in the same “pick” position every time. Try this program and see how it works.
Do these values work? If not, what do they have to be changed to so that the block is in the exact same position each time?
Once you have determined the stops, write them below:
| Feeder Position | Angle |
|---|---|
| A | _______ |
| B | _______ |
| C | _______ |
| D | _______ |
| E | _______ |
| F | _______ |
Use the information above as a starting point to learn how the feeder works. Once these positions are known, you should be able to write the rest of the program with what you have learned from other activities.
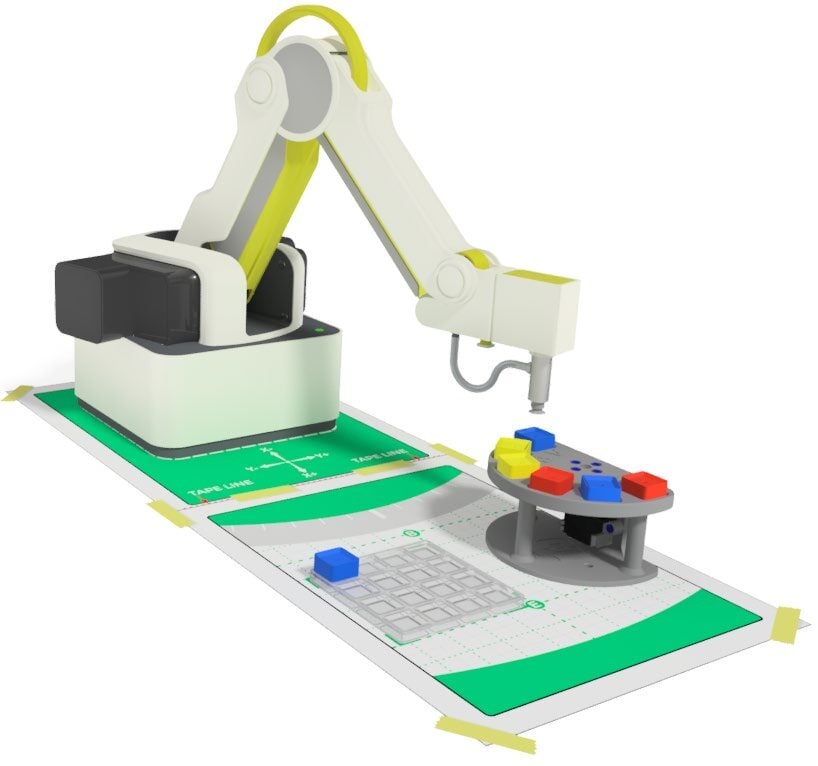
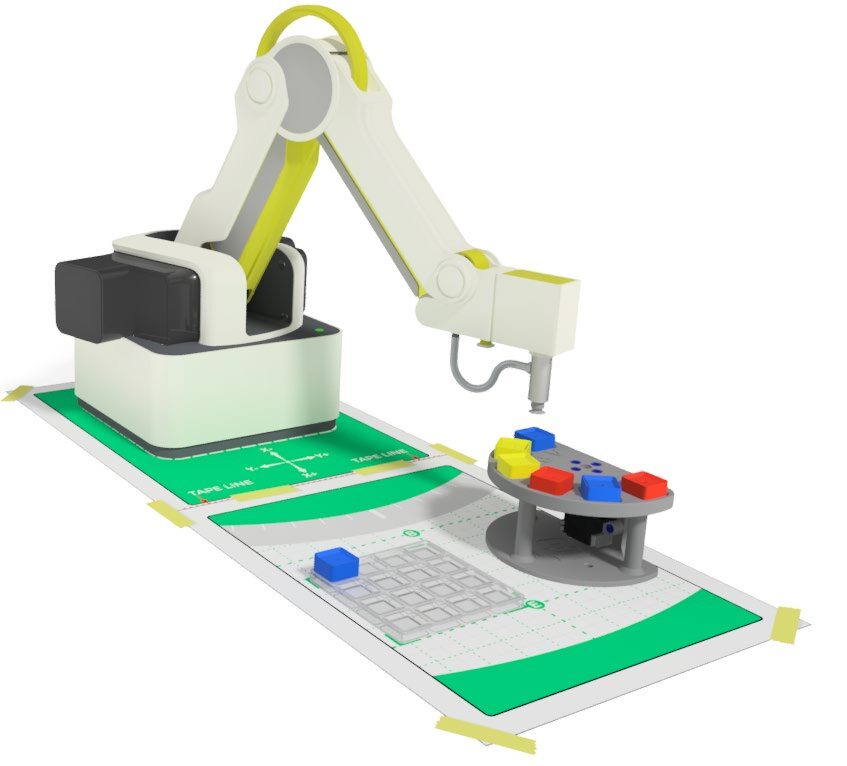
7. Set up the robot, feeder, and pallet similar to what is shown in the diagram. Be sure that the feeder and the pallet are within the work envelope of the robot.
![]() Use double sided tape to hold the feeder and pallet in place so that they are less likely to move throughout the activity.
Use double sided tape to hold the feeder and pallet in place so that they are less likely to move throughout the activity.
8. Using what you have learned in previous activities, develop a program that will make the following happen:
- Load the feeder with cubes.
- Press the button to make the operation start.
- The robot should pick a part off the feeder and place it on the pallet, filling two rows or two columns.
- The feeder should move the next part into position.
- Repeat until the feeder is empty and there are six parts on the pallet in two columns or rows of three.
- Robot goes to a home position, and the feeder resets to the first position.
Teaching Tips:
DEBRIEF
In the space below outline what worked well for you, and what you would change if you did it again. Be sure to explain why!
CONCLUSION
- What happens if a block isn’t there on the feeder when there is supposed to be?
- How does a part feeder provide an advantage over picking from a pallet?
- Did you have any problems printing the feeder? What settings did you use to make it on your printer?
- Can you think of any way to make this 3D printed feeder better? How? Do it!
- Place a screen capture of your program below or show it to your instructor to get full credit for the project.
GOING BEYOND
- Use an LED to let an operator know that the feeder is empty.
- Look at activity 1.7 Developing a cube matrix in the Magician curriculum (link) and make the robot use this method to add the blocks to the pallet.
- Use the color sensor to sort the blocks by color on the pallet when done.