Lesson Modules
Teaching Tips:
PROCEDURE
Order of operations
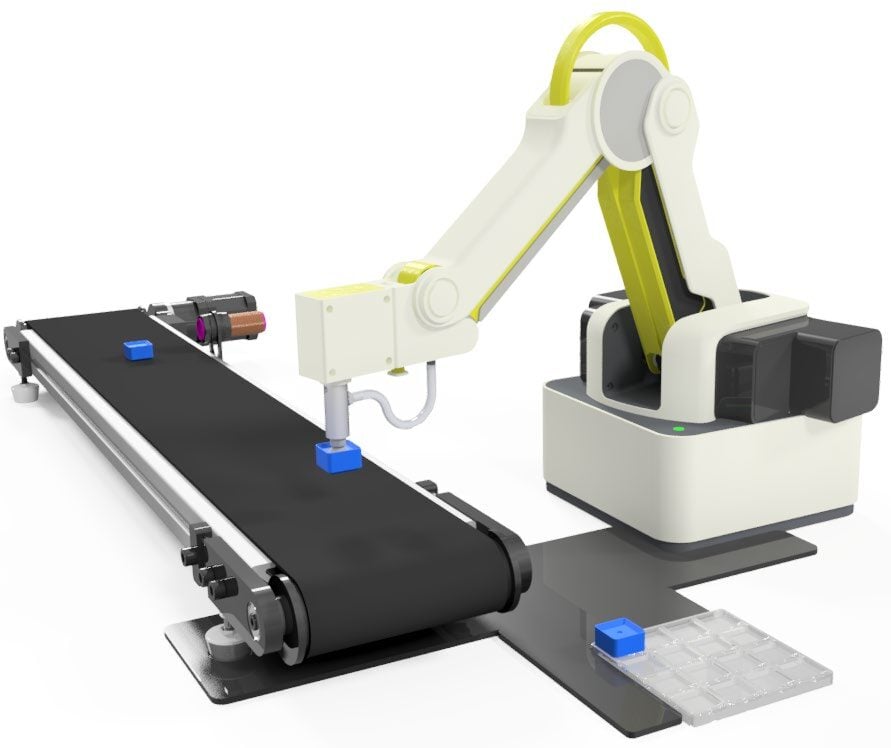
- The Robot will pick up a cube from a known location and place it on the conveyor belt.
- The Robot will return home and then start the conveyor belt.
- The conveyor belt will run until the block arrives at the IR Sensor for inspection.
- The block will be manually removed from the belt, inspected and then returned to the belt.
- Once the block is returned to the belt, the belt will run again until the parts runs off the belt and into storage.
- The process will loop forever.
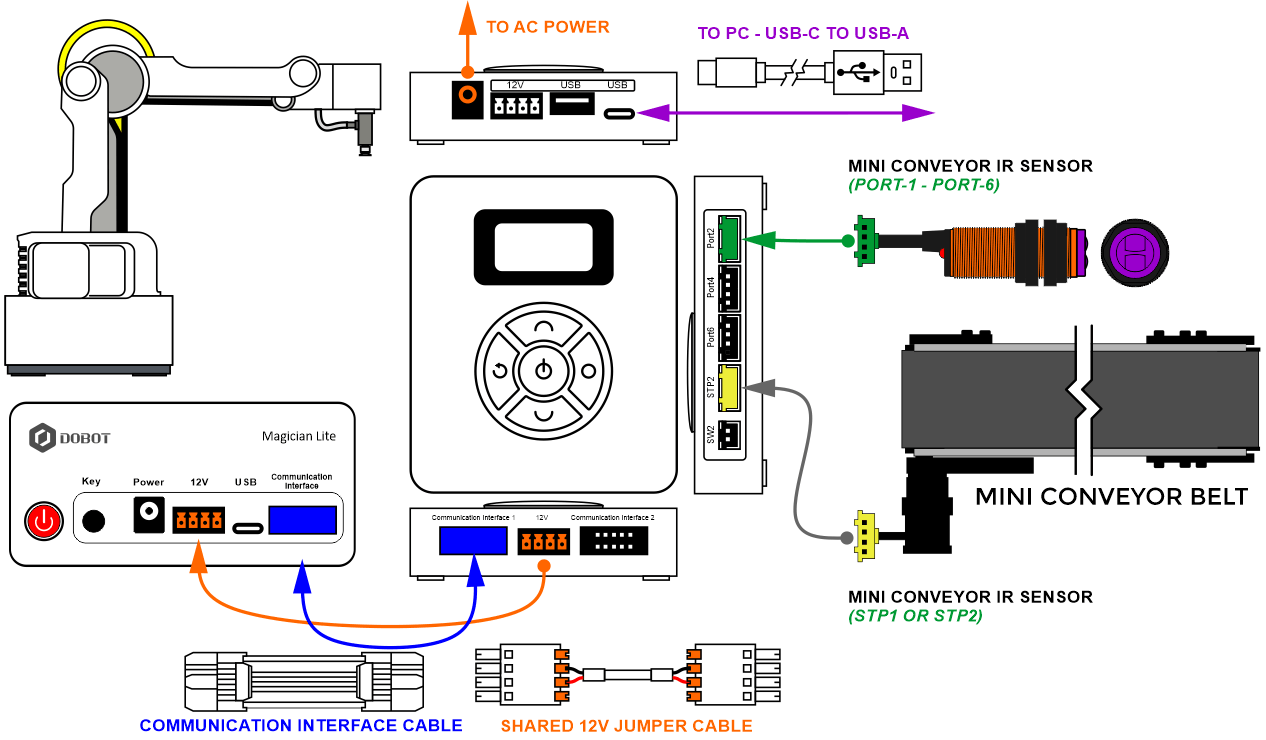
Caution: NEVER wire anything to the Dobot Magician or the Magic Box while it has power on. ALWAYS turn it off before making connections or damage to the robot could occur. Be sure to ask your instructor if you have any questions.
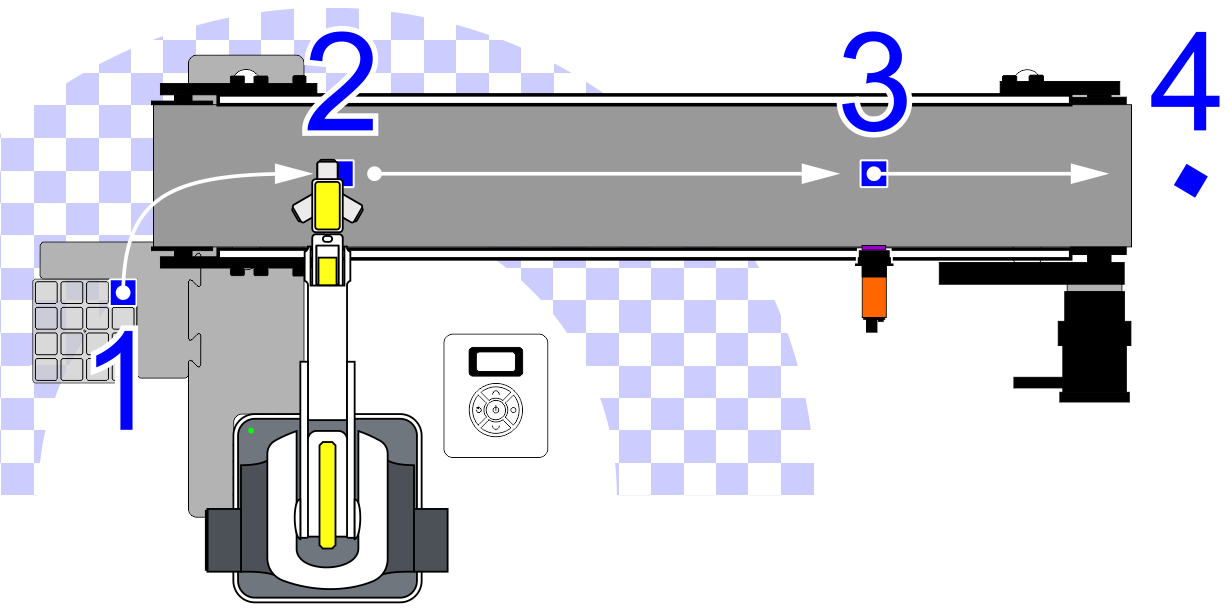
1. Set up the robot with the suction cup gripper.
2. Plug the Conveyor Belt into STEPPER2 of the MAGIC BOX and plug the IR sensor into PORT2 of the MAGIC BOX.
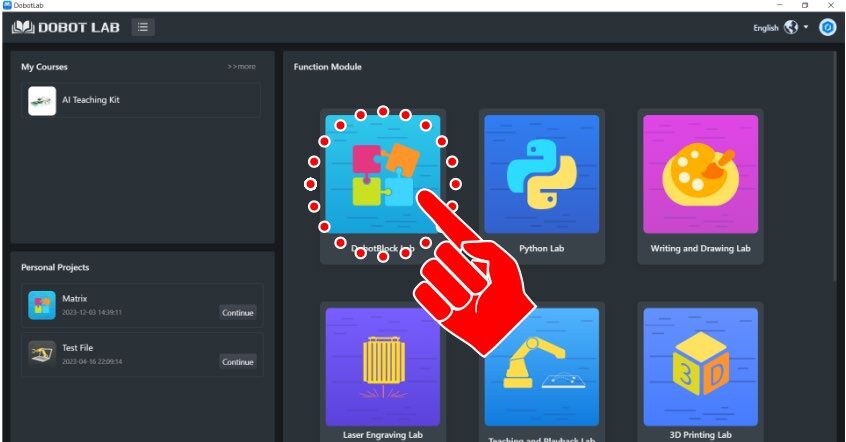
3. Open a new file in DobotBlock Lab.
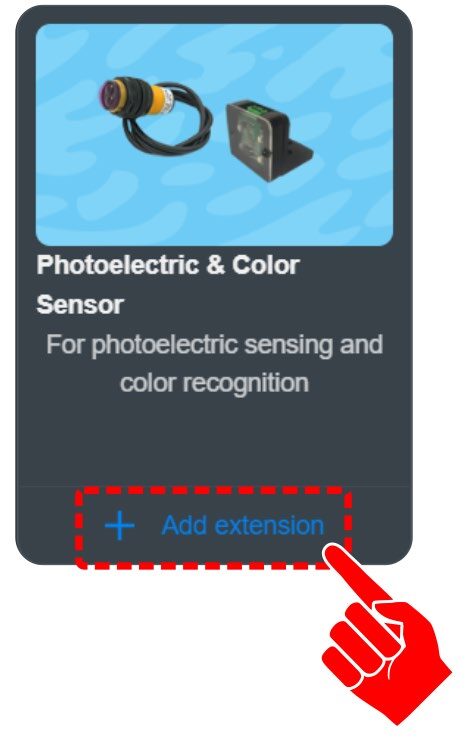
For this activity, we will need to add an EXTENSION to use the PHOTOELECTRIC SENSOR (IR Sensor). Click the EXTEND icon in the bottom left corner.
3a. For this activity, we will need to add an EXTENSION to use the PHOTOELECTRIC SENSOR (IR Sensor). Click the EXTEND icon in the bottom left corner.

4. Click on “+ Add extension” for the Photoelectric and Color Sensor.
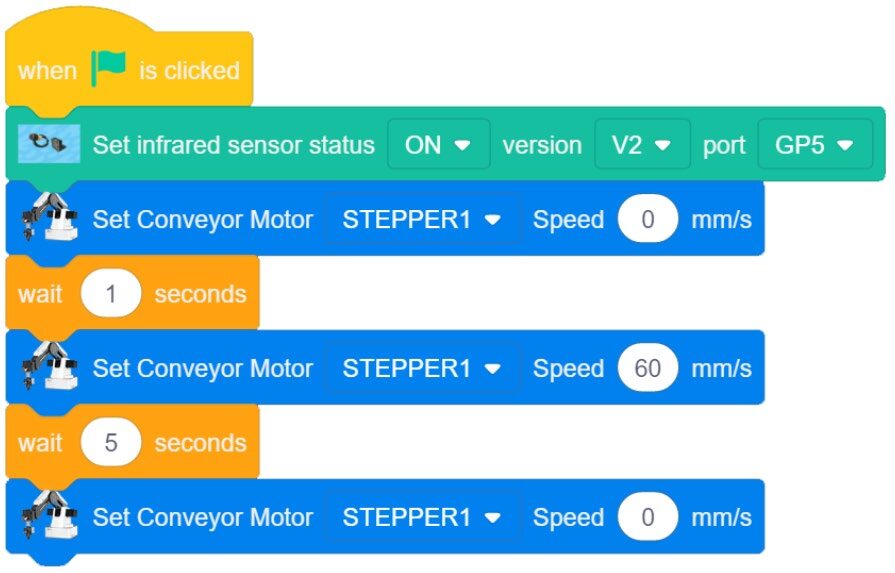
5. New blocks required for this activity:
- Photoelectric Sensor Extended Toolbox
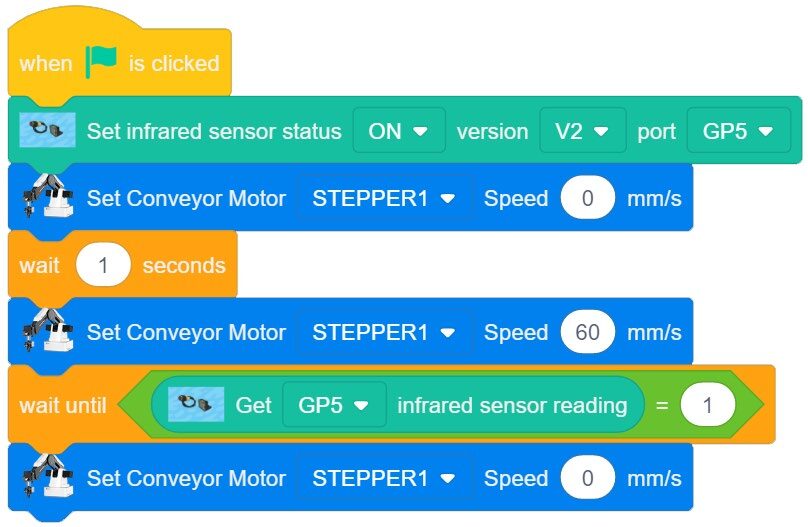
– SET INFRARED SENSOR STATUS
Settings: ON, V2, GP5 - Settings Toolbox
– SET CONVEYOR MOTOR
Settings: STEPPER1, 60 mm/s


Write a quick code that will turn on the conveyor for 5 seconds.
In this example, 60 mm/s is used for the speed of the conveyor. Play with this value until you have a controllable speed for this activity.
Once the program is completed, run it and see if it works correctly. If it does not work, troubleshoot it until it does.
6. If your set-up did not work correctly the first time, what did you have to do to make it work?
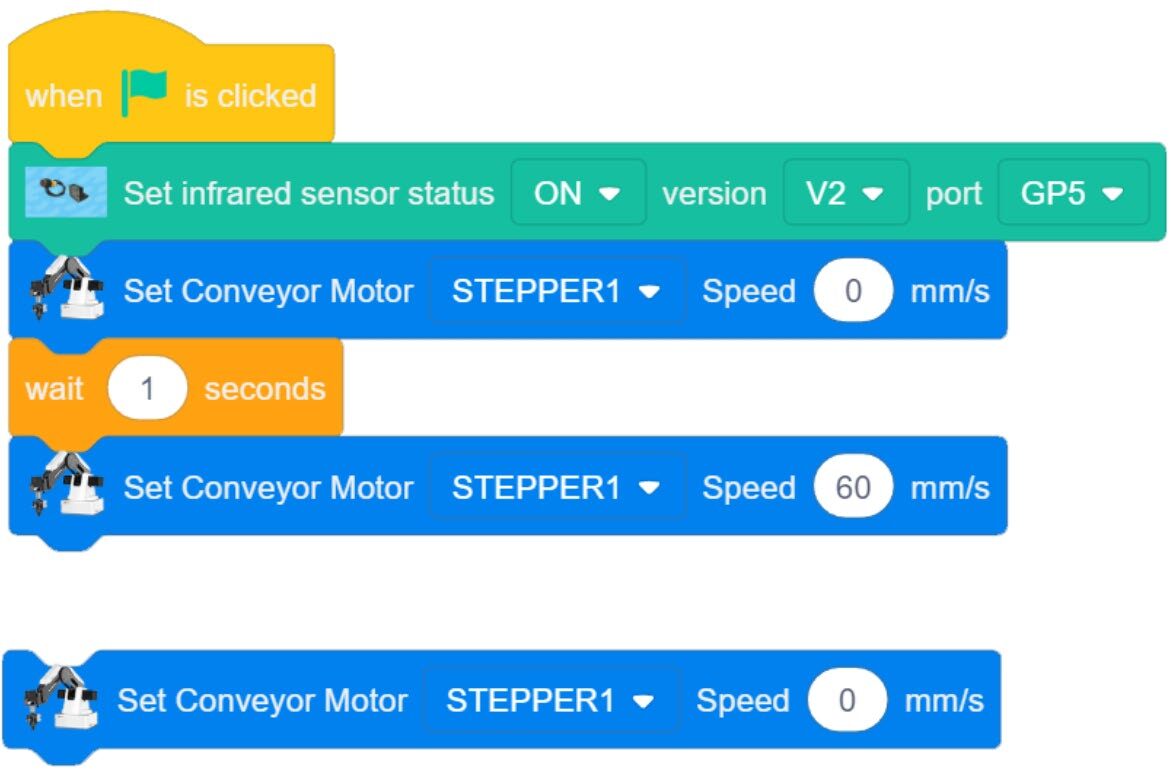
7. Now edit the current code to get the conveyor belt to stop when an object is detected by the IR Sensor.
Remove the 5-second DelayTime from the program.
Change this OPEN loop system to a CLOSED loop system by using the sensor to add feedback.
To create a loop that will keep checking the IR Sensor value until an object is detected, we are going to replace the wait-for-time with a WAIT UNTIL.
Insert a WAIT UNTIL loop and insert it where the wait-for-time block was.
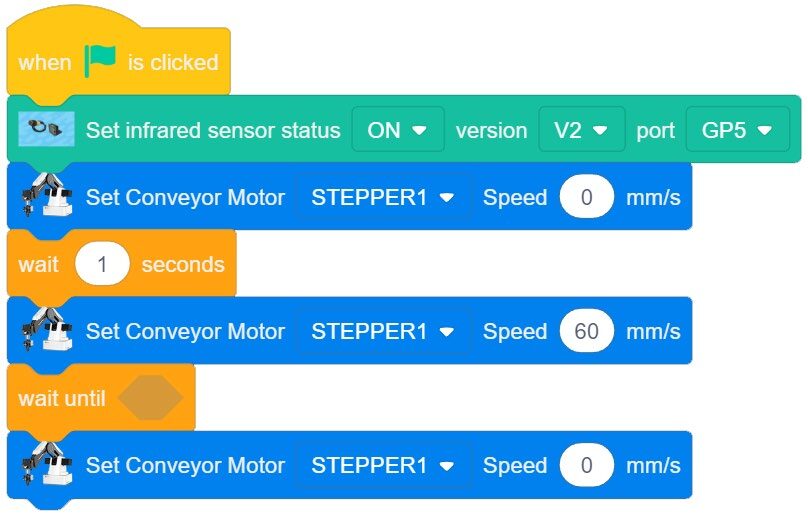
8. Create a condition that evaluates the IR Sensor’s value. We are looking for the sensor’s value to change from 0 to 1.
The IR Sensor reads true/high/1 when an object is present. The small LED on the back of the IR Sensor will also light up.
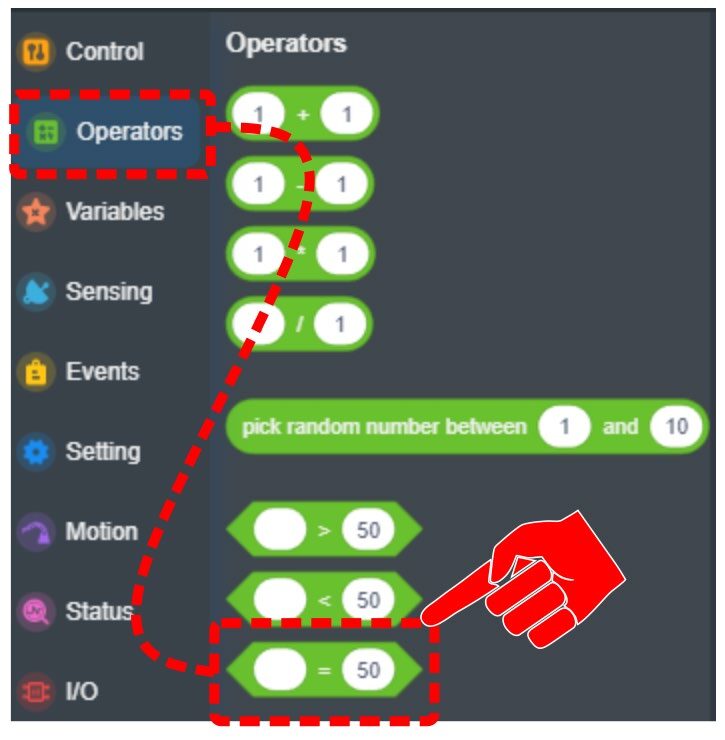
Insert the EQUALS condition from the Operators Toolbox.
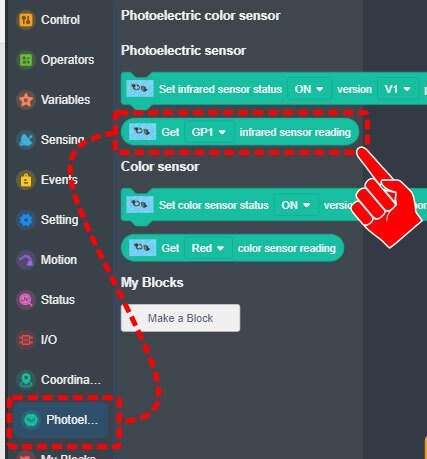
Insert the GET INFRARED SENSOR READING from the Photoelectric Color Sensor Extended Toolbox.
Add both blocks together to complete the statement as shown.
Make sure to change the GET INFRARED SENSOR READING value from GP1 to GP5 and the number value to 1.
Run the program. Let the conveyor run for a few seconds, then manually place a cube in front of the sensor. The conveyor should stop.
If it does not work, troubleshoot it until it does.
What are all of the things that could possibly be wrong if it doesn’t work? Look at all of the variables in the blue and the green blocks in the program above.
9. If your set-up did not work correctly the first time, what did you have to do to make it work?
10. Now that the conveyor starts and stops using the IR Sensor, you can find positions, set any needed VARIABLES, and create MY BLOCKS and set variables for this activity.
Create a Pick and Place routine.
- Start with the robot at a Home position.
- Pick and Place – Get the block and put it on the conveyor and return to home position.
Next, start the conveyor until the block reaches the other end.
Create a variable named “waiting”. Set this variable to one (1) when the robot is waiting and zero (0) when it is not.
- Start the belt and run it until the cube reaches the sensor.
- Stop the belt.
Once the program is completed, run it and see if it works correctly. If it does not work, troubleshoot it until it does.
11. Reminder:
This activity requires the following operations:
- The Robot will pick up a cube from a known location and place it on the conveyor belt.
- The Robot will return home and then start the conveyor belt.
- The conveyor belt will run until the block arrives at the IR Sensor for inspection.
- The block will be manually removed from the belt, inspected, and then returned to the belt.
- Once the block is returned to the belt, the belt will run again until the part runs off the belt and into storage.
- The process will loop forever.
12. Now that the conveyor starts and stops, the next step is to create a loop that will allow the block to be removed and then wait for it to be returned.
The issue is that we have no idea when the block has been removed, how long it will take for the inspection, or when it will be returned.
We need to create a closed loop system that will look for the following conditions without respect to time:
- The Block has been REMOVED (Sensor Feedback)
- The Block has been RETURNED (Sensor Feedback)
![]() Some of this program can be condensed into separate MY BLOCKS (functions) in order to simplify the main program. This makes the program much more efficient and easier to troubleshoot.
Some of this program can be condensed into separate MY BLOCKS (functions) in order to simplify the main program. This makes the program much more efficient and easier to troubleshoot.
13. The final task is to start the conveyor again and run the part off the end and into a container.
Use the same code you started with to accomplish this task. The time needed to run the part off the conveyor will be different for each project, depending on where the sensor is mounted.
SAFETY: Place a small WAIT in front of this section of code to allow time for the user to get their hand away from the belt before it starts running.
Once the program is written, try it and make sure that it works as expected. If it does not work correctly, troubleshoot until it does.
Remember to check all the variables in the blocks first like:
- Have you used the right ports?
- Are the speeds correct?
- Are 1’s and 0’s used correctly?
- Are the MyBlocks called out correctly?
14. If your set-up did not work correctly the first time, what did you have to do to make it work?
Teaching Tips:
CONCLUSION
- Why is it better to have the infrared sensor stopping the conveyor belt rather than just running it for time?
- How would the program be different if the conveyor belt could not be run as a linear rail?
- What’s one way to determine where the robot is at any given time in the program?
GOING BEYOND
Finished early? Try some of the actions below. When finished, show your instructor and have them initial on the line.
- _________ 1. Use functions to make your program as short as possible.
- _________ 2. Add the AI extension as done in previous activities and use the color sensor and make the robot report what color block is being sent down the conveyor using voice.