Lesson Modules
Teaching Tips:
SECTION 1 – WIRING the MAGIC BOX, SENSORS, & MAGICIAN ROBOT
Caution: NEVER wire anything to the Magic Box or Robot while it has power on. ALWAYS turn them off before making connections or damage to the Controllers could occur. Be sure to ask your instructor if you have any questions.
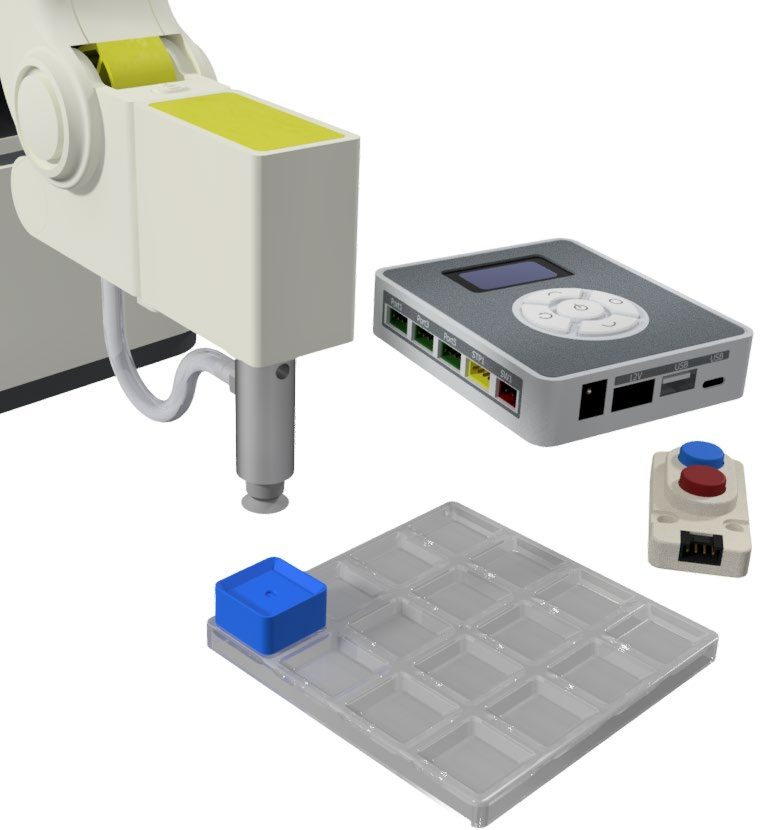
Step 1 – Gather Hardware
- 1× Magic Box
- 1× USB-A to USB-C Cable
- 1× AC/DC Power Adapter (12 V)
- 2× Common Sensor Cables
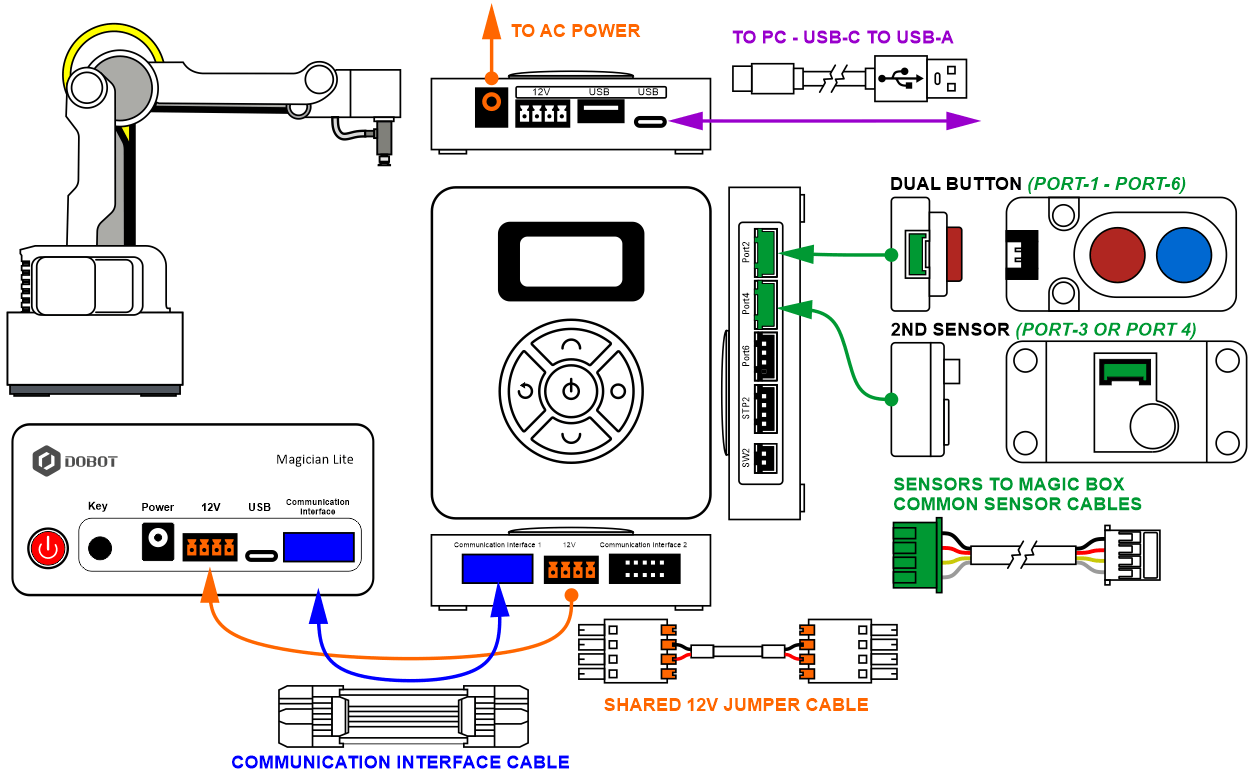
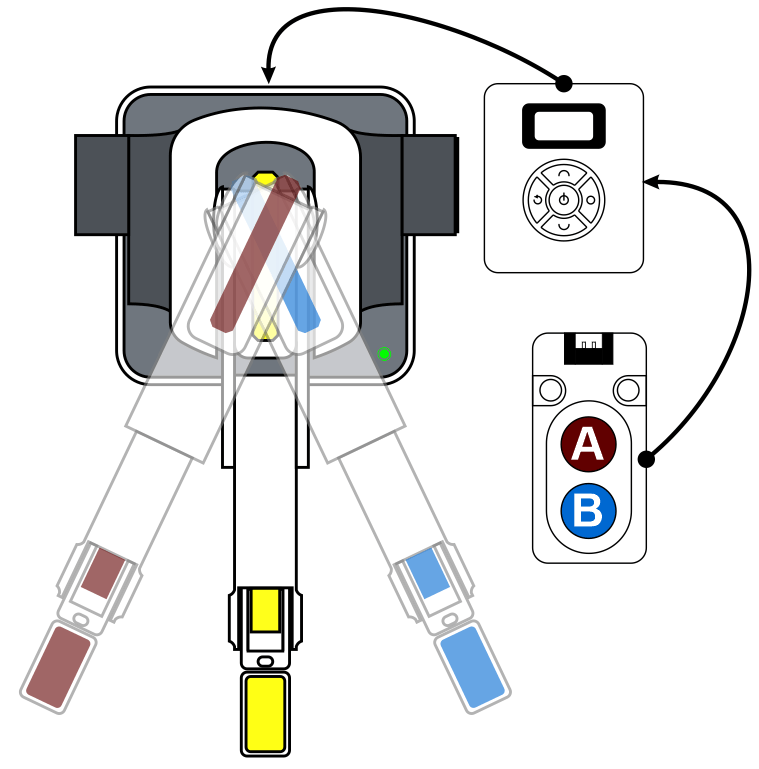
Step 2 – Wire the Magic Box
Wire the Magic Box as shown below.
- 1× Dual Button Sensor – PORT 2
- 1× Additional Sensor – ANY AVAILABLE CORRESPONDING PORT
Caution: MAKE SURE THE TAB IS PRESSED DOWN ON THE WHITE CONNECTOR WHEN DISCONNECTING ALL SENSORS!!! It is very easy to damage the sensors if the white connector is pulled or tugged on without pressing down the small white tab to release the cable from the sensor housing.
SECTION 2 – CONNECTING the MAGIC BOX & ROBOT to DOBOTLAB
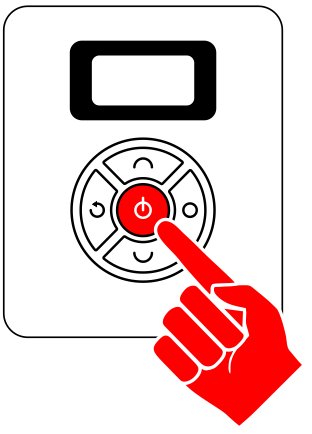
Step 3 – Launch & Power On
- Open up DobotBlock Lab in the software.
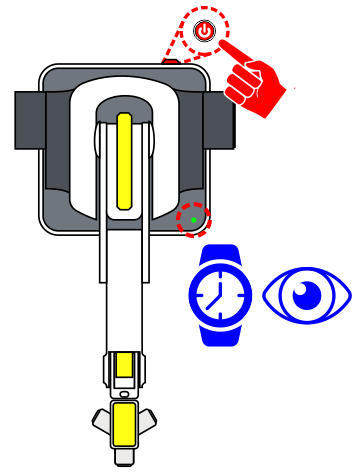
- Once ALL of the wiring is done (sensors connected and robot arm connected), power ON the Magic Box and Robot. WATCH and WAIT for the robot to completely power on (GREEN INDICATOR).
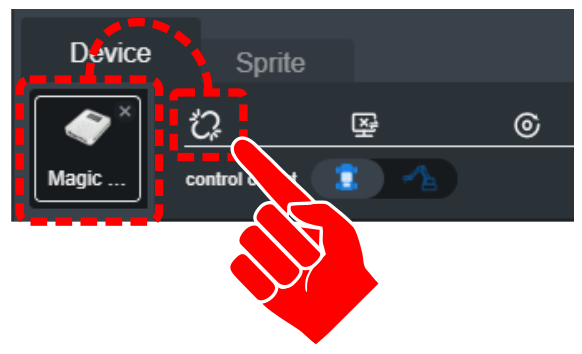
- Follow the same process from previous activities to add the Magic Box as a device and connect the software to it (establish communication).
WAIT…. THERE IS NO NEED TO CONNECT TO THE ROBOT? For this activity, you will use the magic box to control the robot (communication cable and added extension).

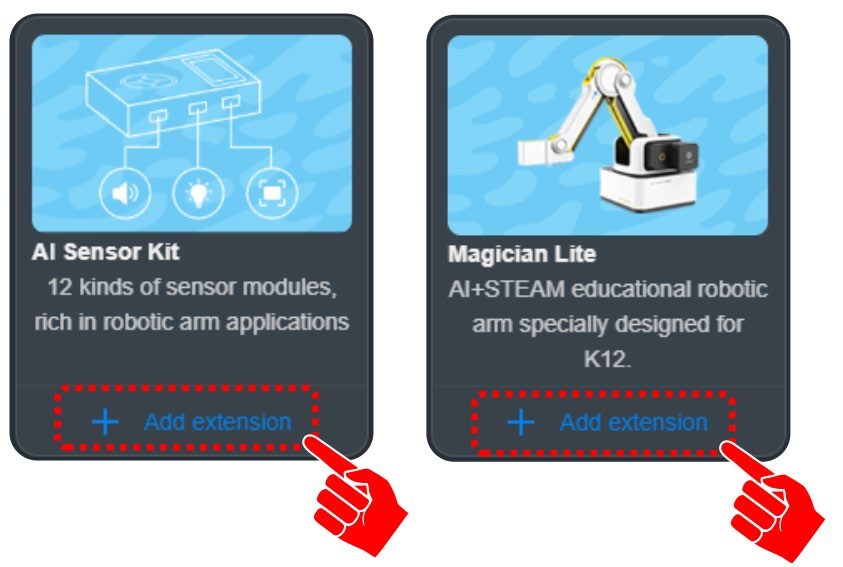
Step 4 – Add Extensions & Home Robot
- Click on “+ Add extension” for the AI SENSOR KIT & MAGICIAN LITE.
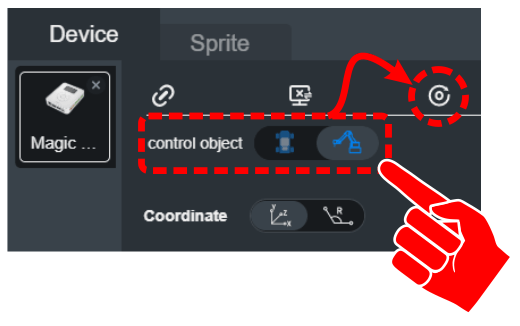
- Once the EXTENSIONS are added, slide the control object from the Magician GO to the Magician Lite Robot and press the Home button. The robot should move to its home position (ensure the robot’s work envelop is clear!).
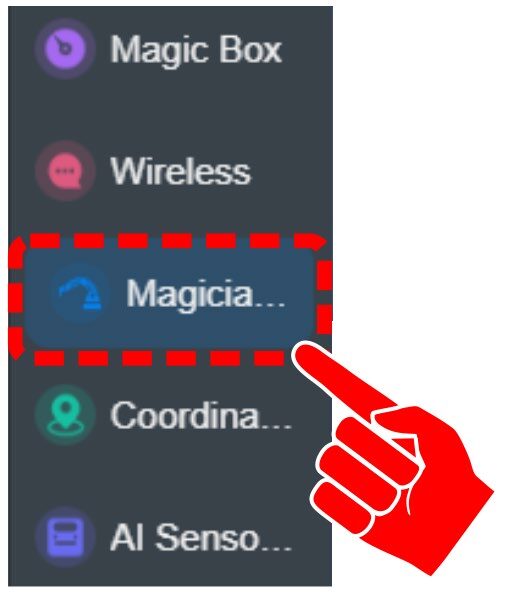
![]() Notice that after adding the Magician Extension, a new category has been added to the tool bar.
Notice that after adding the Magician Extension, a new category has been added to the tool bar.
SECTION 3 – BASIC PROGRAMMING BETWEEN THE MAGIC BOX & ROBOT ARM
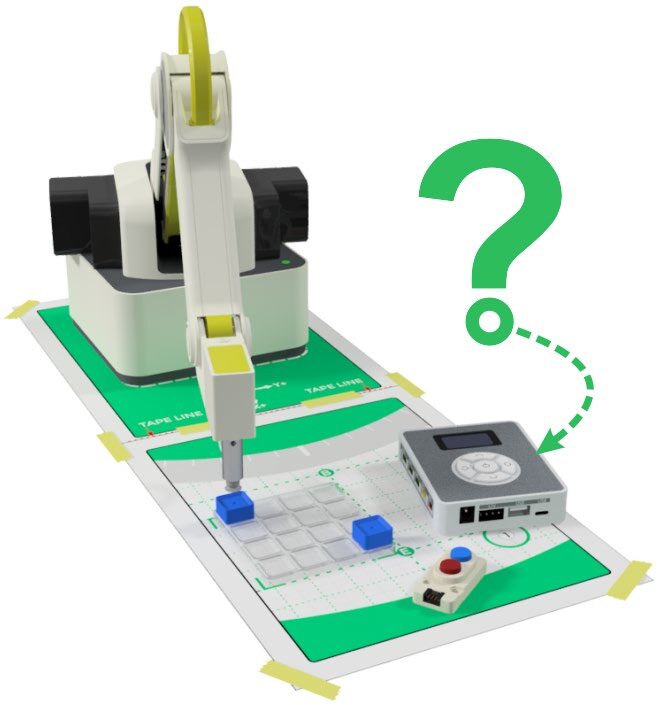
SKILL BUILDER – DUAL BUTTON AND MAGICIAN ARM
This activity will use the DUAL BUTTON input sensor to send the robot to different positions.
- When no button is pressed, the robot will go to or remain at the home position.
- When Button “A” is pressed, the robot will go to a position in the negative direction.
- When Button “B” is pressed, the robot will go to a position in the positive direction.
- The robot will stay at a position if the button is held.
Follow the steps below to complete this activity.
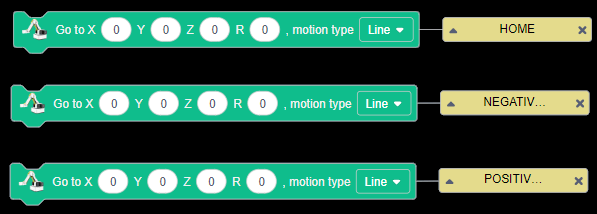
Step 5 – Create Three GO TO Positions
Drag over three GO TO POSITIONS from the NEW category.
Find the coordinates and fill them in.
![]() Either drive the robot to the desired positions or use the Unlock Arm Button. Either type in the position numbers or use the “Fill Coordinates” option.
Either drive the robot to the desired positions or use the Unlock Arm Button. Either type in the position numbers or use the “Fill Coordinates” option.
The robot needs to be able to make a choice of which position it should be at. There will be three possible locations for the robot to choose from: HOME, NEGATIVE, or POSITIVE.
While there are several ways to program this process, this activity will look at two of them.
- A group of individual IF Statements
- A nested set of IF Statements for this process
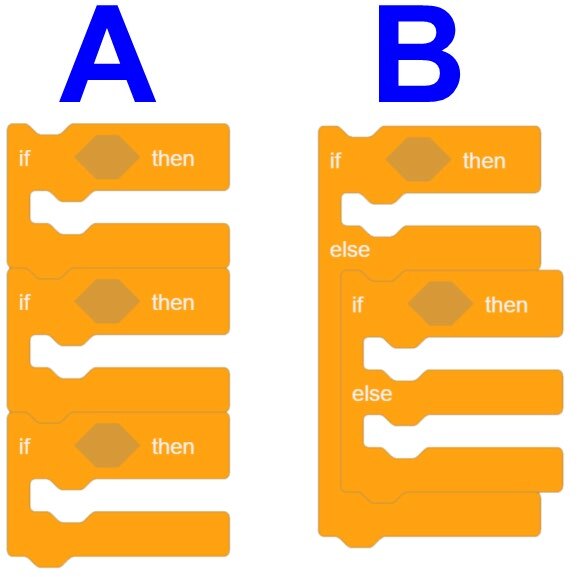
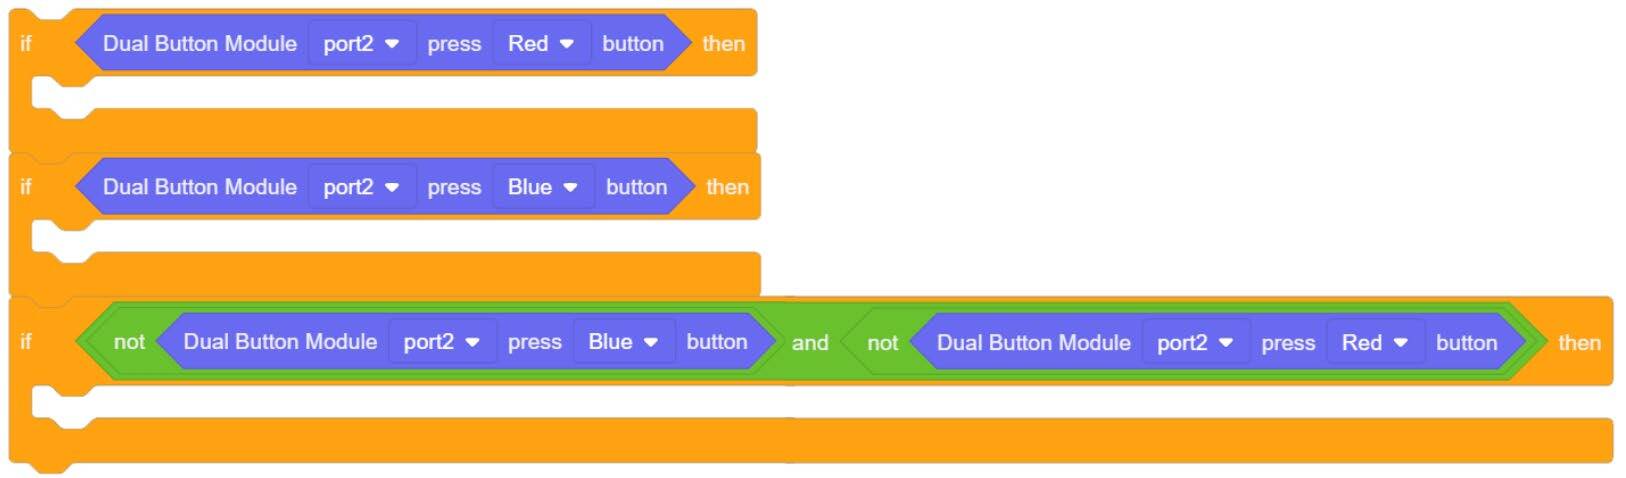
OPTION A – A Group of Individual IF Statements
The condition of the DUAL BUTTON will be placed inside the first two IF Statements. The third IF Statement will instruct the robot on what to do IF the buttons are not pressed.
Option A provides the programmer the opportunity to build a complex computation for the third condition. The condition should only be met if the RED button and the BLUE button are NOT pressed.

OPTION B – A NESTED SET OF IF STATEMENTS
- The first condition of the DUAL BUTTON (RED) will be placed inside the IF Statement.
- The second condition of the DUAL BUTTON (BLUE) will be placed inside the ELSE IF Statement.
- The third condition falls into the final ELSE condition (IF neither condition is TRUE, do this).
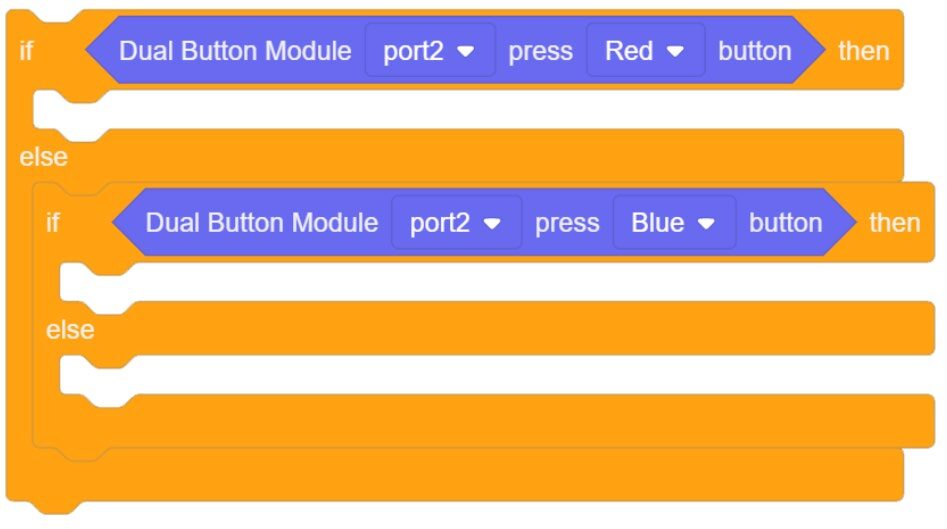
This option simplifies the code and places the choices in a hierarchy (order of importance) that also takes care of the fourth possible condition… BOTH the RED button and BLUE button are pressed at the SAME time. The RED condition will override the BLUE condition in this format.
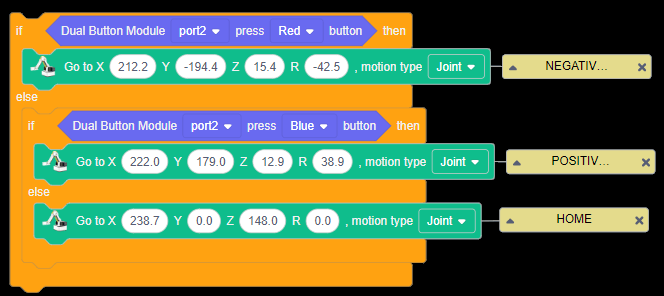
Step 6 – Add Movement Commands
Regardless of which option is used, the GO TO POSITION blocks can now be added to each of the Statements.
EXAMPLE:
Step 7 – Add Additional Code & Test
Add additional code to the program to complete it for testing.
- EVENTS: WHEN STARTED – Start the process.
- CONTROL: FOREVER LOOP – Loop/Rewind and repeat the process.
- Small micro WAIT – Small wait to slow the process of looking for the sensor values.
- IF / ELSE Nest – Look for conditions; run conditions if TRUE or run ELSE.
Once the program is completed, run it and see if it works correctly.

If your set up did not work correctly the first time, what did you have to do to make it work?
SECTION 4 – USE A DIFFERENT SENSOR(S) TO CONTROL THE ROBOT’S MOVEMENT THROUGH A PICK AND PLACE ROUTINE
For this challenge, choose a different sensor from the kit that you have practiced with that will fit this challenge.
REMINDER: If the sensor is not already attached to the Magic BOX or a sensor is being removed, make sure it is powered off before installing the new sensor to keep from damaging the controller.
If a sensor is being uninstalled or removed, make sure the tab is completely pressed to keep from damaging the sensor.
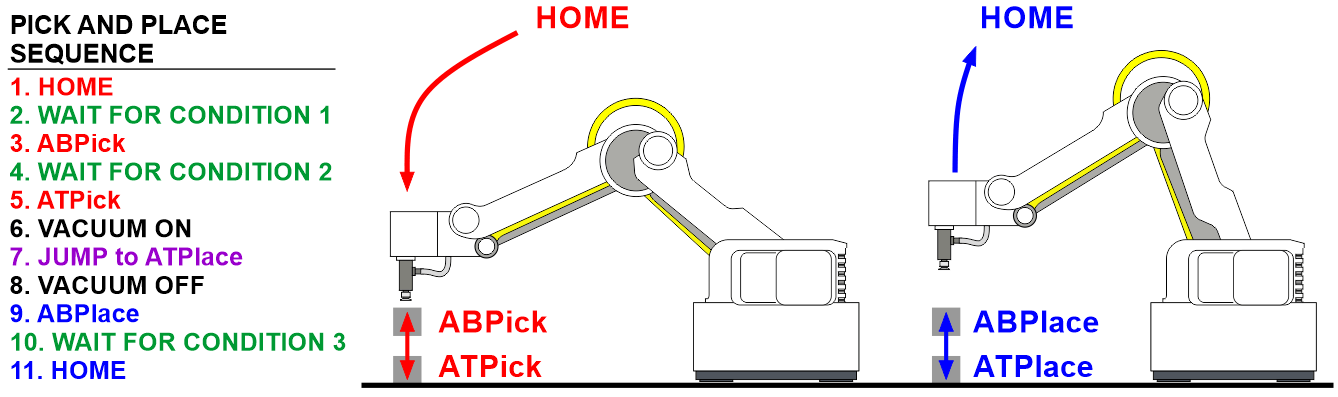
Pick and Place Challenge
- The robot will start at a home position and wait for an input signal before moving to the ABOVE PICK location.
- The robot will wait at the ABOVE PICK location until a signal (different signal?) is received to pick up the block and jump it over to the AT PLACE location.
- The robot will sit at the ABOVE PLACE location until another signal (different signal?) tells it to move home.
- The process should then be looped and ready for another loop.
If your set up did not work correctly the first time, what did you have to do to make it work?
Teaching Tips:
CONCLUSION
- Give a reason why the Dual Button module would be useful in industry and explain your answer.
- What sensor did you choose to start the challenge activity? Justify your choice with at least three bullet points.
- What other sensor might be a good choice? Why?
GOING BEYOND
- Use the JOYSTICK to control the robot’s movements through a pick and place operation. Use a digital input to turn on and off the vacuum gripper.
- Use the Dual-button module to complete the following task:
- Place a block to be picked up.
- If the block is red, have the operator press the red button and drop it into a bin for red blocks.
- If the block is blue, have the operator press the blue button and drop it in the blue block bin.
- If the block is any other color, drop it in a garbage bin by using a different input.
- Repeat this forever.
Teacher Initials _________