Lesson Modules
Teaching Tips:
Caution: NEVER wire anything to the Magic Box while it has power on. ALWAYS shutdown the BOX before making connections or damage to the controller could occur. Be sure to ask your instructor if you have any questions.
Caution: MAKE SURE THE TAB IS PRESSED DOWN ON THE WHITE CONNECTOR WHEN DISCONNECTING ALL SENSORS FROM THE MAGIC BOX! It is very easy to damage the sensors if the white connector is pulled or tugged on without pressing down the small white tab to release the cable from the sensor housing.
SECTION 1 – SETUP BOTH ROBOTS
SECTION 2 – WIRING the MAGIC BOX AND SENSORS – 1st SETUP
Setup #1
- For this activity, you will need:
- 2× Magic Box
- 2× USB-A to USB-C Cable
- 2× AC/DC Power Adapter (12 V)
- 4× Common Sensor Cables
- Wire the Magic Box as shown below
- 1× Dual Button – PORT 2
- 1× LED Module – PORT 4

SECTION 3 – CONNECTING MAGIC BOXES to the COMPUTER & DOBOTLAB
- Connect both Magic Boxes to separate computers using their included USB cables.
- Open up DobotBlock Lab in the downloaded software on your computer.
- Once all of the wiring is done (sensors connected), power ON the Magic Box.
- Follow the same process from previous activities to add the Magic Box as a device and connect the software to it (establish communication).
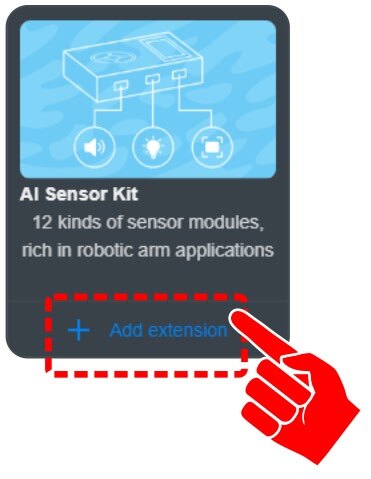
- Click on “+ Add extension” for the AI SENSOR KIT.


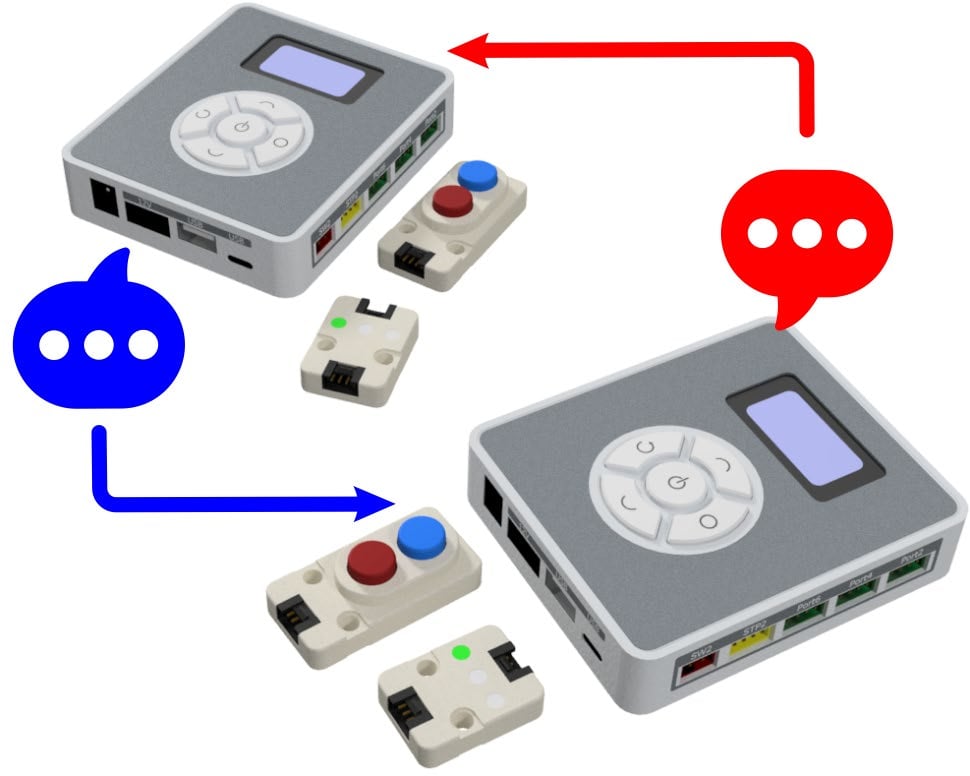
SKILL BUILDER 1 – SEND A SIGNAL THROUGH BLUETOOTH
The setup for sensing a signal between Magic Boxes is done with a few tools.
SET UP BLUETOOTH GROUP is the block that allows the program to send signals on a unique Bluetooth network. Each device must run this block at the beginning of the program.
A unique group (Street Name) should be chosen for each group of Magic Boxes that are to communicate (6 digit number (000001 – 999999)).
Each device is then given a specific device ID (House Number). The number can be any number from 0-255.
WHEN RECEIVING INFORMATION – Work similar to BROADCASTING MESSAGES. This block can replace the WHEN STARTED FLAG event header to start an operation each time a signal is received.
RECEIVE INFO FROM DEVICE – Can be set to a variable. Both numerical and string values can be received.
SEND INFO TO DEVICE – Block used to send numeric and string values to a specific device in the group.


Bluetooth group # must be 6 digits long. For example: if you want to use the Bluetooth group # 1234, as in this activity, you must type in the leading two 0’s: 001234!
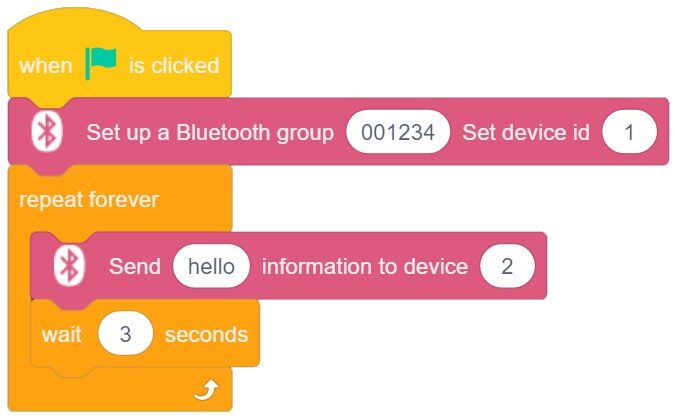
DEVICE 1
- Drag over a SETUP BLUETOOTH and a SEND BLUETOOTH from the WIRELESS category in the block toolbox.
- Create the program to the right on one computer.
- Set up a unique group number for both devices.
- This device will be DEVICE ID 1.
- Send the STRING HELLO to DEVICE 2 in a loop every three seconds.
DEVICE 2
- On the second computer, create a new variable (BLUE).
- Drag over a SETUP BLUETOOTH and a RECEIVE INFO from the WIRELESS category in the block toolbox.
- Create the program to the right on one computer.
- Use the same group number from the 1st device.
- This device will be DEVICE ID 2.
- Set the VARIABLE BLUE to the information RECEIVED from device 1.
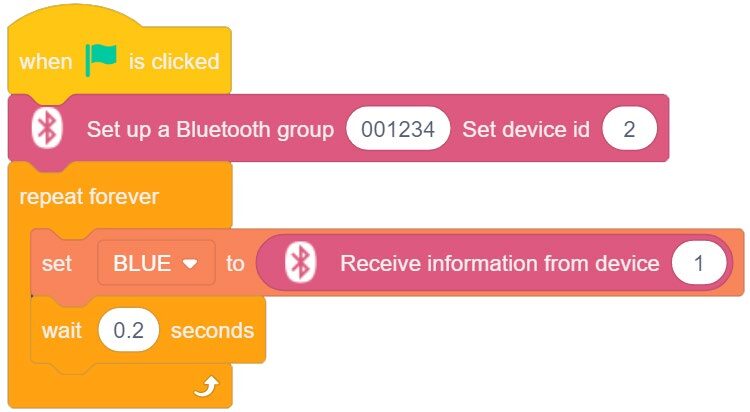
Run both programs. The STRING hello should briefly appear and disappear in the BLUE variables box.

If your set up did not work correctly the first time, what did you have to do to make it work?
SKILL BUILDER 2 – CONTROL A DEVICE THROUGH BLUETOOTH
Now that a signal can be both sent and received through Bluetooth, use this signal to control one device from another. The following program will use a button press (DUAL BUTTON) from Magic Box 1 to turn ON and OFF the LED MODULE from Magic Box 2.
DEVICE 1
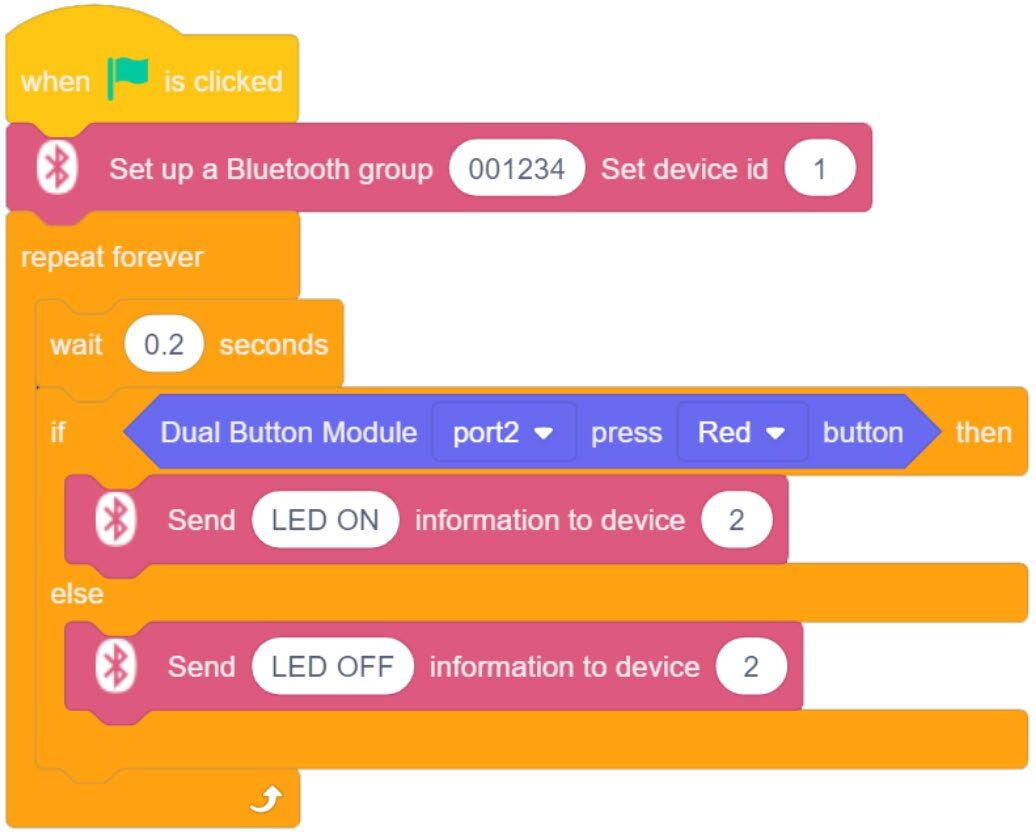
- Drag over a SETUP BLUETOOTH and a SEND BLUETOOTH from the WIRELESS category in the block toolbox.
- Create the program to the right on one computer.
- Keep the same GROUP and ID numbers.
- Drag over an IF/ELSE Statement from the Control toolbox.
- IF BUTTON RED is pressed, send the STRING LED ON else LED OFF.
DEVICE 2
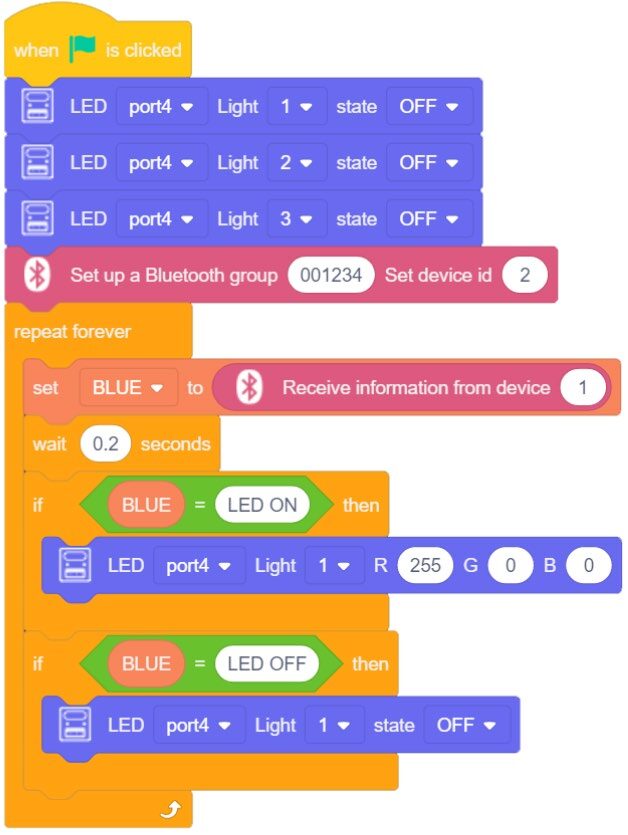
- Drag over a SETUP BLUETOOTH and a RECEIVE BLUETOOTH from the WIRELESS category in the block toolbox.
- Create the program to the right on computer 2.
- Start the program by turning off all of the LEDs.
- Keep the same GROUP and ID numbers.
- Set the variable BLUE to the info received from device 1.
- Drag over two IF Statements from the Control toolbox.
- IF variable BLUE = LED ON, turn ON LED 1 (RED).
- IF variable BLUE = LED OFF, turn OFF LED 1 (RED).
Run both programs.
![]() NOTE: There will be a small delay in the LED turning ON and OFF. Be patient, the delay may be 1 to 2 seconds.
NOTE: There will be a small delay in the LED turning ON and OFF. Be patient, the delay may be 1 to 2 seconds.
Why do you think there is a delay?
If your set up did not work correctly the first time, what did you have to do to make it work?
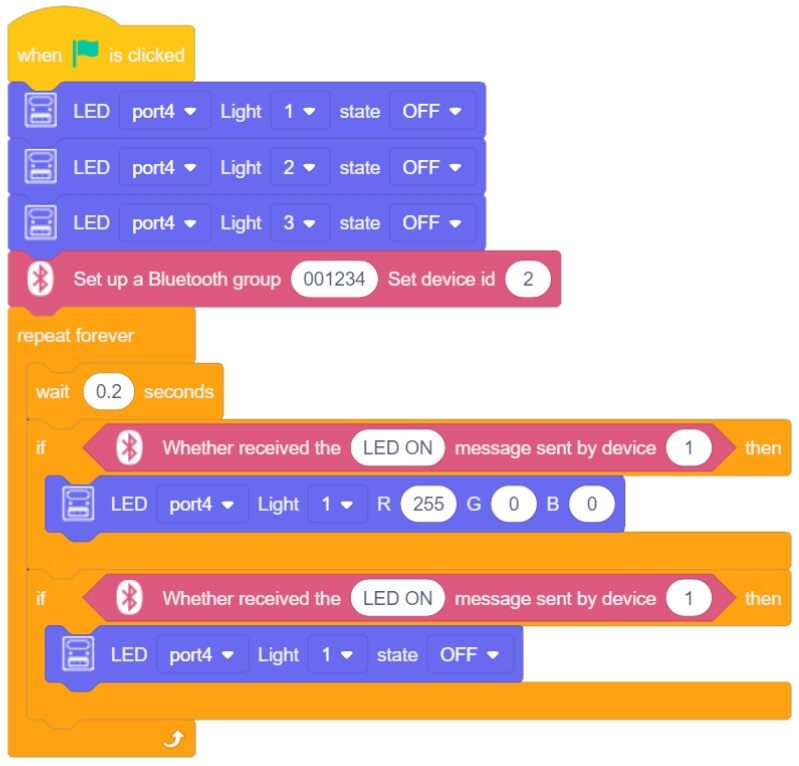
The program can be simplified further by using the WHETHER RECEIVED instead of setting a variable to the value received.
- Create the program to the right on computer 2.
- Keep the same GROUP and ID numbers.
- The variable (BLUE) can be removed completely from the program.
- Drag over a WHETHER RECEIVED and place one in each IF Statement.
- IF variable BLUE = LED ON, turn ON LED 1 (RED).
- IF variable BLUE = LED OFF, turn OFF LED 1.

Run both Programs.
If your set up did not work correctly the first time, what did you have to do to make it work?
CHALLENGE – SECTION 4 – PASS the LED SIGNALS (HOT POTATO)
Create a program that will allow BOTH Magic Boxes to cross communicate.
Program both Magic Boxes with the same program.
- The BLUE and RED DUAL BUTTONS control LED 1 and LED 2 from the opposite Magic Boxes.
- The RED BUTTON turns LED 1 RED.
- The BLUE BUTTON turns LED 2 BLUE.
If your set up did not work correctly the first time, what did you have to do to make it work?
Teaching Tips:
CONCLUSION
- List two advantages to wireless communication between devices.
A. ____________
B. ____________ - List two disadvantages to wireless communication between devices. Did you experience any?
A. ____________
B. ____________ - How could wireless communication in an industrial, or factory type setting?
GOING BEYOND
- Use My Blocks to make the challenge above simpler.
- Make one LED come on when the other Magic Box’s button is pressed, and another come on when it is not.
- Make the challenge above work with two different LEDs back and forth, on both magic boxes.
Teacher Initials _________