Lesson Modules
Teaching Tips:
PROCEDURE
Caution: NEVER wire anything to the Dobot Magician while it has power on. ALWAYS turn it off before making connections or damage to the robot could occur. Be sure to ask your instructor if you have any questions.
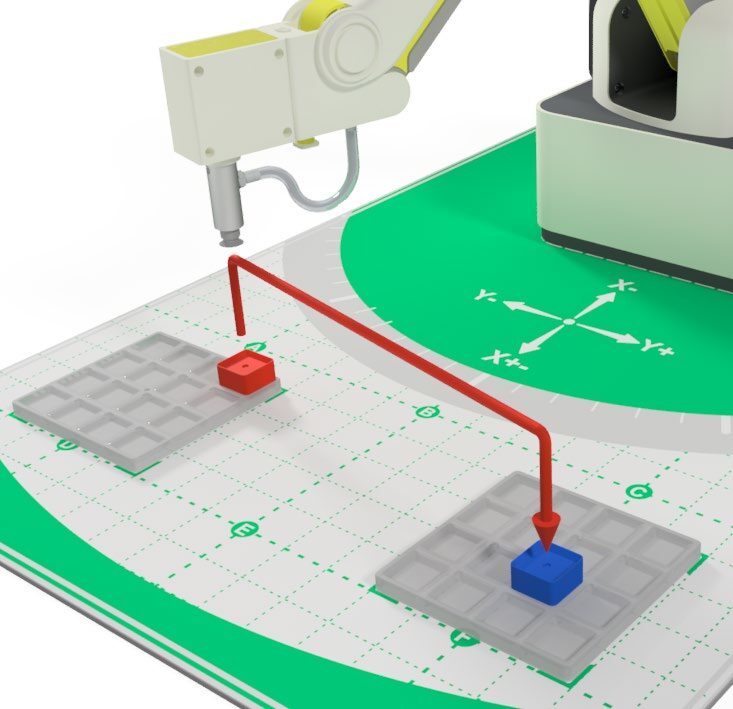
1. Set up the Dobot in the same configuration from activity “1.3 Pick and Place.”
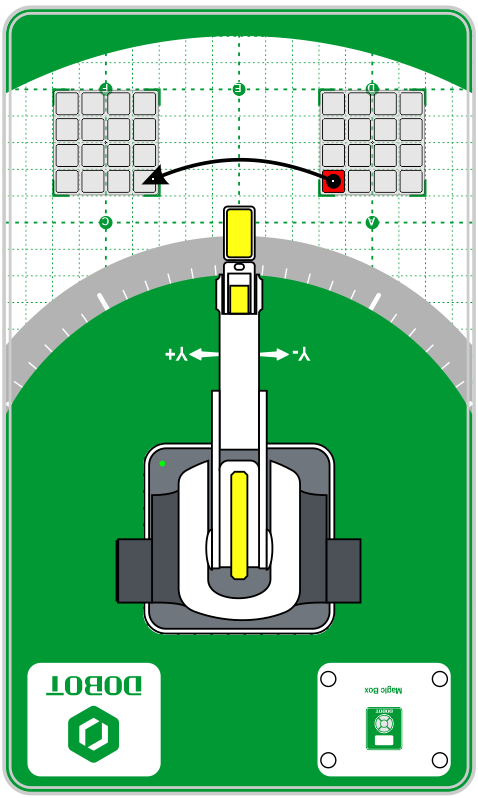
2. In this activity, use the JUMP command to simplify the original PNP activity from 1.3.
3. Open up the DobotBlock lab in the DobotLab software.


4. Open your Pick and Place Blockly Activity.
In this activity, we will add a JUMP movement as well as a LOOP. The JUMP command in blockly works the same as it does in Teach and Playback. This will allow us to remove a few lines of code, creating the same operation in fewer steps.
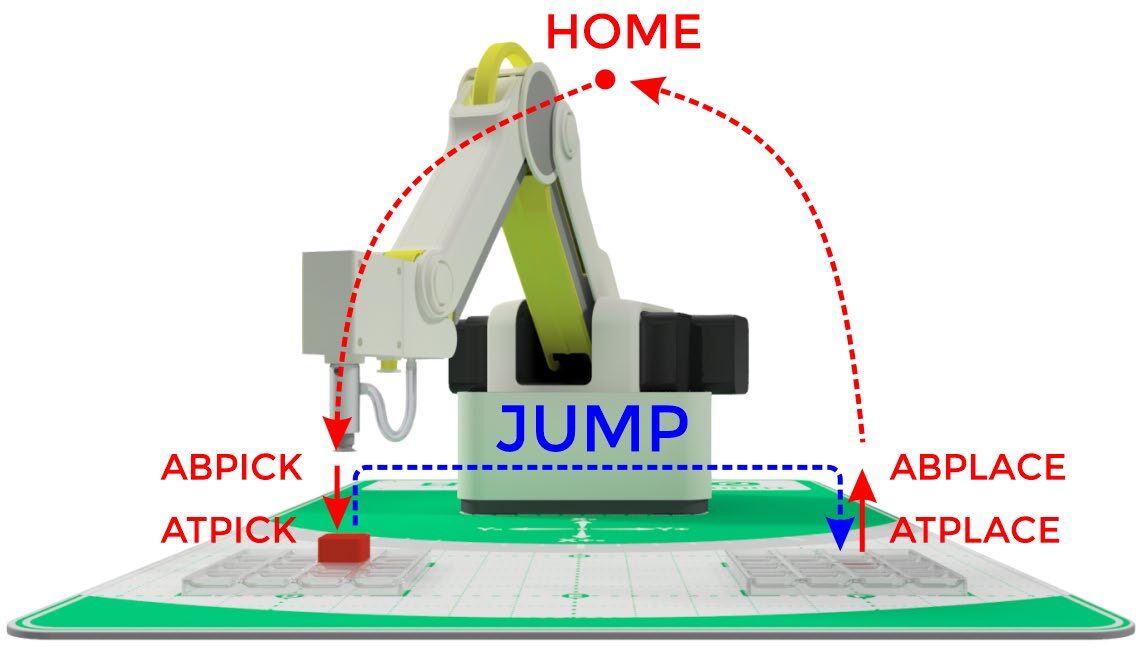
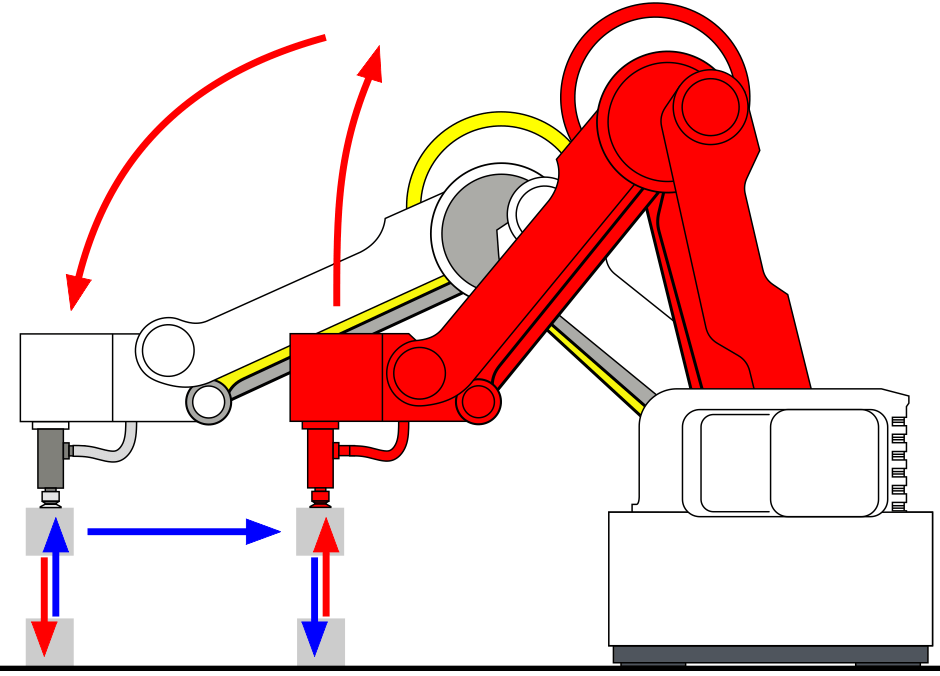
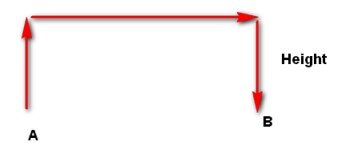
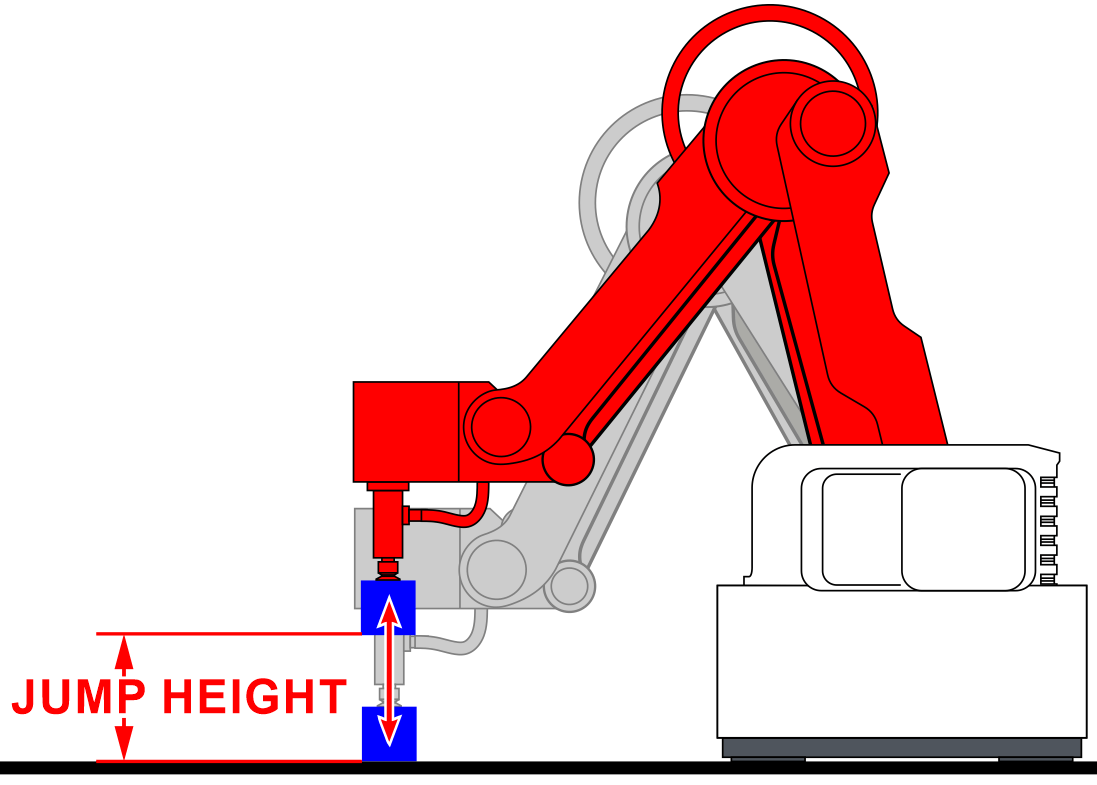
JUMP Movement – A JUMP movement combines three steps into one. It combines the retract, move over, and back down movements into one step. This type of movement simplifies repetitive movements such as dipping operations or soldering operations. The Z Height for the JUMP movement is defined with a SETTING block.
A JUMP movement does not replace the initial ABPick to ATPick as well as the final ABDrop.
First identify what portions of the last program, if any, can be replaced with a JumpTo command.
After the suction cup is turned on, there is a group of code that is an UP-OVER-DOWN. We will combine these three steps into one JUMP.
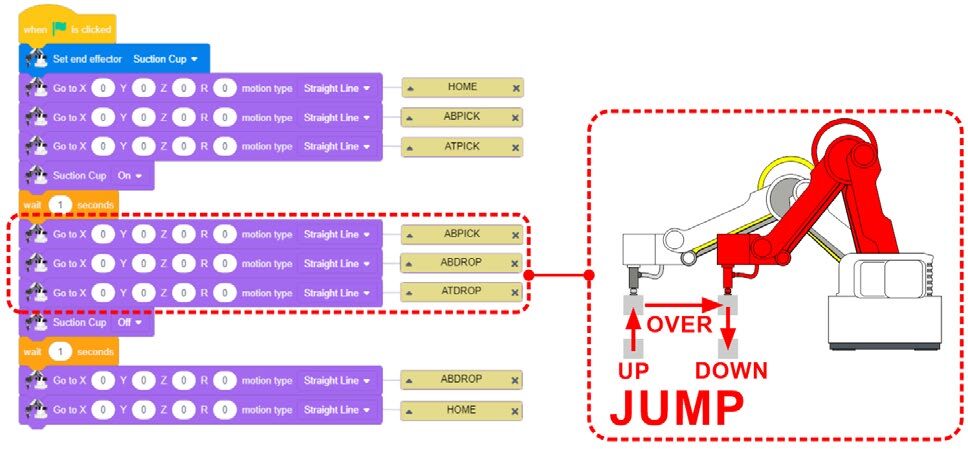
5. Isolate the section of code to be replaced and pull it off to the side (we still need the ATDROP coordinates).
Does the Jump command make writing a program any easier?
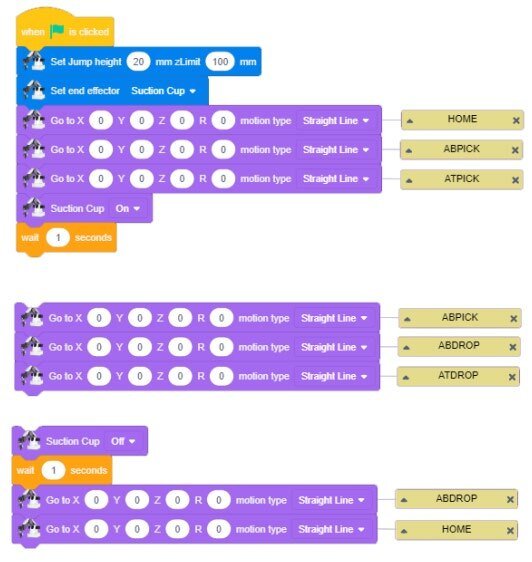
6. From the MOTION category, drag over a JUMP TO XYZR. Fill in the coordinates with the values for ATDROP (the final point we would like to JUMP to) and add a comment to the block. Reassemble the code with the new JUMP line.
That definitely makes your program shorter and more efficient.

7. Run your code to ensure proper operation.

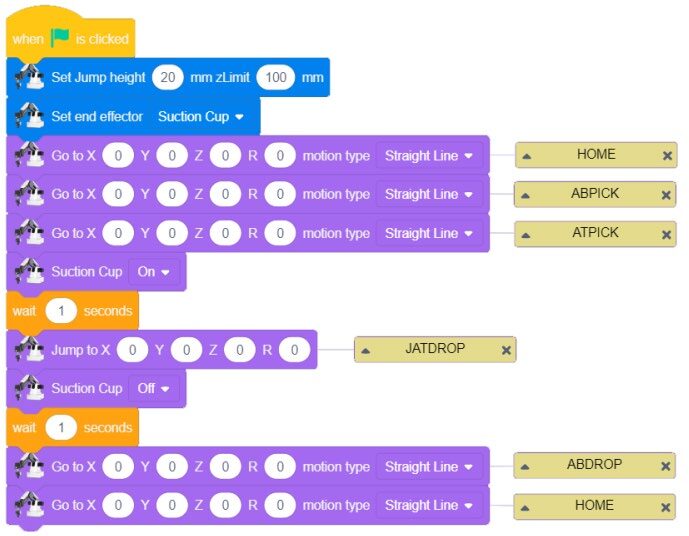
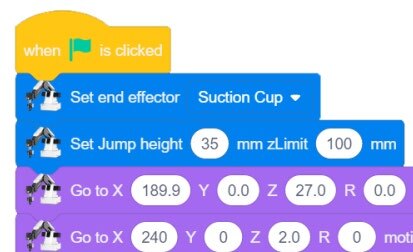
8. Next, we want to add a command that will allow us to control the JUMP Z Height. Drag over a SET JUMP HEIGHT from the SETTING category.
The JUMP height is a relative coordinate, not an absolute coordinate. We want the jump height to be the distance we want the JUMP to travel up for its current location.
Example:
ABPICK Z = 2.0 ABSOLUTE
ATPICK Z = -33 ABSOLUTE
JUMP HEIGHT = (33 + 2) = 35

Since this is a setting command line, we will add it to the top of our program where we assigned the EoAT. This step can be added anywhere in the program, as long as it is placed before the jump command is used.

If your set up did not work correctly the first time, what did you have to do to make it work?
9. Next, we are now going to make the program loop, or repeat, a certain number of times.
To do this we will be using the REPEAT block from the CONTROL category and the while loop – both can be found in the Loops section on the left.

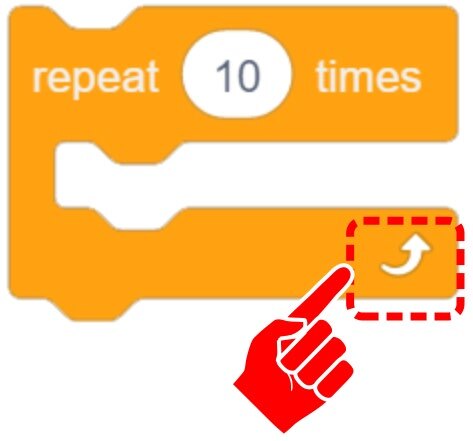
The white arrow at the bottom of a C Block (referred to as a “C” block because of its shape) indicates that the original condition will be re-checked to see if it is still true at the end of each loop. If it is, the loop will run again. In this example, our condition is the number of times to REPEAT. The REPEAT will loop until the condition is no longer true.
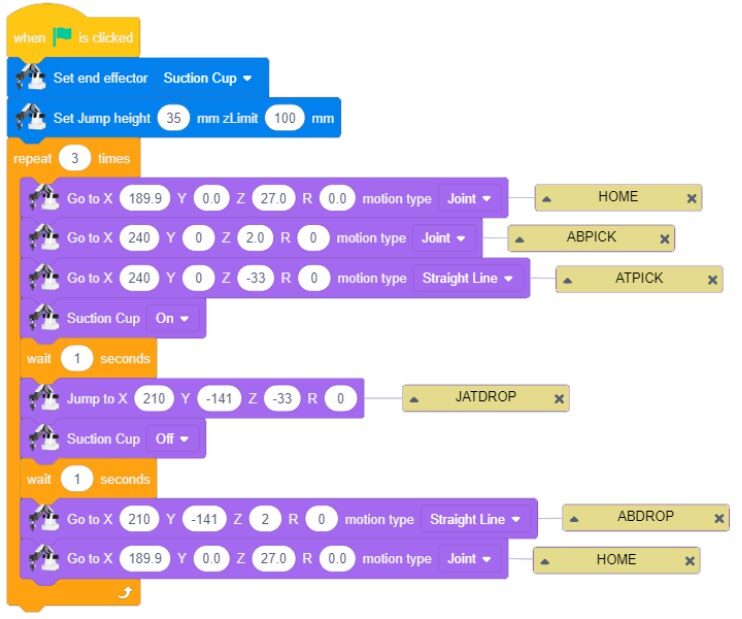
Drag only the operations we wish to repeat into this “C” block. We will leave the rest of the program outside of the loop.
Edit the REPEAT block to make this section run 3 times.
10. Run your code to ensure proper operation.

Often, we need a section of code to run FOREVER instead of a set number of times. To do this, we will use a FOREVER block. Drag over a FOREVER block from the CONTROL category. Replace the REPEAT block with the FOREVER block and test your program.
Run your code to ensure proper operation.


If we select the Repeat Loop to be deleted before the program section is pulled out of the loop, it will delete the loop and everything it contains.
Notice that once the program drops off the block and returns to its safe position, it goes back to the start of the program to try to pick up another block and that this will continue repeating indefinitely until you hit the stop button, or the robot is turned off.
If your set up did not work correctly the first time, what did you have to do to make it work?
Teaching Tips:
CONCLUSION
- What is the difference between a forever loop and a repeat loop?
- Can a loop be placed inside another loop? Give an example of how you might use this when programming in Blockly.
- Describe in your own words how a JumpTo command works. Why is it good programming practice to use JumpTos?
GOING BEYOND
Finished early? Try some of the actions below. When finished, show your instructor and have them initial on the line.
- Nesting Loops – Produce 2 different pick and place routines. Routine 1 will repeat three times then routine 2 will repeat twice. This process will loop routine 1 and then 2 forever.
- Produce a repeat loop for a dipping operation. Use the JumpTo when appropriate.