Lesson Modules
Teaching Tips:
PROCEDURE
Caution: NEVER wire anything to the Dobot Magician while it has power on. ALWAYS turn it off before making connections or damage to the robot could occur. Be sure to ask your instructor if you have any questions.
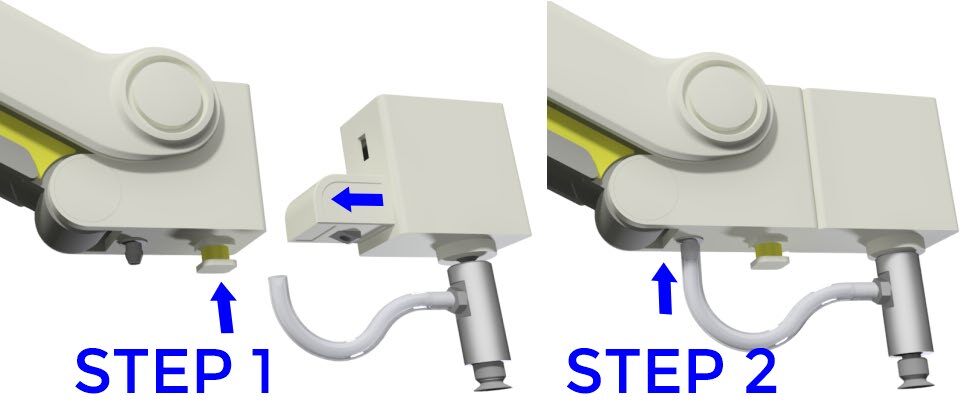
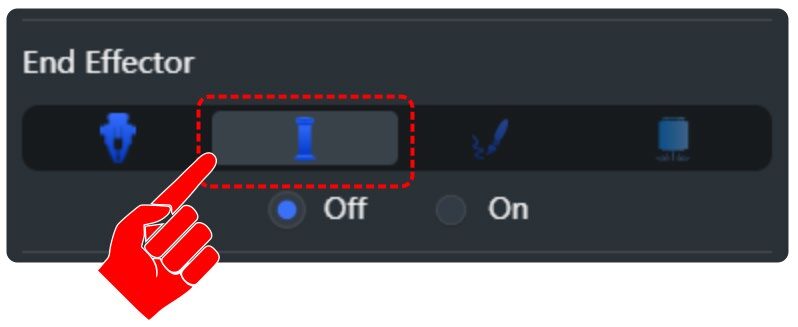
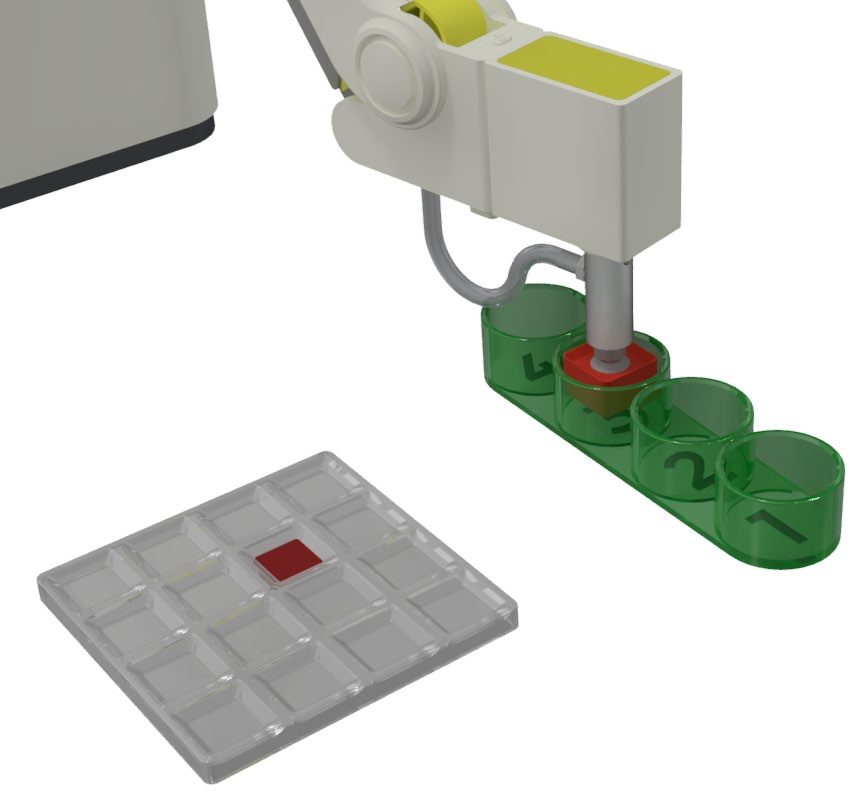
1. Attach the Suction Cup to the robot as shown below.
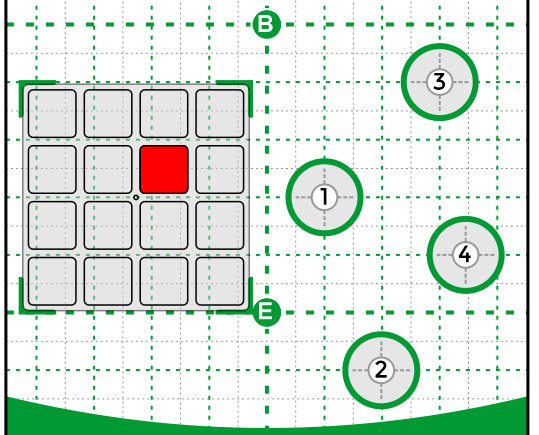
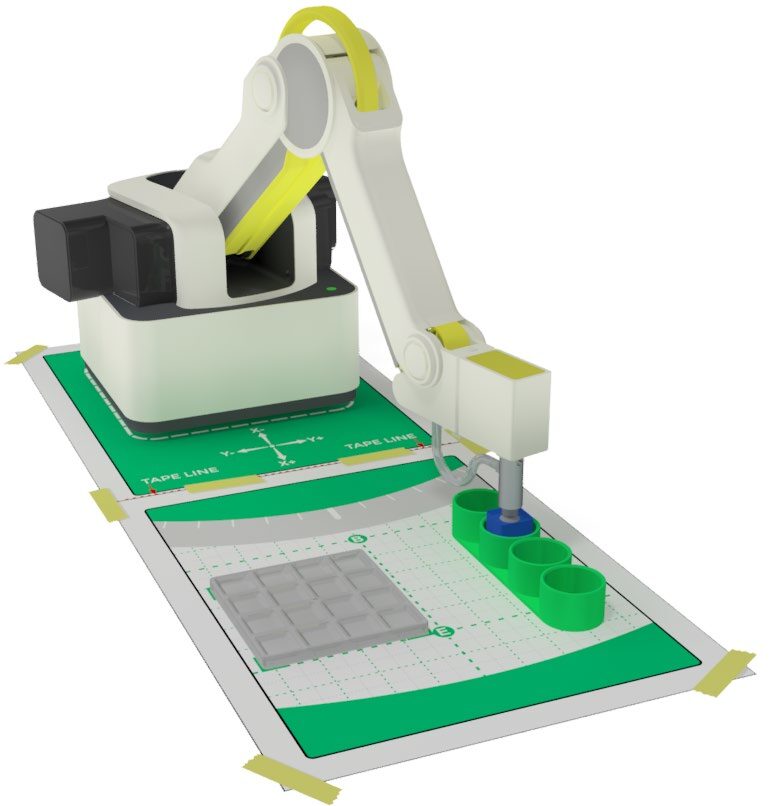
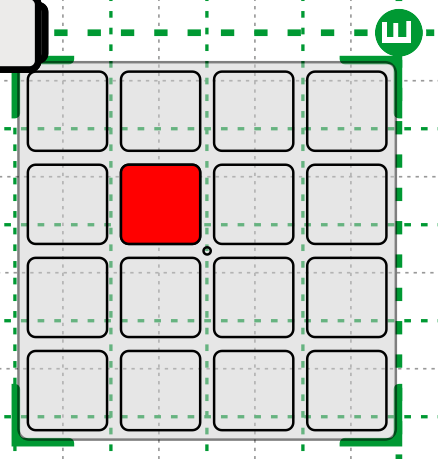
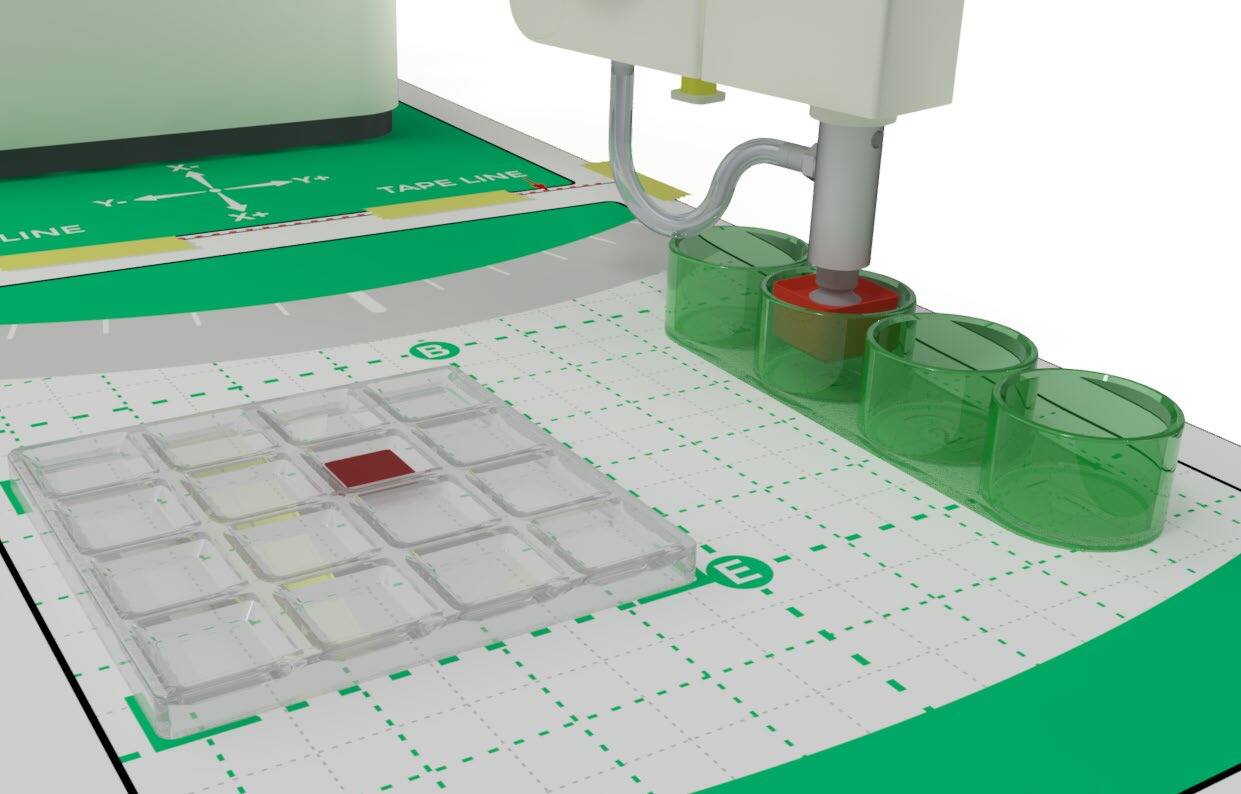
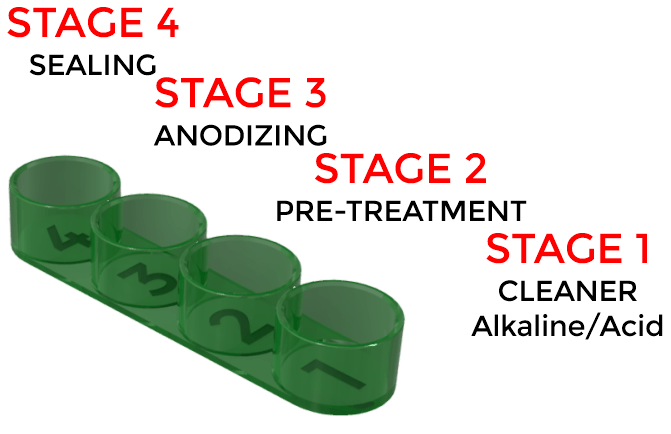
2. Set up the Dobot dip tank field diagram as shown below.

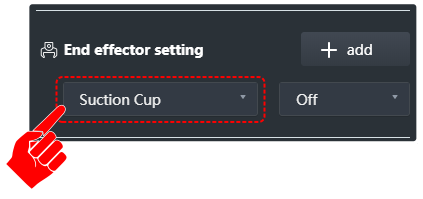
3. Open DobotLab software, open the Teach and Playback Lab, connect and home the robot, and be sure the Suction Cup is chosen as the END OF ARM TOOLING (EoAT) in both the ARM CONTROL PANEL and the COMMAND CONTROL PANEL.
4. Once the robot is setup, create the rough sequence to perform the following actions:
- a. Go home
- b. Pick up the cube from the pallet
- c. Dip it in Tank 1 for 2 seconds
- d. Jump the object and dip it in Tank 2 for 2 seconds
- e. Jump the object and dip it in Tank 3 for 2 seconds
- f. Jump the object and dip it in Tank 4 for 2 seconds
- g. Move the part back to the pallet.
- h. Go home
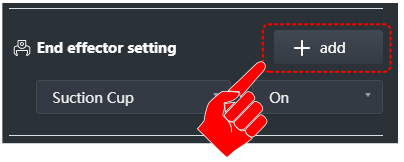
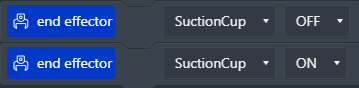
5. Be sure to turn on/off the Suction Cup when necessary.
6. Hit the Play button to run your program and see what happens. Did it work the first time? If not, what did you have to change to make it work?
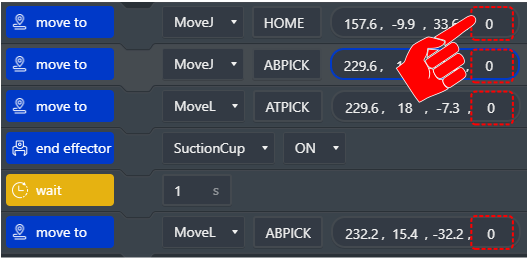
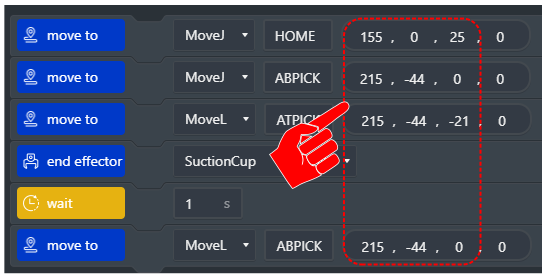
7. When recording points using the lock button, it is not always very accurate. When you look at all the Z values of all the above tank positions, they are probably very different.
We can make them all the same by clicking on the values and typing in a value that works well; this is called TEACHING. When fixing points like this it is also called TOUCHING UP points.
 You can even use this method to touch up the x and y values of the tanks to make sure they are in a straight line.
If you are using cubes, change all of the Roll Angles to zero as we did in Activity 2.
8. How many lines of code did it take to write the program using what you have learned before? How many points did you have to teach it?
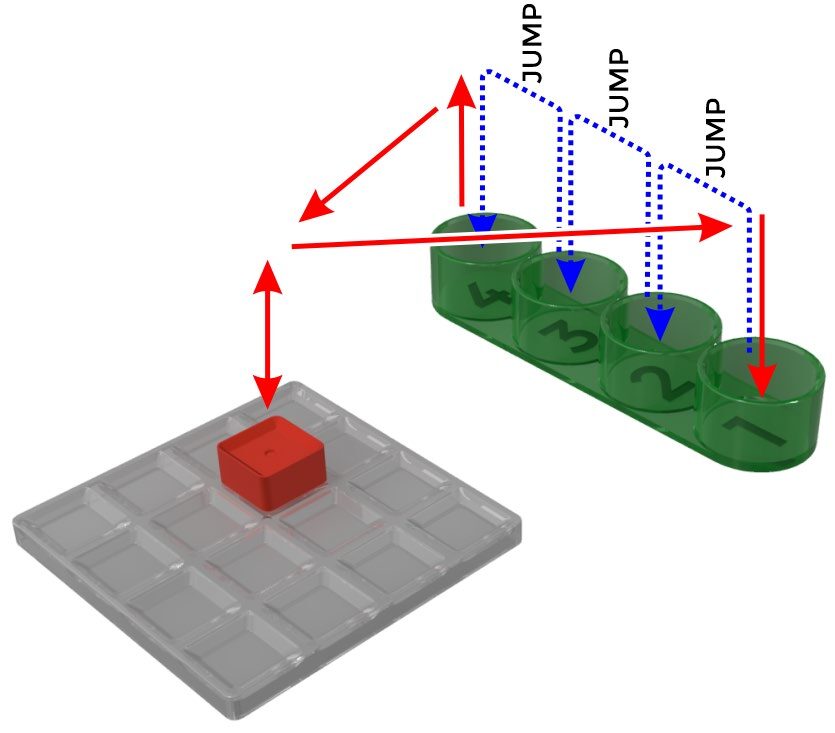
9. Now we are going to use the JUMP command to make the program even easier, and much more accurate. Open a new program.
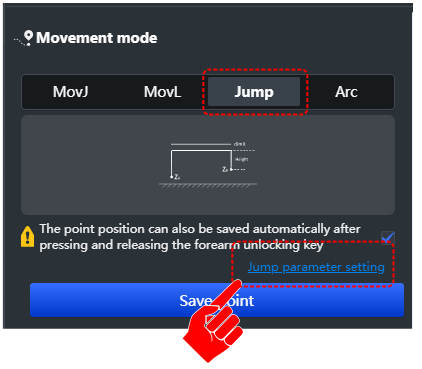
What is a JUMP? A JUMP movement combines three steps into one. It combines the raise up, over, and back down to the same Z level at new location. This type of movement simplifies repetitive movements such as a dipping operation or soldering operation. The Z Height is defined in the JUMP parameters in the settings menu.
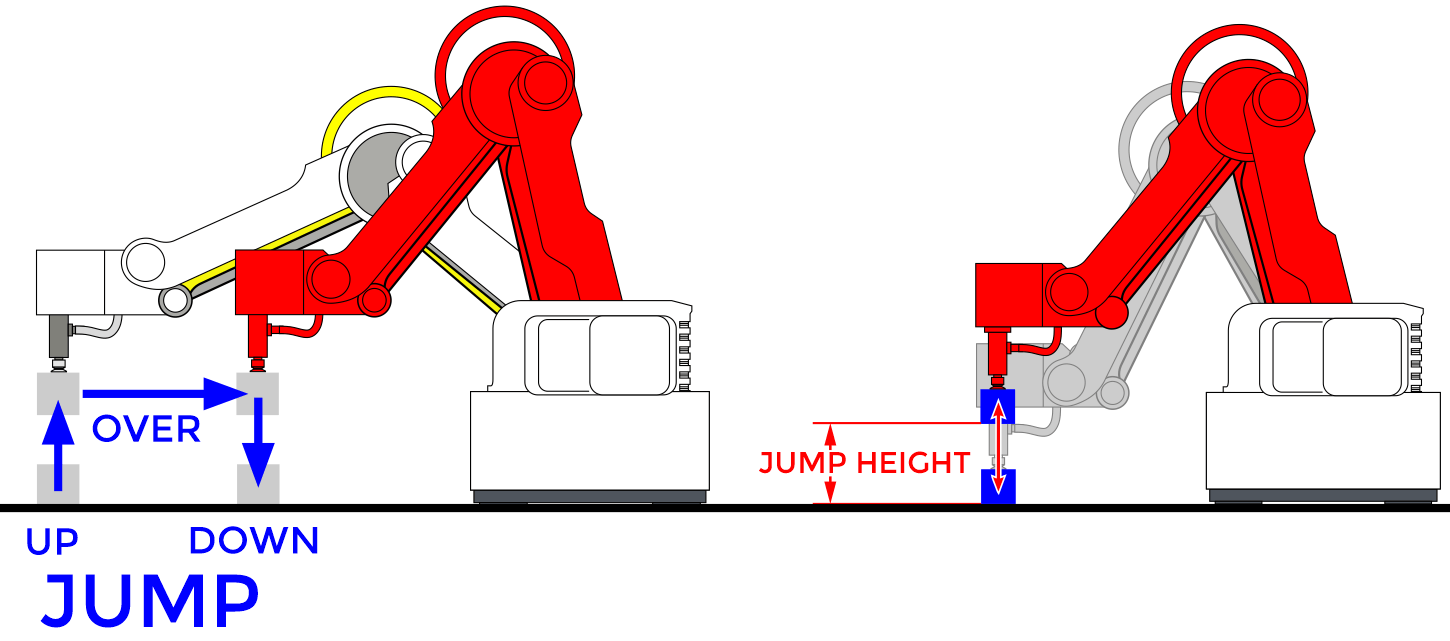
A JUMP movement does not replace the initial ABOVE position or the initial AT position or ABOVE the final position. It is only used to RAISE UP / MOVE TO A DIFFERENT POSITION / RETURN TO Z FROM LAST POSITION.
EXAMPLE:
- HOME
- ABPick
- ATPick
- JUMP to ATPlace (Blue)
- ABPlace
- HOME
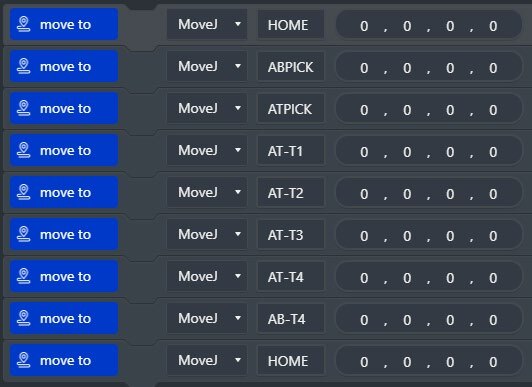
10. This time, only record the following points:
- Home
- Above Pick and At Pick
- At Tank 1
- At Tank 2
- At Tank 3
- Above Tank 4 and At Tank 4
- Home
Do not record any above points except for Above Pick and Above Tank 4. Jumps will replace these points.
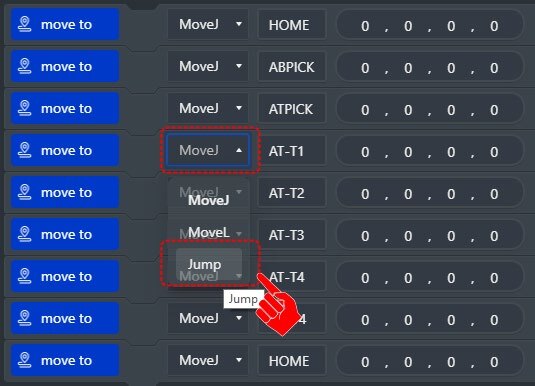
11. Now change the MotionStyle of the Tank 1, Tank 2, Tank 3, and Tank 4 to JUMP. Double click on the MotionStyle box for each point and change it from MOVJ to JUMP.
Now play the program. What does this change do to the program?

12. Adjusting Jump Height
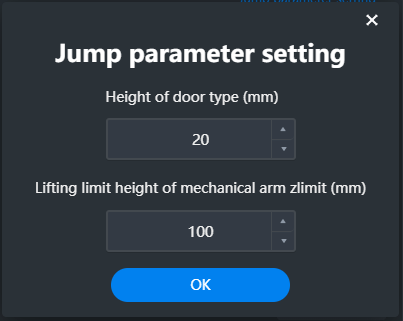
To change the Z height for JUMP, open Jump Parameter Settings and edit the value. This lets you clear the tank safely.
Compare the first dipping program to the second with JUMPS—how is it more efficient?
13. Now add the missing steps to finish the sequence:
- Move Linear Movements (MoveL)
- Pause for Time
- Suction Cup On and Off
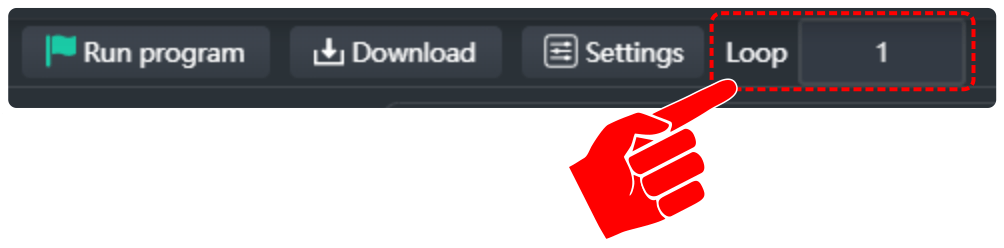
14. Next, add the ability to make the robot repeat the operation five times. Do this with a process called LOOP. LOOPS will make something happen multiple times so that our program is shorter and more efficient. In the TEACH AND PLAYBACK LAB, the loop function will loop the entire program from start to finish. We do not have the ability to control how much of the program will loop or even if it should loop (a conditional loop).
15. To make your program LOOP multiple times, just add the number of times you want it to repeat in the loop window.
16. Be sure to save your work when done.
Teaching Tips:
CONCLUSION
- Describe a MOVL move using the Dobot.
- Describe a MOVJ move when using a Dobot.
- What makes a Jump command more efficient to code than a MOVJ or MOVL?
- What kind of manufacturing process is dipping? Explain your answer.
- Anodizing is a manufacturing process. Explain how it works and why we do it.
GOING BEYOND
Finished early? Try some of the actions below. When finished, show your instructor and have them initial on the line.
- Take away the first tank and change the program to fix the operation using the software.
- Add another tank and change the program to fix the operation using the software.
- Raise the tanks using a block of wood provided by your instructor and fix the operation using the software. What is the most efficient way to do this?
-
Randomize the tank patterns for the dipping process.