Lesson Modules
Teaching Tips:
PROCEDURE
Caution: NEVER wire anything to the Dobot Magician while it has power on. ALWAYS turn it off before making connections or damage to the robot could occur. Be sure to ask your instructor if you have any questions.
1. Typical Start Up Procedure
- Disconnect any existing END of ARM TOOLING (EoAT).
- Carefully disconnect any existing vacuum tubes.
- Press and hold the release button on the bottom of the arm and pull off the EoAT.
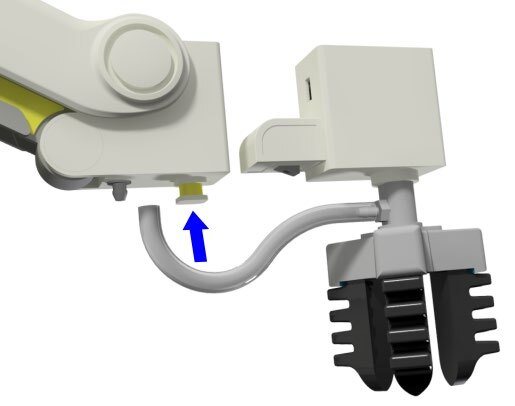
2. Attach the Soft Gripper
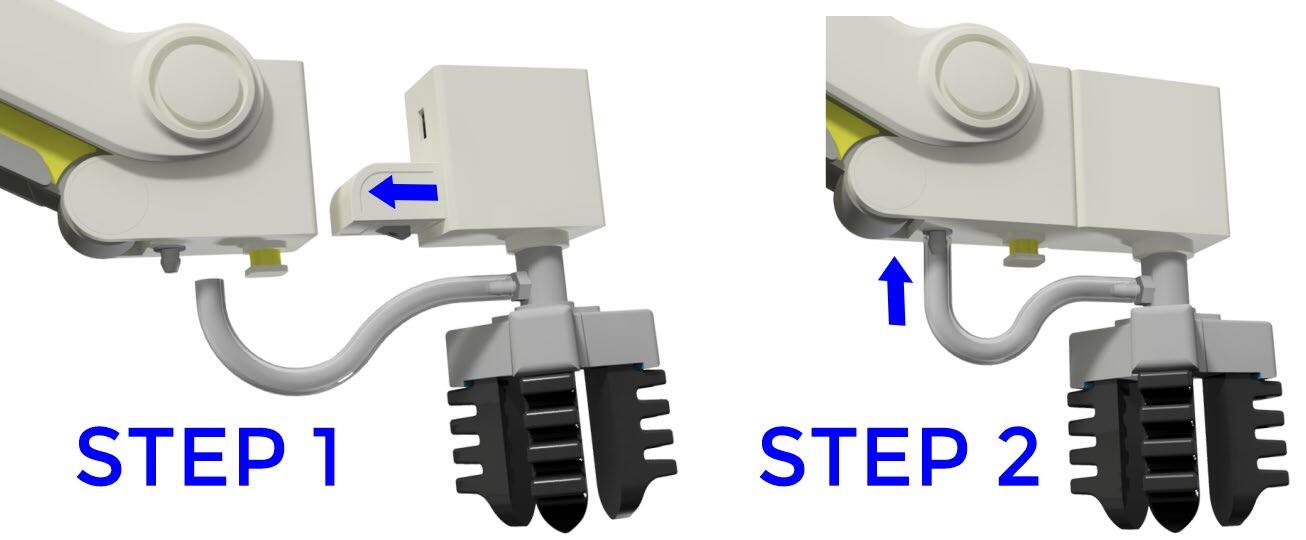
- STEP 1 – Push the Soft Gripper in until it snaps in.
- STEP 2 – Attach the hose to the air nozzle.

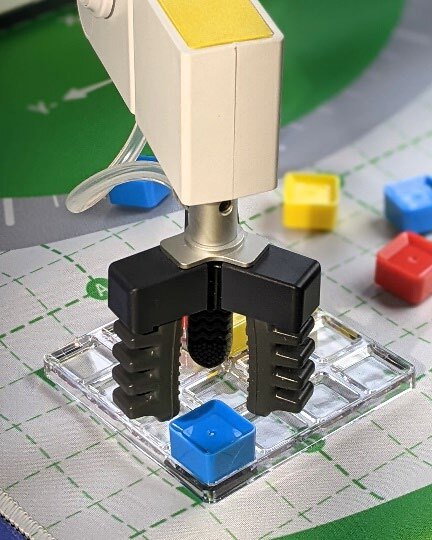
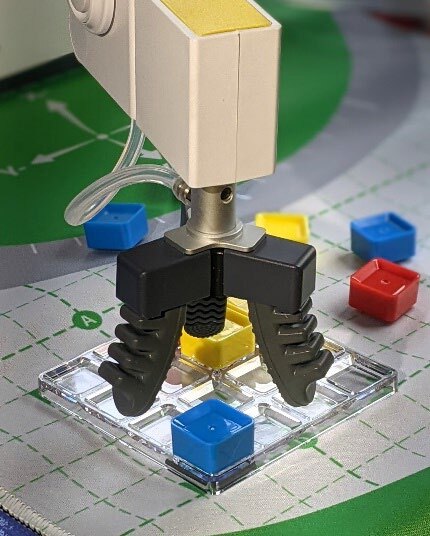
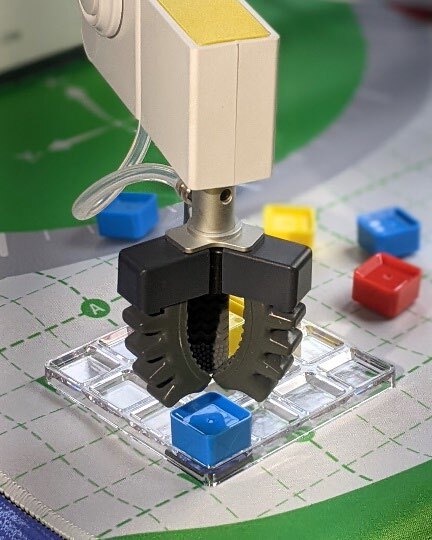
The soft gripper works by inflating or deflating the device with an internal pump in the robot. Blow air into it and it closes; Suck air out of it and it opens! There is also a Disabled mode when the air pump is turned off.
Soft Gripper Modes of Operation



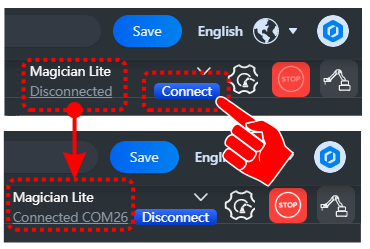
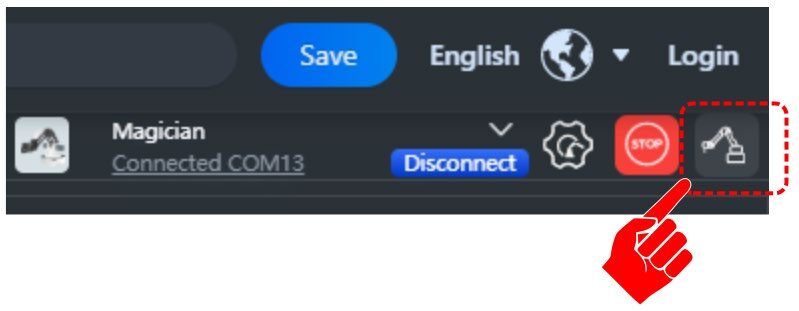
1. Open DobotLab software, enter the Teach and Playback Lab, and connect the robot.

2. Open the Arm Control window and Home the robot, making sure the work envelope is clear.

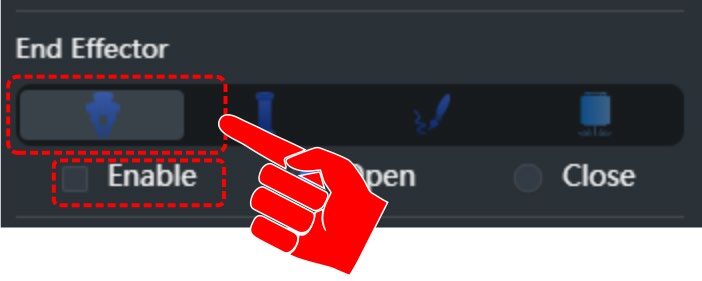
3. Be sure the Gripper is chosen as the END EFFECTOR (EoAT).
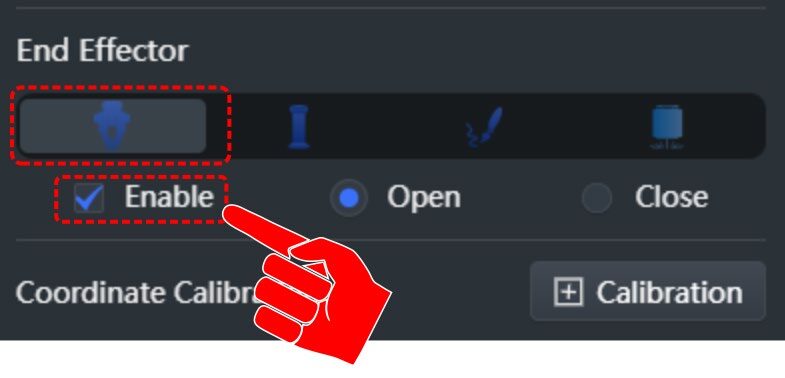
 The END EFFECTOR only needs to be Enabled when the gripper needs to be active. We will activate it later in the activity.
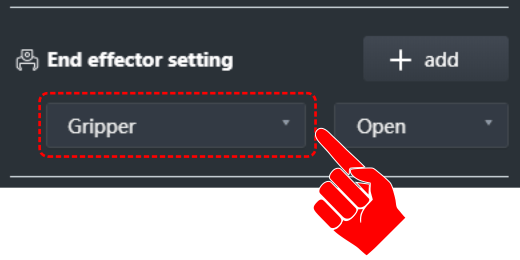
4. Select the Gripper in the End Effector Setting so the open/close actions can be recorded.
5. X / Y Axis Identification
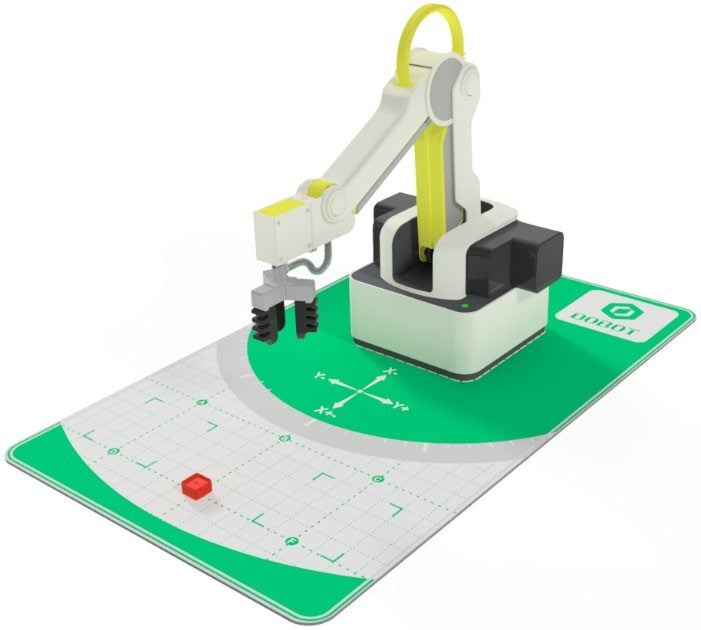
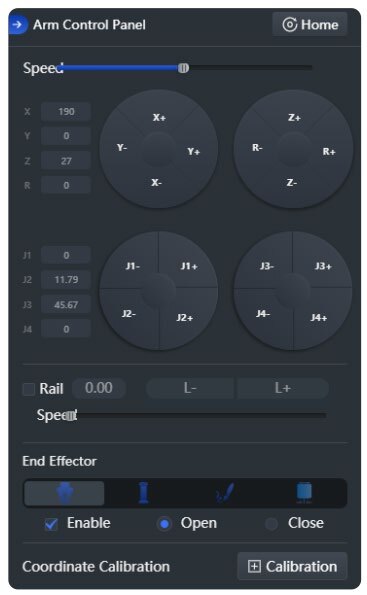
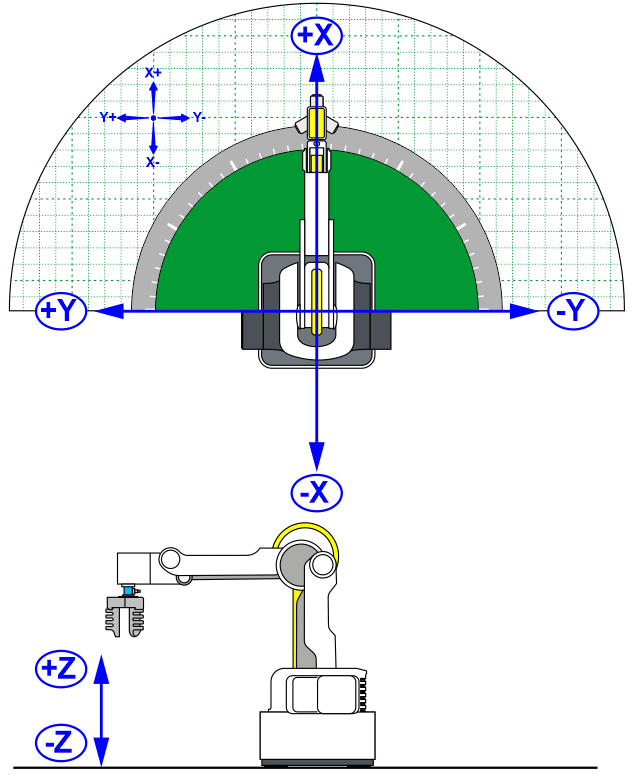
Open the Arm Control Panel and move the robot around. Using the diagram below, identify the X and Y axis on the robot. Mark which direction is positive and which is negative (+/−).

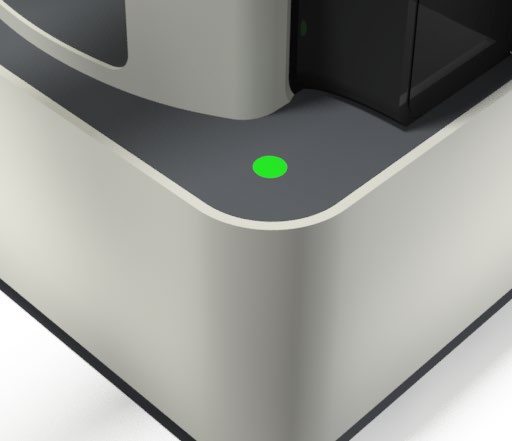
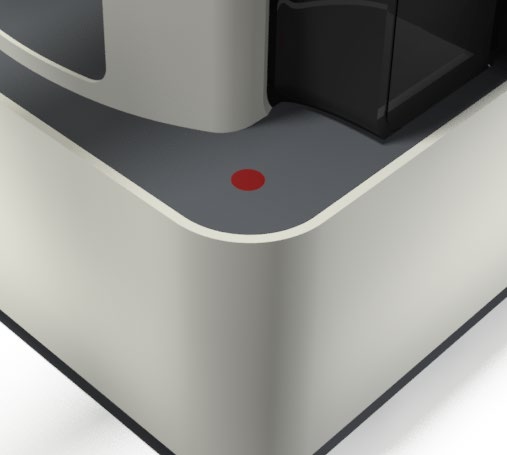
If you move the arm too far you will get an error, the light on the robot will turn red, and the arm will stop moving. Hit the opposite axis button until the light turns green again and the arm starts moving.
LIGHT INDICATORS
GREEN = READY RED = LIMIT REACHED or IMPACT

6. Place a cube
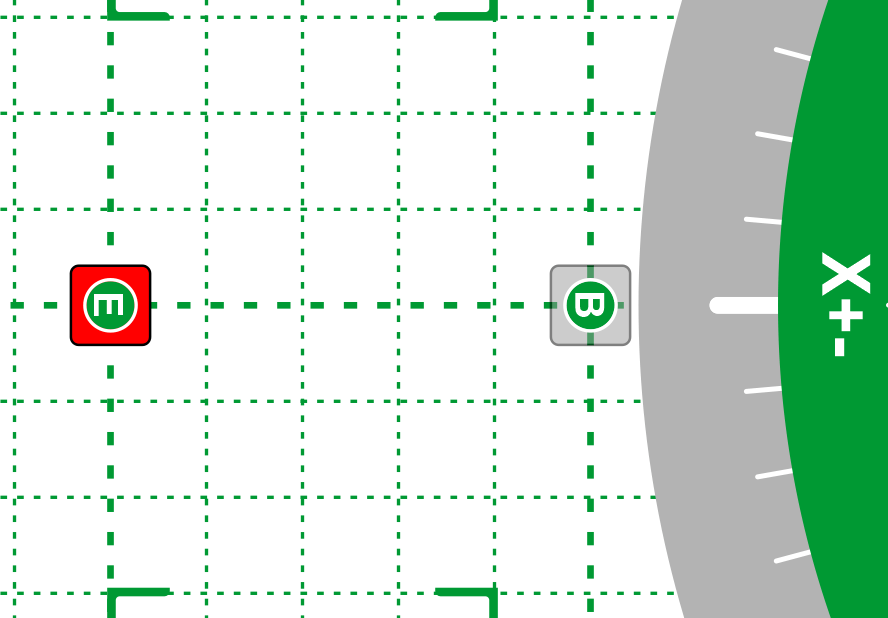
Place a cube on letter “E” on the field diagram. The cube will be picked up at E and placed at B.
7. Record Pick & Place Points
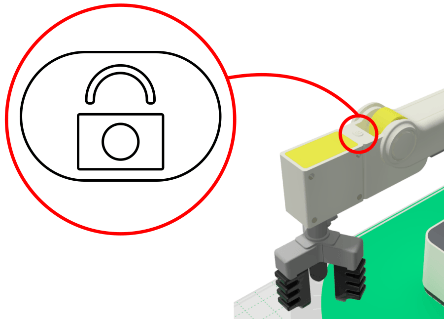
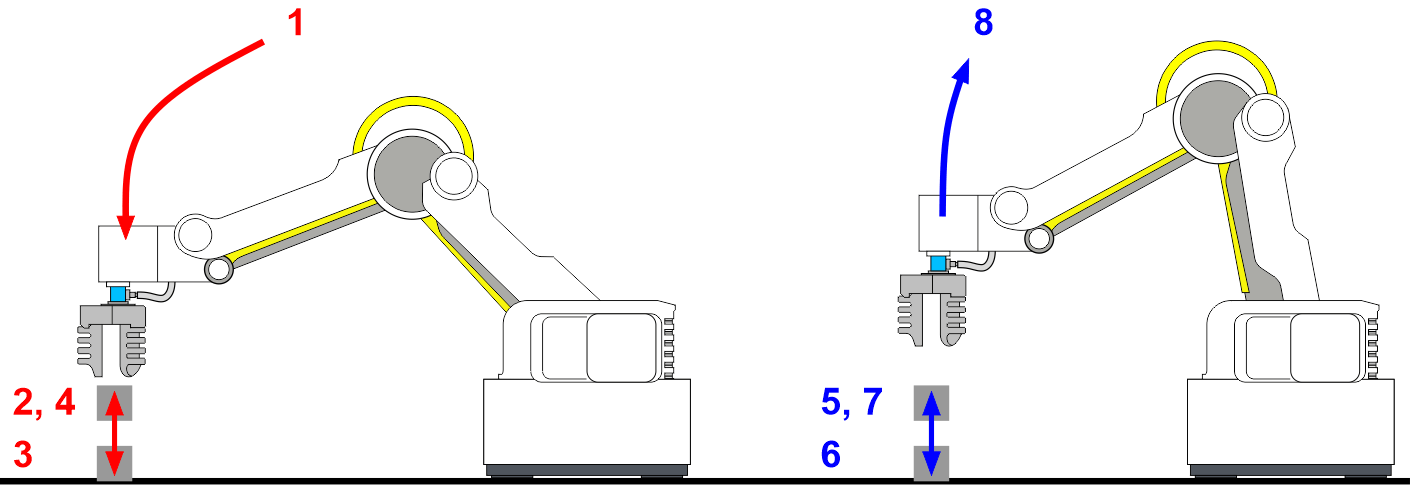
Use the “Lock” button on the arm to record all the positions in this order:
- 1 – Home
- 2 – Above Letter E (ABPICK)
- 3 – At Letter E (ATPICK)
- 4 – Above Letter E (ABPICK)
- 5 – Above Letter B (ABPLACE)
- 6 – At Letter B (ATPLACE)
- 7 – Above Letter B (ABPLACE)
- 8 – Home
8. Name the positions in the name column of the program

Be sure to name the positions something relevant so that others will be able to tell what the positions are. Example: A point named ABPICK means the point above the place where the object is picked up.
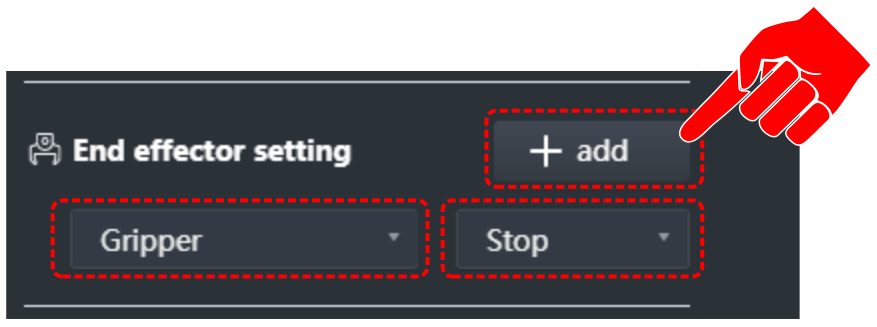
9. Add Open/Close Gripper Steps
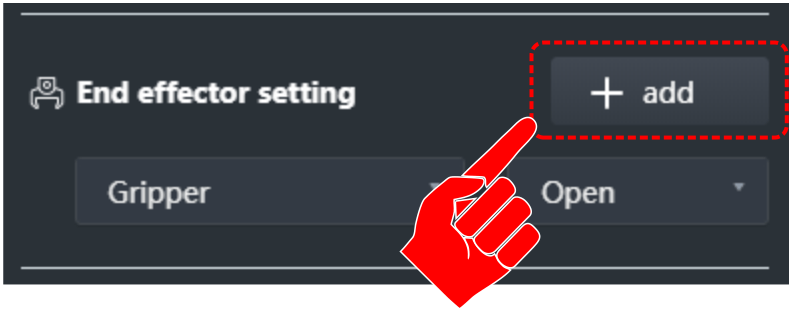
Select the Add button in the END EFFECTOR Settings window. This adds a step at the end of your program. Drag it into the correct position. Repeat to open the gripper when the object needs to be released.


Right-click on each step (one at a time) and select Execute. This lets you step through the program to find any errors before running the entire program. Make edits as necessary.
NOTE: The gripper will AUTOMATICALLY become active (pump on) when an open/close step is executed. It can also be manually activated and deactivated by selecting or unselecting the nable options for the END EFFECTOR in the Arm Control Window. The pump will switch modes hile opening and closing the gripper (the sound coming from the pump will alternate when the ode is switched). One mode produces pressure to open the gripper while the other mode roduces a vacuum to pull the gripper closed.
10. Select the “Run” button to run your entire sequence and see what happens.
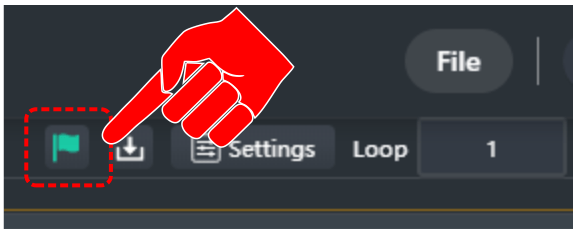
Click the Run button in DobotLab to execute your program. Watch the robot perform the pick and place sequence you recorded.
Did it work the first time? If not, what did you have to change to make it work?
11. Keep the gripper parallel
If you are using cubes, keep the gripper parallel to the robot by changing all Roll Angles to 0°…
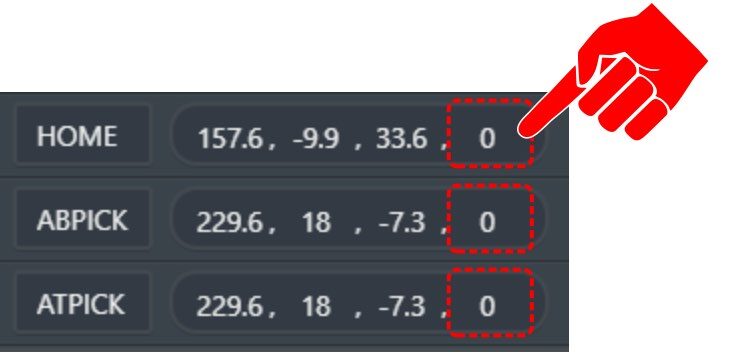
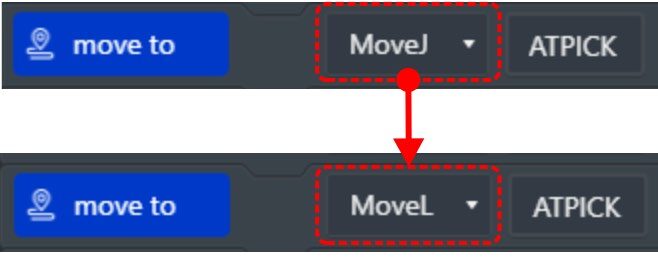
12. Change step #8 (At Pick) to Move Linear (MOVL). Run the program.
What changed? Which positions should be Linear movements, and which should/could be Joint movements? Edit the sequence accordingly.
13. Add Pauses
Add pauses between steps to allow the gripper to fully open or close. One-second pauses are sufficient for this activity. Drag each new pause to the correct spot.

Add additional pauses where needed; use them when building up full pressure or vacuum before picking up or letting go.


14. Add a step at the end to stop / turn off the pump.
15. Save your work.
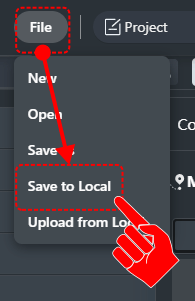
Teaching Tips:
CONCLUSION
- Did this gripper work well to pick up the small cubes? Was it easy? What are some issues you might have with this type of gripper?
- Was your robot very accurate with this gripper? Example: could this gripper be used to stack the cubes? Explain why or why not.
- How can you get the suction to turn on in time to pick up the part, or get it to shut off in time to drop it off correctly? Explain below after you have tried it in the program.
- What happens if you try to pick up something different, like a marble or small sphere? Ask your instructor for some different objects to try. What kind of objects does this gripper work well with?
GOING BEYOND
Finished early? Try some of the actions below. When finished, show your instructor and have them initial on the line.
- Have the robot reverse the process and put the cube back in its original place.
- Make the process happen multiple times.
- Adjust the speeds and acceleration to increase efficiency but not lose accuracy.
