Lesson Modules
Teaching Tips:
Before Class
Determine which of these modules you need to review with students before lessons begin. Each of these lessons/sections are located in the free "Introduction to Dobot" course. The bolded modules are included in this lesson for your convenience.
Lesson 1: Unboxing and Connecting
Unboxing - unbox your Dobot and identify all the accesories
Connecting - download DobotStudio, connect our computer to Dobot
Firmware Update - do a firmware update before you proceed
Lesson 2: Dobot Studio
Overview - quick overview of all the DobotStudio apps
Programming - introduction to Blockly
Easy Movement Control - introduction to LeapMotion and Mouse
Automated Image Tracing - introduction to Write & Draw, LaserEngraving, and 3DPrinter
Pose and Save - introduction to Teaching and Playback
Lesson 3: Gripper Attachment
Installation - how to install the Gripper attachment
Programming - how to use Blockly and Script to control the Gripper attachment
Troubleshooting - as problems arise and are sloved, the solutions are added to this section
Lesson 4: Suction Cup Attachment
Installation - how to install the Suction Cup attachment
Programming - how to use Blockly and Script to control the Suction Cup attachment
Troubleshooting - as problems arise and are sloved, the solutions are added to this section
Lesson 5: Conveyor Belt Attachment
Installation - how to install the Conveyor Belt attachment
Programming - how to use Blockly and Script to control the Conveyor Belt attachment
Troubleshooting - as problems arise and are sloved, the solutions are added to this section
Lesson 6: Pen, 3D Printer, and Laser Attachments
Installation - how to install the other attachments
Programming - how to use Blockly and Script to control the other attachments
Troubleshooting - as problems arise and are sloved, the solutions are added to this section
Observe Module
Demonstrate a program and/or watch a video of Dobot working to spark interest.
Demo Programs
1. Draw a star with the pen, using blockly
2. Sort blocks by color with the suction cup, using blockly
3. Pick and place blocks with gripper or suction cup using blockly
Video
(see class view)
Teaching Tips:
Please see the Dobot Startup Guide for more information and sample programs to try with your class.
Teaching Tips:
Challenge Solution
https://www.robotlab.com/hubfs/Dobot%20files/introToDobot_suctioncup.blockly
The difficulty level on this challenege is higher, don't worry if students don't grasp it right away.
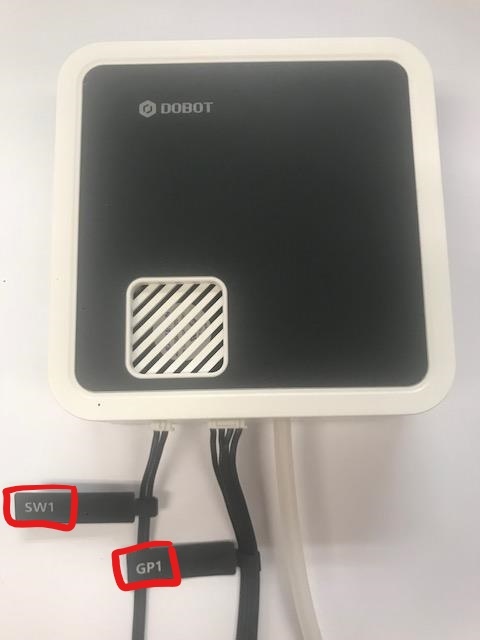
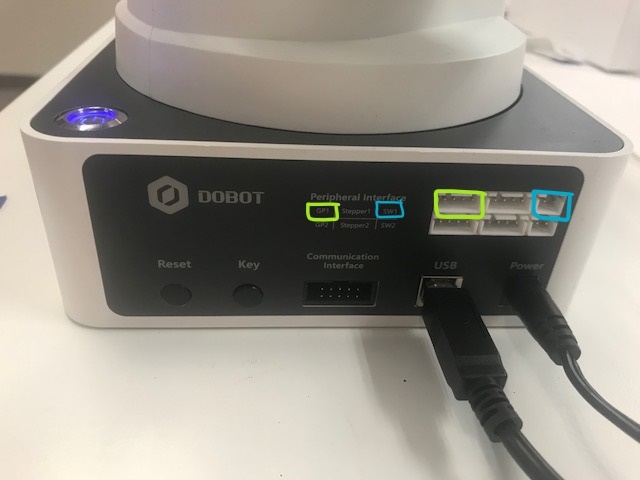
Installation
Air Pump
The air pump is the mechanism that provides gripping and suction power to the gripper and suction cup attachments. These attachments will not function without the air pump.
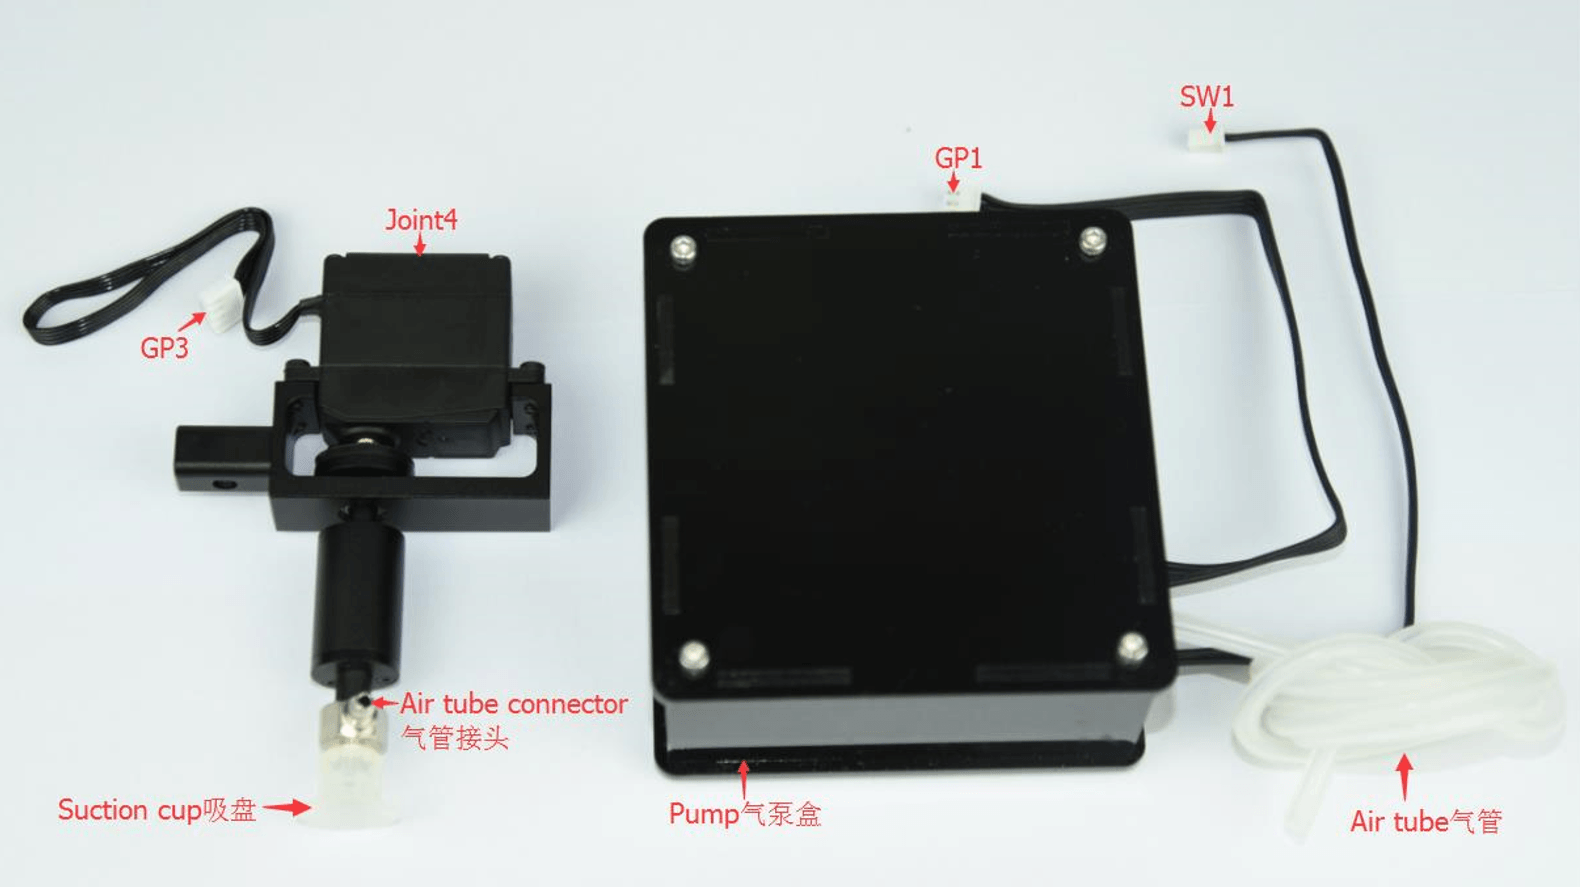
Here are the instructions to complete the air pump installation:
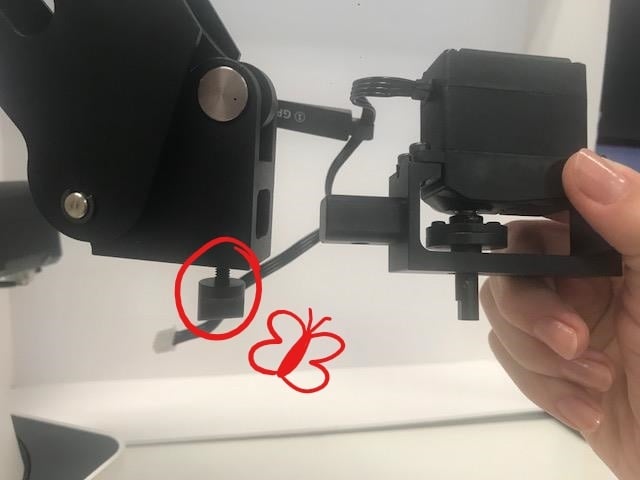
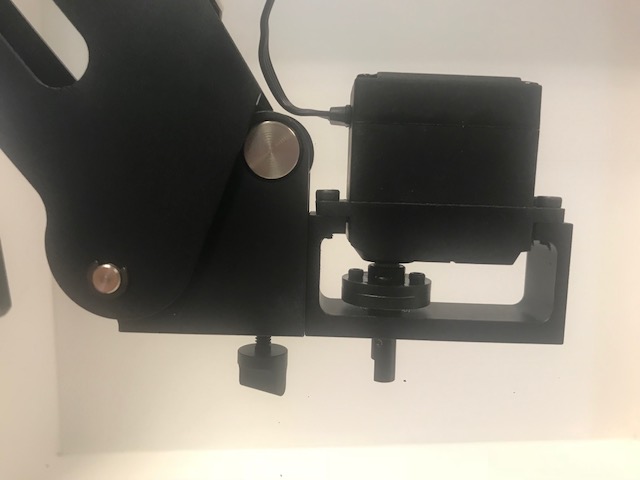
#1 Connect power line labeled SW1 on the pump box with the interface on the Dobot labeled GP1. |
|
#2 Tighten air pump kit onto the end of the Dobot with the butterfly nut. |
|
#3 Connect GP3 of Joint4 servo line with forearm connector GP3. | 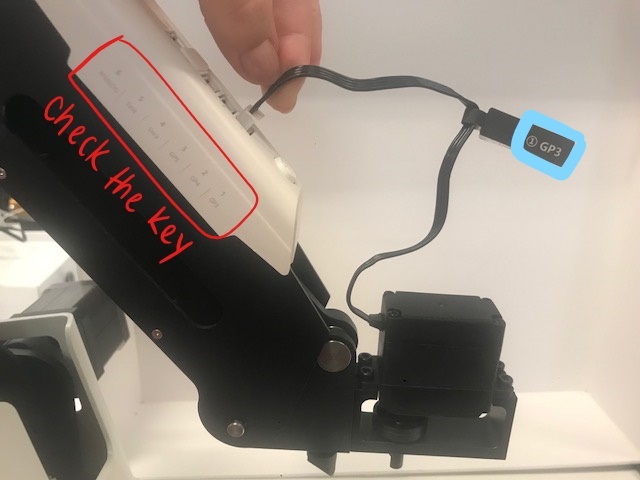 |
Pneumatic Gripper
The gripper and suction cup attachments share the same air pump kit. So when switching between those two attachments it is faster to just remove the gripper or suction cup, rather than disassembling the whole air pump.
#1 If the suction cup is attached, unscrew it from the air pump with the smallest hex wrench. (Be careful, the screws are very tiny. It might help to hold them in a water bottle cap if you are worried about misplacing them.) | 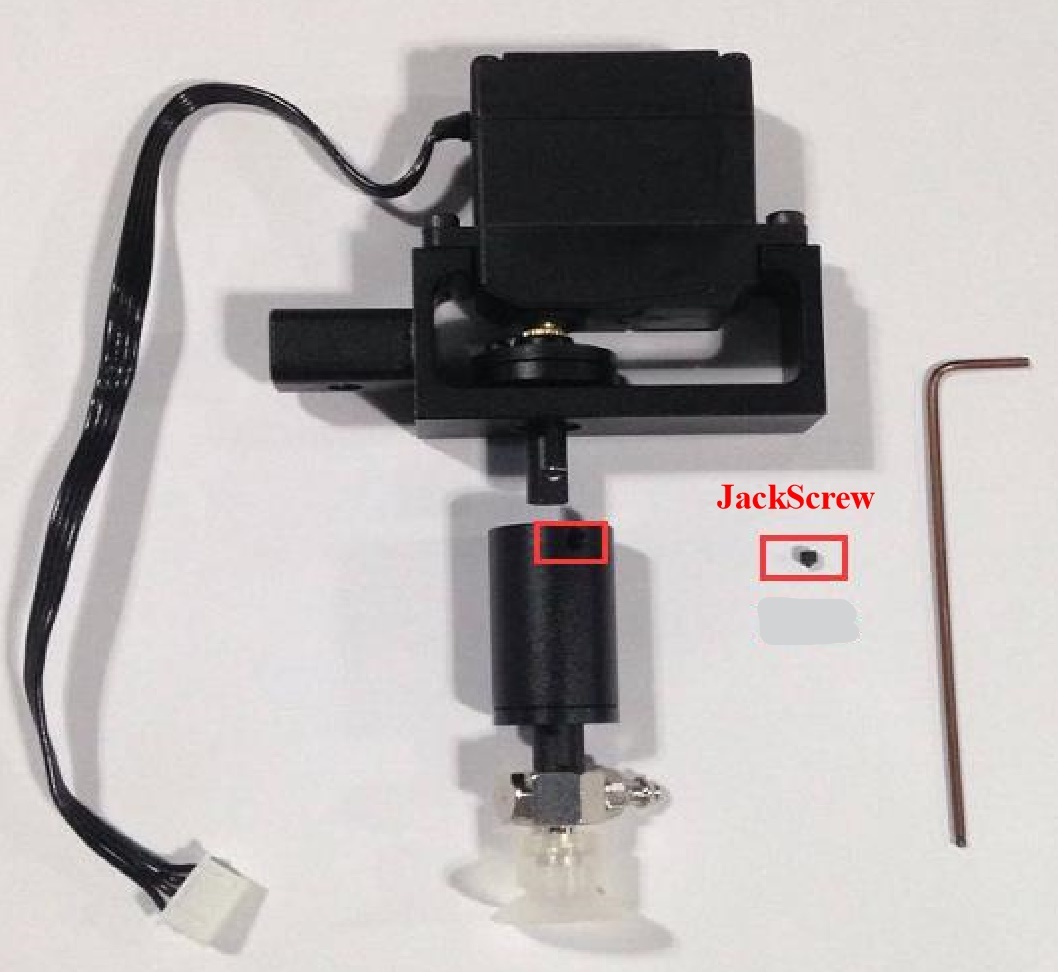 |
| #2 Install the gripper kit using the silver coupler. | 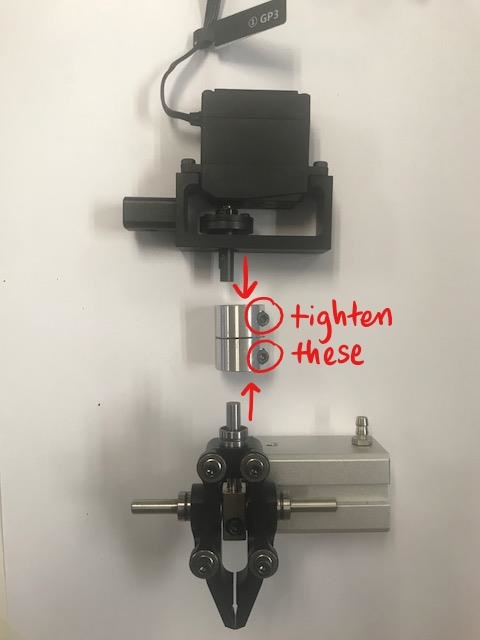 |
#3 When you are done, it should look like this: (It may help to wrap some tape around the handle of the wrench) | 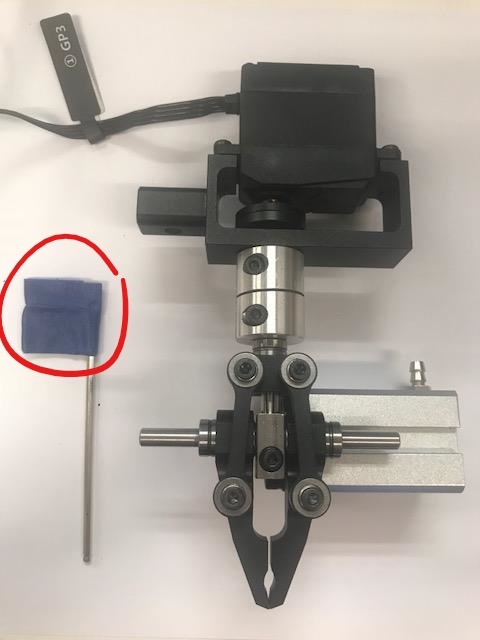 |
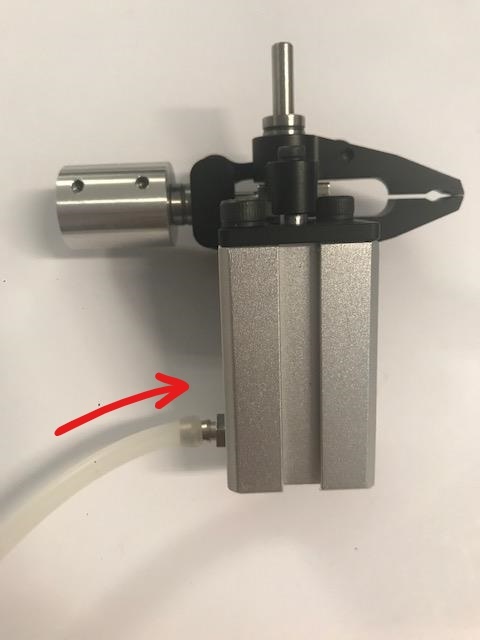
#4 Attach the air tube to the adapter. (It isn't always easy to attach the tube, don't worry, you won't break it.)
|  |
Programming
Blockly
These two blocks control most of the Gripper functionality.
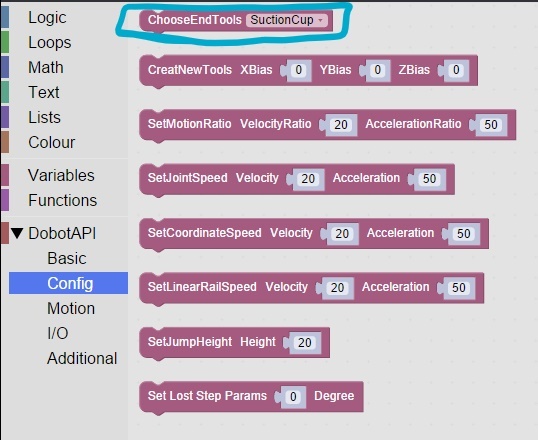
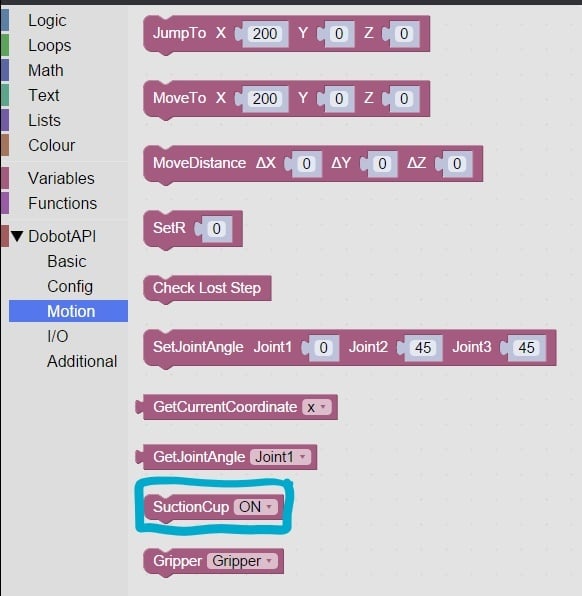
 | Choose Tool Tell the program what attachment you are using for the Dobot. This should be done at the beginning of each program or whenever |
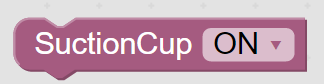 | Suction Cup On/Off Turn the suction cup on and off during the run of the program. |
They can be found here:
Here is an example of a responsive program using these blocks:
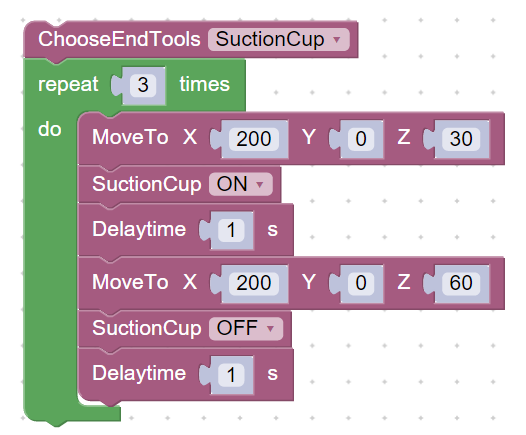 | 1. Tell the program what attachment you are using for the Dobot. 2. Repeat the inner blocks (steps 3-8) 10 times. 3. Move to a location you specify. 4. Power on the suction cup. 5. Pause for 1 second (and do nothing during this time) 6. Move to a location you specify. 7. Power off the suction cup. 8. Pause for 1 second (and do nothing during this time) |
Teaching Tips:
Challenge Solution
If students are having trouble, remind them that this sample code is a good hint!
The solution is the same, just remove the "repeat" block, and change the (x, y, z) coordinates on the "MoveTo" to whatever you like.
Installation
Air Pump
The air pump is the mechanism that provides gripping and suction power to the gripper and suction cup attachments. These attachments will not function without the air pump.
Here are the instructions to complete the air pump installation:
#1 Connect power line labeled SW1 on the pump box with the interface on the Dobot labeled GP1. |
|
#2 Tighten air pump kit onto the end of the Dobot with the butterfly nut. |
|
#3 Connect GP3 of Joint4 servo line with forearm connector GP3. | |
Pneumatic Gripper
The gripper and suction cup attachments share the same air pump kit. So when switching between those two attachments it is faster to just remove the gripper or suction cup, rather than disassembling the whole air pump.
#1 If the suction cup is attached, unscrew it from the air pump with the smallest hex wrench. (Be careful, the screws are very tiny. It might help to hold them in a water bottle cap if you are worried about misplacing them.) | |
| #2 Install the gripper kit using the silver coupler. | |
#3 When you are done, it should look like this: (It may help to wrap some tape around the handle of the wrench) | |
#4 Attach the air tube to the adapter. (It isn't always easy to attach the tube, don't worry, you won't break it.)
| |
Programming
Blockly
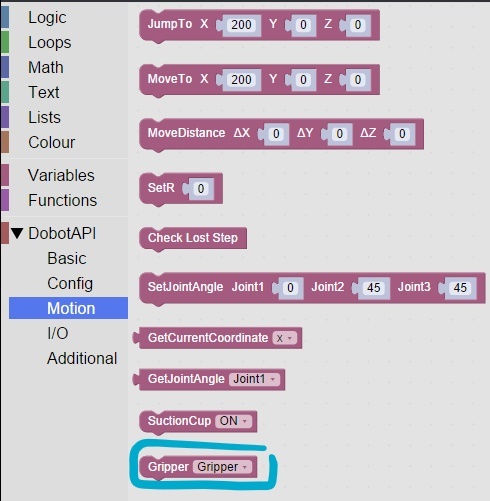
These two blocks control most of the Gripper functionality.
They can be found here:
| Choose Tool Tell the program what attachment you are using for the Dobot. This block should be placed at the beginning of each program. |
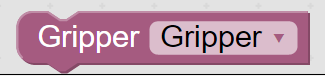 | Gripper On/Off Open and release the gripper during the trun of the program. |
Here is an example of a responsive program using these blocks:
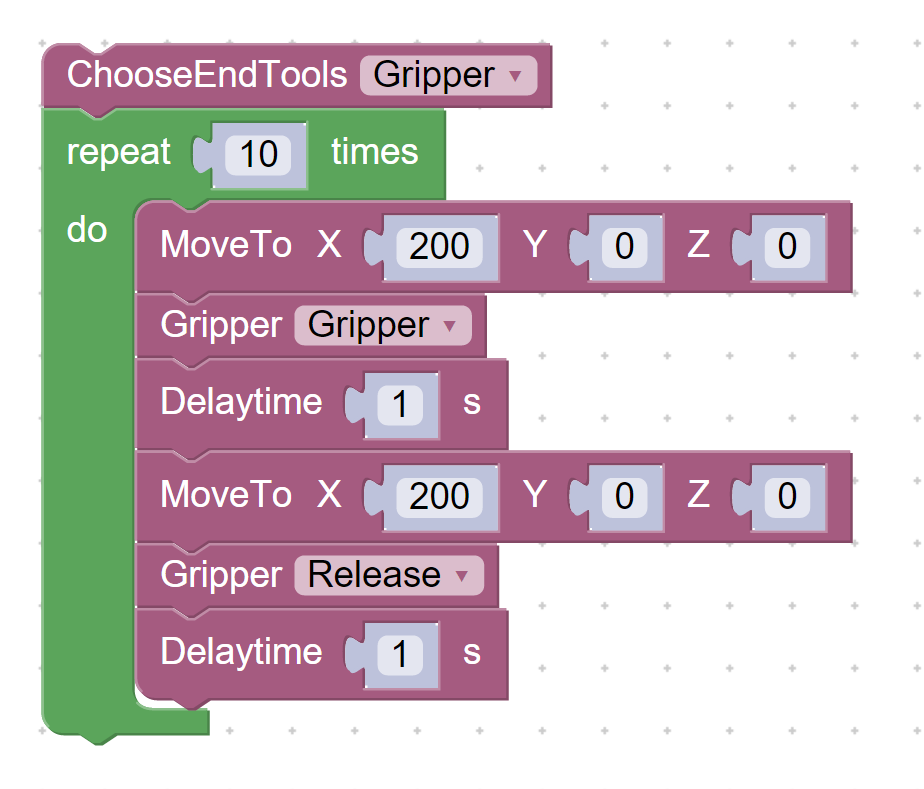
| 1. Tell the program what attachment you are using for the Dobot. 2. Repeat the inner blocks (steps 3-8) 10 times. 3. Move to a location you specify. 4. Close the Gripper. 5. Pause for 1 second (and do nothing during this time) 6. Move to a location you specify. 7. Open the Gripper. 8. Pause for 1 second (and do nothing during this time) |
Teaching Tips:
Challenge Solution
Block #1 is the only block neccesary to solve the code challenge. The most common problem faced when using the conveyor is impropper connection, so this challenge is a good way to ensure all the conveyors are connected correctly.
The conveyor belt will not be used until later in this course. You may want to refer back to this module later if students need a refresher.
Istallation
Conveyor Belt
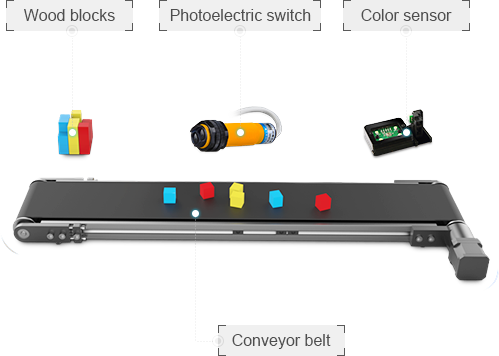
Your conveyor belt kit comes with:
- Conveyor belt
- Photoelectric switch
- Color sensor
- Wood blocks
Make these connections:
Photoelectric sensor to GP2 Color sensor to Communication Interface Conveyor motor to STEPPER 1 | 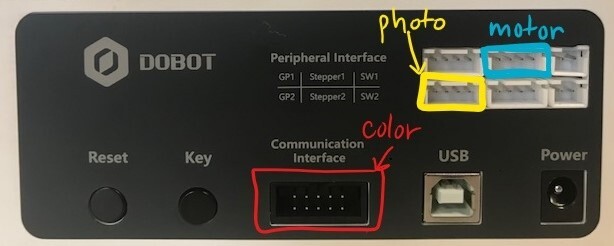 |
Dobot
Position Dobot in front of the conveyor belt so it can reach objects on the belt.
An easy way to determine Dobot's range of motion in relation to your conveyor belt is to move it using the Mouse app.
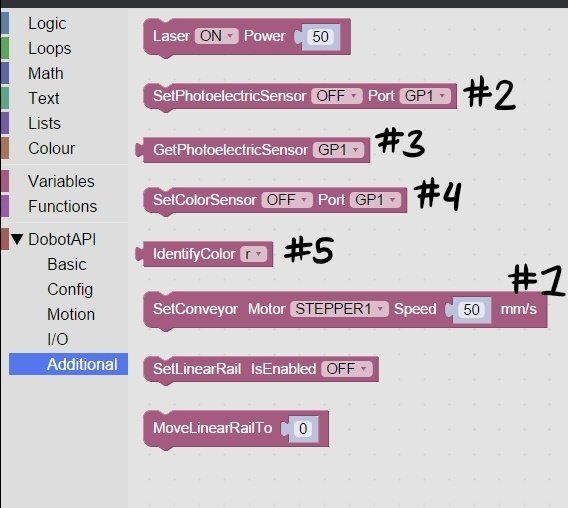
Programming
Blockly
These blocks control most of the conveyor belt functionality:
#1
| SetConveyor Set the motor the conveyer will use and the speed it will move in mm/s. |
#2
| SetPhotoelectricSensor Turn the photo sensor on/off, tell the program what port the sensor is plugged into. |
#3
| GetPhotoelectricSensor Get the value from the Photoelectric Sensor. |
#4
| SetColorSensor Turn color sensor on/off, tell the program what port the color sensor is plugged into. |
#5
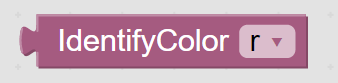
| IdentifyColor Identify a color that has been presented to the sensor. The sensor can recognise red and blue. (green can be recognised but lighting heavily affect the accuracy for this color). |
 | SetMotorSpeed Set the motor the conveyer will use and the speed it will move in pulse/s. (this one is hidden in 'I\O', unlike the other important blocks) |


All the other blocks are located in the Additional tab: