
Lesson Modules
Teaching Tips:
This lesson will take about 2 hours to complete. You may have to split the lesson into multiple classes.
Many of the activities in these lessons exist in the tutorial section of the LittleBits Code Kit App. These tutorials show the students EXACTLY how to set up their code. If students do this then they are not problem solving and learning how to program. Try to reduce the risk of students using the tutorial page to build their program. You can tell if the students are using the tutorials or not by looking at the top left of their screen. If it says “Blank Canvas” they are most likely doing it themselves. If it says anything else, it is likely they are using the tutorial.
| If this is what is shown on the top left of the students' screen then they are making their own project. | If there is any other name in the upper left hand of the students' screens then they are using a tutorial and are likely not creating their own project. |
%20Hello%20World/other.png) |
Materials:
- One LittleBits Code kit per group (suggestion: 2-3 students per group)
- One computer for each student group
- Teacher computer
- Internet connection
- Projector
- OPTIONAL (see teacher view in Explore for activity)(Or you can do an activity like the one in this video from 2:25-5minutes)
- Peanut butter (double check if any students have allergies before doing this activity)
- Bread
- Jelly
- Plate
- Knife (safe for school)
- We know that purchasing, organizing and cleaning up after this activity may not be the best option for you so please be aware that you can still have an effective learning activity without these materials.
Preparation:
· Look over the "Little Bits Code Kit Reference" and "Little Bits Blockly Key" Students will have access to these resources. If you prefer, you can also print them for student use.
Observation activity:
Choose 2 students (one will be the eyes and one will be the hand). Get all of the students to stand in a line holding hands with the hand and eyes on opposite ends. The eyes are going to see something that it wants the hand to pick up. The eyes will very quietly whisper to the person next to them (whose hand they are holding) that the hand should pick up that item. The students will whisper the directions to the next person in line (similar to the game of telephone). Once the message gets to the hand the hand should perform that action. Make it clear to the students that this is how inputs and outputs work – by sending messages back and forth!
Tell the students that coding is a combination of inputs and outputs. For the example they just did, the input was the eyes. The eyes took information in. Then the hand moving was the output – the action that was taken based on the information from the eyes.
Split the students into smaller groups and have them continue this activity where the person on one end it the eyes (input) and the person on the other end if the output (hand). Let students create their own "codes" to send from the eyes to the hand.
Have students go to their computers and answer the questions
1) In your own words, explain input.
2) In your own words, explain output.
Once all of the students have submitted their responses have a class discussion about their responses.
Teaching Tips:
1) Reveal the students’ goal of the day
Create a program that has the LED Matrix scroll the text of your choice slowly in green.
Create a program that has the LED Matrix display an image of a smiley face.
Create your own goal using the text and/or images blocks and program the LED Matrix to reach that goal.
2) Watch video abut inputs and outputs
3) Input & Output Little Bits Activity
Have students use their Little Bits Code Kit Reference to try and create a working little bit.The students have a link on their screen titled "Little Bits Code Kit Reference". The goal is that the students can demonstrate their understanding of how the LittleBits function together. Their designs do not have to be complex. They can be as simple as the project below. Encourage students to experiment, revise, and analyze.
Warning: The buzzer is VERY loud and the volume control is very sensitive. If students choose to use the buzzer, have them put the volume low but not all the way low. Also be aware if any students have a sensitivity to noise and make accommodations for this.
%20Hello%20World/sample%20little%20bits%20project%20input%20output.jpg)
4) LittleBits Code Kit App Activity
You can either do the following activity or a similar activity (In THIS video there is an example of a similar activty from minute 2:15 to minute 5)
- Take out the loaf of bread, a jar of peanut butter, a jar of jelly and a butter knife.
- Put the students into small groups and tell them to write step-by-step instructions for making a PB&J sandwich.
- Have one group read their instructions aloud, and act them out exactly. EX: if step one is “take a piece of bread and put some peanut butter on it” take a piece of bread and set the whole jar of peanut butter on it.
- After you act out the first set of instructions, have the students revise their lists to be more specific.
- A successful list will look something like this:
- Take two pieces of bread out of the packaging, and set them on the desk.
- Open the jar of peanut butter using a twisting motion with your right hand
- Set down the peanut butter jar on the table
- Using your right had, clasp your hand around the handle of the knife
- Put the knife in the jar a quarter of the way
- Lift the knife up vertically
- Swipe the knife across one piece of bread
- And so on.
- Another way to accomplish this task without having to buy any supplies or risking an allergic reaction is for the students to write directions for the teacher to perform a simple task ex: grab a book from the bookshelf and bring it to the front table.
- After the activity explain that this is how coding works. You have to give the computer very specific directions in order to get the result you want.
5) Watch video “ Hello World- littleBits Code Kit Onboarding”
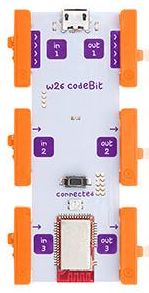
Have students answer the question “What does the codebit do?”
(Answer: The codebit allows you to wirelessly upload code from your computer to your codeBit. )
6) Have students open the “LittleBits Code Kit App” and open a blank canvas.
7) Have the students explore the app (5-10 minutes). Encourage them to try things out.
8) Now have the students answer the question on their computers “While exploring the “LittleBits Code Kit App”, what did you learn?
9) Facilitate a discussion about what the students discovered.
10) Show students today’s focus on the class view.
Little Bits Code Kit Reference
What does the codebit do?
|  |

Teaching Tips:
PART 1: TEXT
1) Have the students use the text page of their "LittleBits Blockly Key" to predict the code for having the LED Matrix show the text “Hello World.”
2) Model how to Create a program that has the LED Matrix scroll the text “Hello World” using the Little Bits Code Kit APP.
a) How to set up LittleBits for “Hello World”
| Plug the Codebit Dongle into your computer | 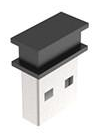 |
b) Build the LittleBits Circuit
%20Hello%20World/hello%20world%20circuit%20-%20better.png)
c) How to code for "Hello World"
| Click the light blue "text" category | 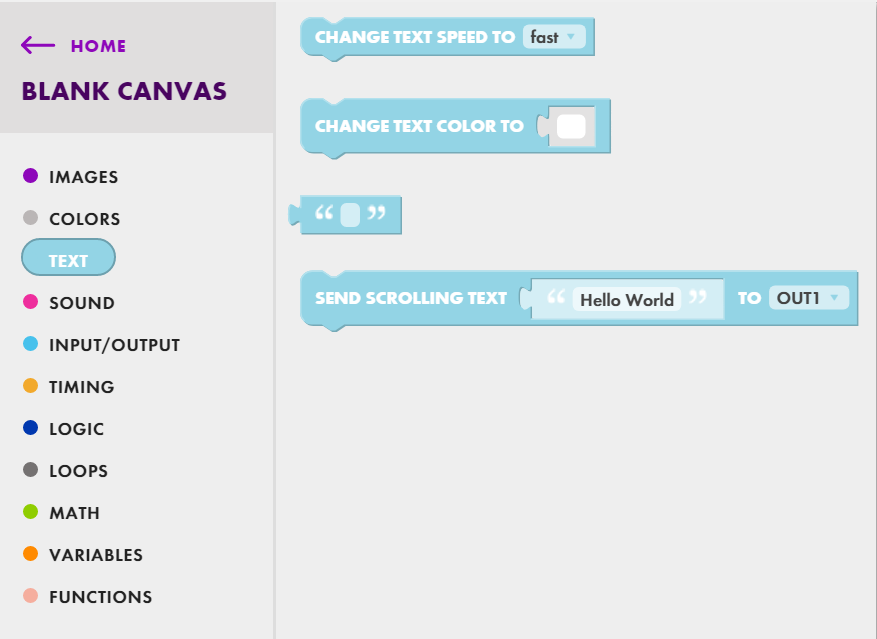 |
| Click and drag the “send scrolling text Hello World to OUT1” to the workspace |  |
| Connect the top of the block to the bottom of the start block | 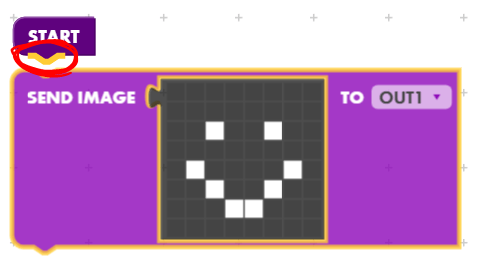 |
On the bottom right of your screen click "Connect to your codebit" Select your codebit and click "Connect" | 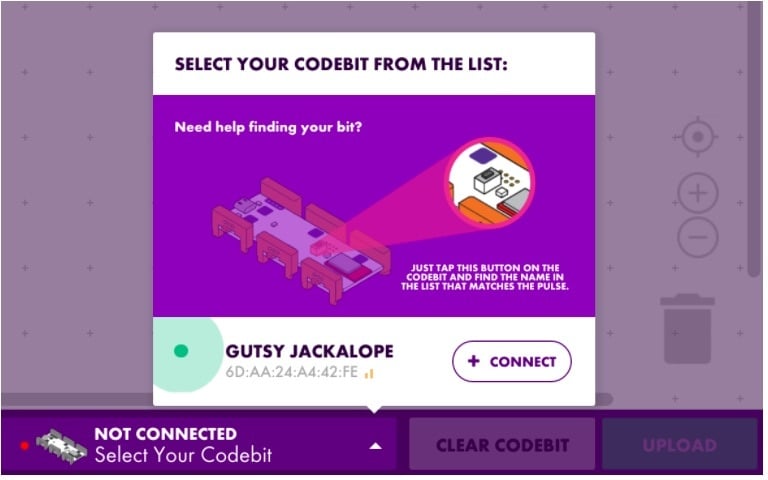 |
| Click upload |  |
| Engage the input (ex: if input is a button – push the button) |
3) Have students create a program that has the LED Matrix scroll the the text “Hello World” on their LED Matrix.
If students are struggling encourage them to problem solve on their own as opposed to giving them the answers. Ask them guided questions if they are still struggling and encourage them to utilize the resources.
4) Once the students have successfully reached that goal. Introduce their new goal: Create a program that has the LED Matrix scroll the text of your choice slowly in green.
Make sure that the goal shows on the class view for their reference as they are working.
The end code will look something like this:
%20Hello%20World/hello%20world%20challenge%20goal%20code.png)
PART 2: IMAGE
1) Have students read over the image section of their Little Bits Blockley Key. Have students predict the code for having the LED Matrix display a rainbow.
2) Now you are going to model how to create a program that has the LED Matrix display an image of a rainbow.
a) How to set up LittleBits:
| Plug the Codebit Dongle into your computer | |
b) Build the LittleBits Circuit
c) Code through the LittleBits Code Kit App
| Click the purple "images" category | 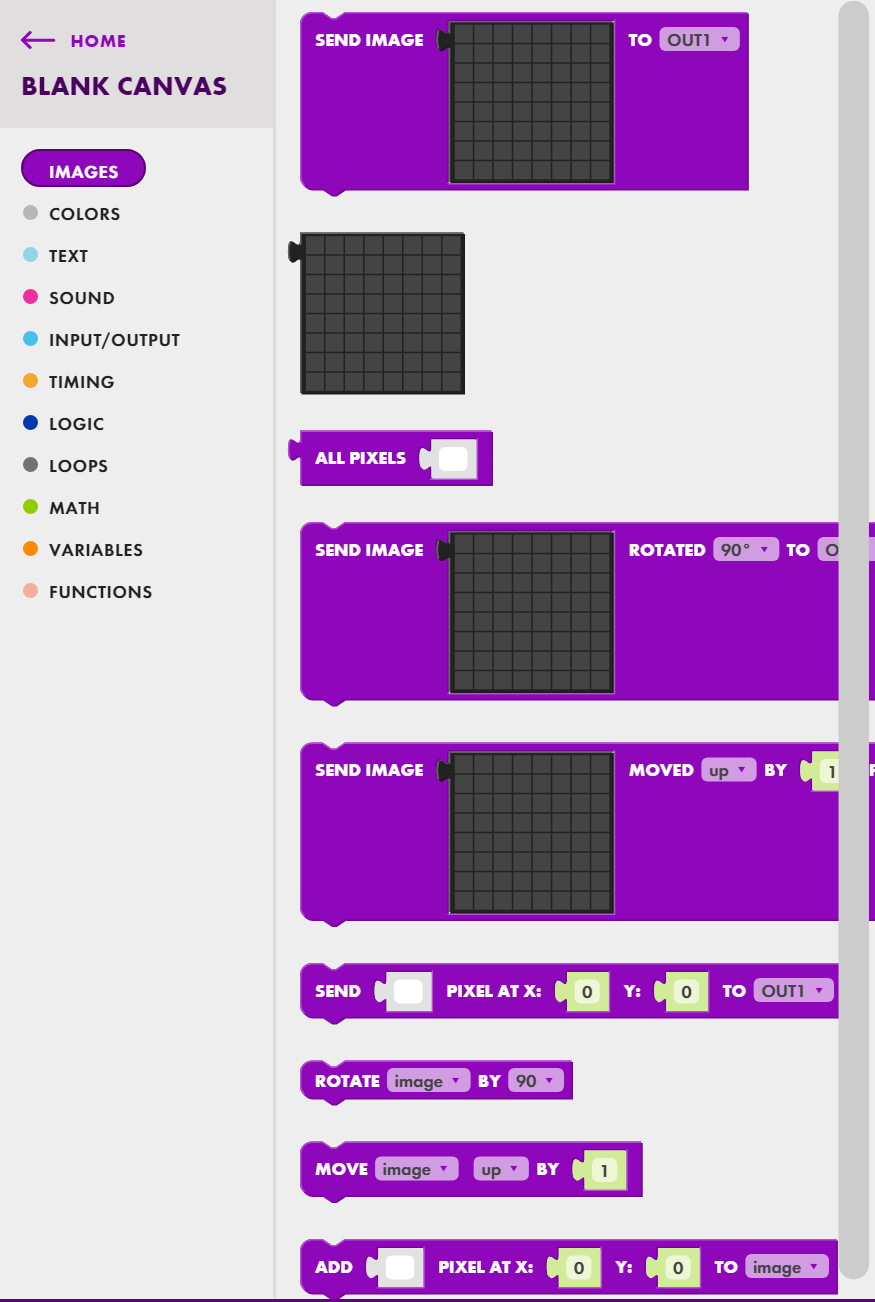 |
| Click and drag the “send image [] to OUT1” to the workspace | 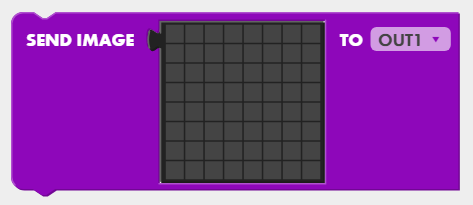 |
| Connect the top of the block to the bottom of the start block | |
| Click the black grid on the workspace | 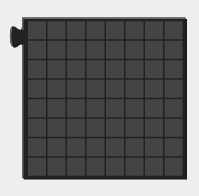 |
| Click the color you want from the left color toolbox and then click on the box you want to be that color. EX: If you want the top let box to be red. Click on the red color you want on the left side color toolbox. Then click on the top left box on the LED. | %20Hello%20World/Screenshot%202018-07-24%2011.43.32.png) |
Continue picking the individual colors until the rainbow is complete. | 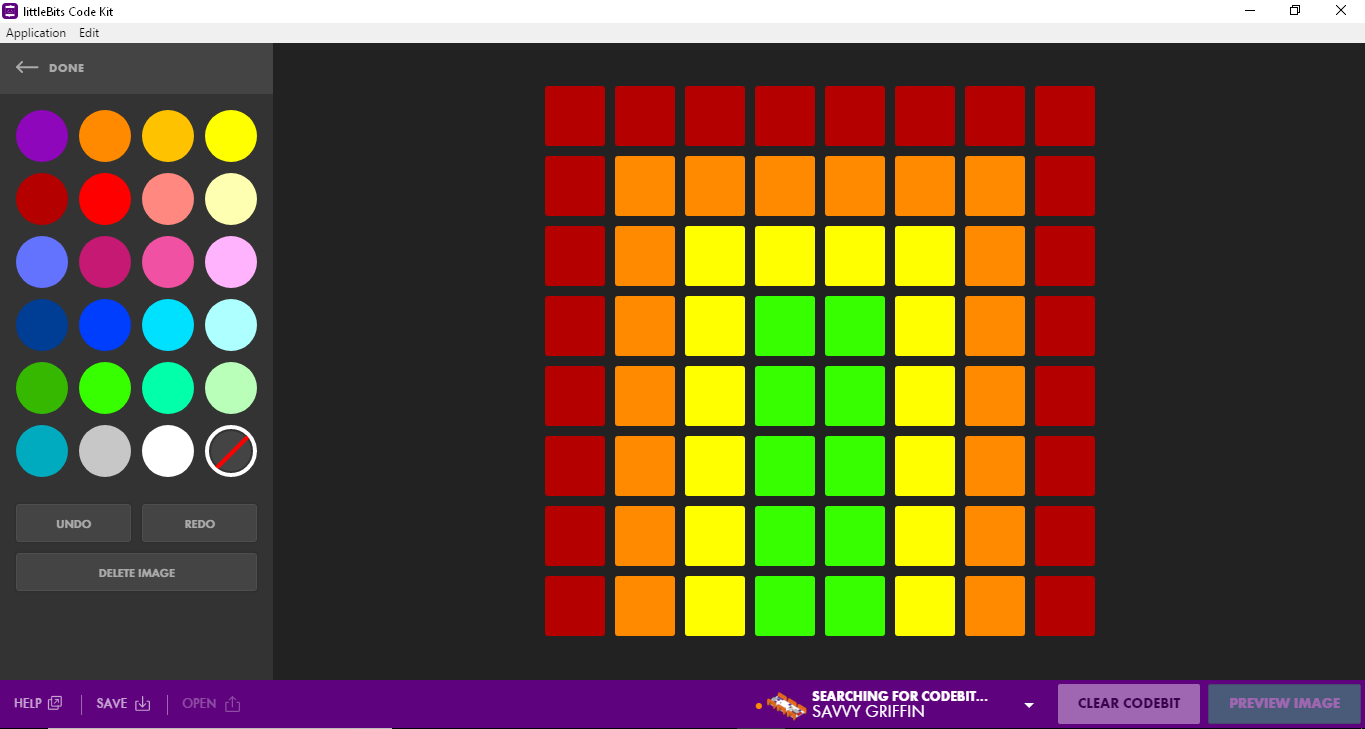 |
| On the top left of the screen, click “Done” | %20Hello%20World/done%20button.png) |
On the bottom right of your screen click "Connect to your codebit" Select your codebit and click "Connect" | |
| At the bottom right of the screen, click upload | |
Engage the input (ex: if input is a button – push the button) |
3) Introduce their new goal: Create a program that has the LED display a smiley face on the LED Matrix. Make sure that the goal shows on the class view for their reference as they are working.
If students are struggling encourage them to problem solve on their own as opposed to giving them the answers. Ask them guided questions if they are still struggling and encourage them to utilize the resources.
4) Goal #3: Create your own goal using the text and/or images blocks and program the LED Matrix to reach that goal.
- Show the students the goal on the class view.
- Have them look through the text and images section of their Little Bits Blockley Key
- Have the students submit their goal as an answer in the act section.
- If you want, you can have the students’ goals displayed on the class view if you click “Show Results”
- Give students time to try to reach their goal. As always, if students are struggling encourage them to problem solve on their own as opposed to giving them the answers. Ask them guided questions if they are still struggling and encourage them to utilize the resources.
5) At the end of the lesson, have students go up and present their projects. Encourage them to discuss their process including ways that their project did not work the way they wanted and how they responded to the challenge.
In this section we will begin building programs.
Teaching Tips:
Have students answer the following 3 questions on their computers. Once all the students have finished answering the questions have a class discussion about their answers. For the last question, if you click the "See Results" button at the bottom of the question - their collective responses will be displayed in a graph.
- Explain how LittleBits works.
- Explain how the LittleBits coding APP works.
- Look over your LittleBis Blockley Key, which category are you most excited to learn how to use?
- Sound
- Input/output
- Timing
- Logic
- Loops
- Math
- Variables
- functions
- Sound
- Input/Output
- Timing
- Logic
- Loops
- Math
- Variables
- Functions